Whatever Happened to ... Hell Dorado

Whatever Happened to ... Hell Dorado

Hell Dorado – Man, if there was ever a game I longed to get access to it was Hell Dorado. I remember back in 2003 when I was playing Chaos Marines for 3rd Edition Warhammer 40K and trying to figure out an excuse to buy some Hell Dorado minis for my force just so I could have them. The fact that it was a French company made it hard to get them at the time and the rules weren't available in English. The day I walked into my regular shop and saw them on the shelf I picked up two starters and the rules immediately.

Read More

Reaper Bone 3 Delivers

Reaper Bone 3 Delivers

Kickstarter – After some minor delays the Reaper Bones 3 Kickstarter arrived. I didn't go whole hog on this one as I don't play D&D I don't really need a boatload of Fantasy models, even if it's an amazing deal. While this was running my group was playing quite a bit of Frostgrave however, so I did pick up the Graveyard set to fill out my board.

Read More

Bring on the Inferno ... another Kickstarter delivers

Bring on the Inferno ... another Kickstarter delivers

Hell Dorado – My kickstarter package arrived the other day and I'm pretty happy with how it turned out. I didn't go crazy with the pledges on this one, instead I just opted for the new book and the limited edition Twilight Knight for the Kingdom Death Crossover. The delay on this one wasn't too horrible considering how some of the Kickstarters I backed have been progressing (C'MON needs to get their shit together ... Relic Knights is now screwed again because of Chinese New Year [WTF a country shuts down for a month ... um ok] not that I'm bitter or anything the game will be fun once it gets released but the wait is killing me).

Read More

Paid in Full: Commissions - How much is your time worth?

Random – Lately the number of inquires I've recieved about commission work has dramatically increased. Many of these questions have been about how to determine a price when doing commission work. So in an effort to answer these questions for the larger population, here's the basic principles I use when putting together a quote.

1. How much is your time worth? When considering doing "craft" projects that you intend to sell to others the first thing you need to consider is how much is your time worth. For the most part you're not going to make $16-$30 an hour painting models or building terrain. Even when painting to a Golden Daemon or Crystal Brush winning level the amount of time you put in usually won't equate to "real job" money. Most gamer's won't pay more to have a model painted then it cost them to purchase so keep that in mind when putting together a price. Also remember if you have a wife and kids or girlfriend your hobby time is probably limited. When I started this site I was between jobs and had much more time to build and paint stuff. Now my time is limited so it's important I enjoy every project I take on and be as efficient as possible so I'm not working for pennies an hour during my free time.

2. What are your material costs and how do you recoup them? Paint, primer, glue, sand all cost money. Good paint brushes and glue cost more. While it can take a while to burn through a pot of paint, you have to consider the costs when figuring your price. One thing I've instituted is buying new pots for army scale projects and billing them as a line item. Once you're done with the project your can give the remainder to your client in case they need touch up or add models they don't need or want you to paint.

Terrain Projects can get tricky as sometimes you use found materials and other times you need to buy foam and other raw materials. Most of the time you're going to buy in bulk and have a bunch of stuff you need to store. If you have limited room you might need to invest in space to store that stuff. Right now I'm not quite at that point but it's getting close.

3. What are your customers expectations? This is a big one. Some customers just want a three color minimum. While other might ask for table top quality expecting to be able to enter them in a juried contest. Managing those expectations and delivering as promised is huge. I've heard many horror stories from painters about unreasonable clients that make requests well beyond what the initial request was and then want to pay less because the quality is what was expected. On the flip side I've also heard numerous stories of painters that send over a quick shot of the base coated model only to have the client "love it and want to know how quick it will ship." That second one is rare but important to remember as some clients dont' want you best work. They just want some color on the models. Knowing this you can save yourself a ton of time.

4. How are you going to get it to the client? Nobody considers shipping costs. One more then one occasion I've  had to deal with customers complaining about shipping, "DUDE the flat rate box is only $5, why does it cost $20 to ship to me in Antarctica? You're trying to RIP ME OFF!" You also see this all over several companies forums. The reality is shipping is expensive, foam and packing materials are expensive. Tracking and insuring packages is expensive. And even it you do everything right the post office, UPS or Fed Ex will inevitably screw up on a one-of-a-kind rare product. It happens, sending boxes across the country or world has risks. Most of the time it's not an issue but when it is will be the one time you didn't insure or track a package. C.Y.A. 

While the post office and FedEx provide free boxes the packing material is not free. Even cheap foam is a $1-$5 a yard minimum. If you're shipping painted models wrap them in foam and pack them well. Otherwise it's likely to be damaged during shipping. For an order of several models you can quickly burn through a large amount of foam and tape. So figure in the cost of shipping and add a few dollars to cover packing materials otherwise it will eat into your already tight bottom line.

5. Don't get burned. When painting models this isn't as big a deal as if you don't get paid keep the model and resell it. So long as it's nothing to obscure you should be able to get at least 40-50% of the retail cost, more if you're willing to wait. But terrain projects are another beast entirely. Custom terrain is hard to sell once its built. Particularly if it's custom to specific client. After getting burned a few times I put forth a 50% nonrefundable deposit. That way if I have to go buy a bunch of supplies for a project I'm not going to be out of pocket if the client changes their mind or "is broke this month bro."

6. Be transparent. Have examples of your work and the various levels of quality and pricing tiers available. Put them out there for the work to see. Eventually people will start to connect with your work and ask about pricing. For example for a table top quality miniature from a skirmish game I typical charge by model size: 30mm - $8-$12; 40mm - $10-$15; 50mm - $15-$30. This gives a good starting point. But for an army level game it's unlikely you'll get that much per model. At this point most people want a "lower table top quality" which falls more in line with the 25mm- $2-$3, and goes up from there.

For terrain projects it helps to come up with some designs you can quickly replicate and make a bunch of them at once. Assembly lines are good for managing time and if you make something that can be used for several systems you diversify your client base. For example the swamps I sell in the online store I typically make 6-10 of them at a time. Since they use water effects it's better to mix a larger pot of it and pour all at once than to make small pot and have a bunch of waste. Having an existing stock also lets you focus on other projects and have a reference point for custom orders.

Being consistent helps you to manage your time and be able to quickly quote a price to a potential customer. I hope this answers any questions for aspiring painters and potential clients.


On the painting table ...

Helldorado – Helldorado has become the "palette cleanser" game for most of my gaming groups. The system is quick and clean so you can play a few games have some fun and move on. I don't find it to be a game I want to play all the time but I do really like the models and setting. The mechanics tend to be a bit more defense orientated than my American sensibilities prefer, which is something several members of my group have agreed with. 

That said I've been trying to get my Demon force painted up with a solid 200 point list that I enjoy. I wasn't really digging the leader that came with the starter box so when Samael came out I picked him up. I think I need to get a Succubus as well but don't have one yet.

I really don't like how the parts attach to the tabs with these models. The two parts of his sword are so close to the tab that it's difficult to trim them away without bending something. Other than that minor gripe (which covers almost any model in the range) there is very little clean-up necessary. I mounted him to one of my Hell Bases and primed him with duplicolor dark grey primer. I really like this primer as it's not to dark nor to light and I can get good coverage with most colors. 

For his skin I base coated him with GW foundation flesh and base coated his robe with the light grey from the same range. A quick flesh wash and black wash provided my initial shading and I began to work up the colors to their final highlights. 

Red Chapel District (Downtown Malifaux Part 3)

Malifaux – Having cast up my road sections and some brick wall section I've begun the time intensive portion of this project. I probably would have better luck if I made my road sections with notches to fit together like a jigsaw puzzle. However I didn't and am going to have some serious gaps to fill in. I think ultimately this is going to strengthen the entire project (as well as subtlety add no slip areas).

While waiting for the resin to set I decided to begin adding blocks to the board. I like the idea of a city built on a city on a city, which according to the fluff so far seems to be the case. The newer areas are built from renovated old buildings or simply built on top of the existing structures. I imagine it to be like Jerusalem or another ancient settlement in which multiple cultures have occupied the same area over the course of centuries. 

With that in mind I began adding flagstones and fieldstone walls to one area. The fieldstone is going to represent the older structures and or buildings cobbled together from existing material. I'm going to use the gothic stones for new structures like the train tunnel and bridges. Hopefully I'll be able to make these work together and not look like a jumbled mess.

The first area I've been working on is the stairway along the main street. As this leads down near the tracks I wanted to create a maintenance room. This could lead down to the sewer or just serve as an area for rail workers to rest. I imagine small rooms like this throughout the city hidden in forgotten places server as hideouts for near-do-wells, the poor and forgotten or laborers. 

I've also decided that the buildings will not be permanently affixed to the board. Dragging it back and forth from my garage to basement (for sanding etc) I learned that I can't go much higher with the board and still be able to go up my narrow stairwell. I'm really glad I didn't block in the buildings before learning this. So now my focus is to build the basic board and texture it appropriately. This will allow me to swap out buildings and build a ruined version of them to represent the Slums and Quarantine Zone as well.

Choo Choo Catchu ... Tunnel of Love

Malifaux - Having sanded down the rough shape of the downtown streets, it's time to work on the actual plan and making it work. I want to add the train (which is still unfinished...) that I was working on for a possible Breach location (lost interest in that project ... for now) to this project. As I fleshed in the rough shape of the mountain/hill I left an area for a tunnel. 

To build the tunnel I'm using the Hirst Arts gothic bridge mold. This mold can create a nice arch which will serve as the tunnel opening. 

Before I can build the tunnel however I need to blast out the interior. So out comes the trusty dremel to bore out the tunnel from the green foam block. You're probably wondering why I didn't just cut the arch out of the foam before I glued it into place. Well there are two good reasons: 1. I'm trying to create this board in a somewhat organic way so that it feels more like the city filled in around the existing terrain (in other words I didn't have a solid plan and got impatient) 2. By building a solid block to begin with it should in theory be stronger than if I had cut a glued an empty arch into place.

The question that come up next is do I bore al the way through to the other side or do I make it a faux tunnel that isn't functional. As the "bridge" over top is about 6" wide I don't think making the tunnel functional is going to have much effect on game play as it's to wide to comfortably move models under. However if it goes all the way through there is the coolness factor of having the train coming through the tunnel.

Ultimately coolness wins out. My initial though was to smooth and finish the sides of the board edge to match the black base, but I think it's potential more of an enjoyable experience to see the edge of the board as rough earth. Maybe...

Downtown Malifaux - Stage 2

Malifaux – I'm getting ready to move into stage two of my downtown board. I still have several other items that I'm going to need to cast and/or sculpt but I'm getting antsy to start the larger portion of the project. 

Because this is going to be a fixed terrain board I need to do some prior planning before moving ahead with it. A few rough sketches give me the general idea of how I want the board to lay out. I'm not going to go into detail with the buildings at this point because I'm more of a hands on visualizer.

I have a base board that I built previously, I was never really happy with the way it turned out so rather than build a new base I'm going to reuse this one (much like a painter with a canvas). Step one is to build up the elevations to fit what I'm envisioning.

The goal is to have a gently sloping winding road traversing the center of the board. One side of the board will be a higher elevation than the other and I want to work a railroad tunnel into that side of the board as well. The far side of the board will be at ground level with a number of staircase in the alleyways. 

The trick is going to be fitting everything I want on the board while maintaining playability. I'm not sure if finishing the building interiors is going to work or not. While I'd love to detail out each structure interior it seems like it may make the board more difficult to use. From past experience lifting a level makes things shift and slide. 


Downtown Malifaux - Stage One ... Revisited

Malifaux – So I came to the realization I suck at using a rolling pin. After several attempts I've broken down and bought a "craft" pasta machine. Luckily as was able to pick it up for 40% off retail and I think I'm going to get quite a bit of use out of this tool.

While I was at the craft store I also picked up a brick of sculpty to try out with the machine. I'm a little nervous that milliput or greenstuff will get stuck in the machine. 

Working the machine is simple enough you set how thick you want the clay, stick a blob on top and turn the crank. Voila perfectly uniform flat clay. Of course there's a bit more to it than that but the basic idea is that simple.

So now that I can produce uniform flat sheets of clay it's time to go back to the drawing board and create the cobblestone sheets. I used the same technique as before, bent pipes to create the bricks. Patience is key as if you screw up the pattern you'll wind up starting over from scratch. After two tries, I slowed down and got the results I wanted.

After baking the clay for 15 min. it's ready to mold. Well, almost ... the baking/cooling process caused the edges to curl slightly. So I stored the dry baked sheets under a stack of old text books for a few days to eliminate the curl. 

Next the master for the mold must be glued down to the casting box to prevent it from floating up during the molding process. Because this is a large flat surface area the odds are it will float in the silicone mixture so to save myself from that potential headache I'm going to be sure to glue this down to a sheet of plasticard the exact size of my mold box (a 5x7 acrylic box frame)


Downtown Malifaux - Stage One

Malifaux – After this year's family vacation I have a boatload of inspiration images for the next big project I'm going to do. My goal is to build a super detailed fixed board based on the town of Eureaka Springs, AK. During my visit to the town I was really impressed with the cramped vertical feel of the town. I think it will make for an interesting game board. I've been leery of doing a fixed terrain board since the tend to get boring after a while. However I think I'll only bring this one out for special events or con demos. 

This time around I'm going to plan ahead and build all the individual components before I begin.  I want the cobblestone to match the bases I've used for my Ressurectionist forces, so first things first I need a way to create lots of cobblestones that can be used for the street. Having learned my lesson with the sewer board, I ruled out cutting individual stones. The process was far to time consuming and won't give me exactly the look I want.

So off to the craft store. After looking around at various options that might work I settled on some brass tubing. The tube is of course a tube, so I had to carefully bend it into a rectangular shape. I did this with two different size tubes so I could create some variety in the pattern. 

I then mixed up some miliput (apoxy sculpt might be a better choice but this was 40% off) and roll it out into a large smooth flat area. Once that's done it's a simple matter of taking the tube and pressing the pattern. Repeat until the area is covered.

This didn't work out as well as I had hoped so before I move on I need to research a better way to flatten the putty. I think a clay roller might work ... unless we have a pasta maker lying around.

Once I solve the flatness issue, the next step will be to cut this into squares (or a large section) and make a mold. This will allow me to quickly duplicate the process to cover the streets. I'll also create some optional pieces to create more interest like man-hole covers and grates. 

To hell with it ...

Helldorado – The hell board is just about complete. I finished the waterfalls and did my pours of water effects. Now all that's left is to go in and add some small details. Painting the skull piles, adding ripples to the water and touching up some spots. I'm really happy with how this board has turned out especially since I didn't really have a plan when I started. 

It's so clear now...

I've begun experimenting with Crystal Clear casting resin. I was inspired by my friend Dave's (nerdelemental) current ice pillar project and decided to work on something similar. Dave was experimenting with using Envirotex Light to make casts which turned out really cool.

Snatching up his idea I visited the local plastics/SFX supplier to see if there was a material that might work better. They suggested trying Smooth-ons crystal clear series. To be honest looking at the giant red sticker on the box warning about toxic fumes I was a little nervous. The salesperson assured me it wasn't as difficult to work with as it seems, so I picked up a trial size to test out.

According to the box it's best when the material is less than 3" thick. My mold for Ice Pillars is pushing the limit but I figured why not try it out. Worst case I ruin my mold and have to make another one. At the same time I go out the mold I created for my rock bases to see what type of effect I could get.

Mixing isn't quite one to one so it's recommended to use a scale. Also it's important to gently stir the product to prevent bubbles. According to the instructions it takes 16 hours to cure. I found I could pop them out after 10 hours but they are a bit tacky. Lesson learned: put the bases on wax paper or some other nonstick surface the yellow bits are from a cardboard box I set them on ... doh!

The end result is pretty cool and I think I might offer them up on the online store once I work out the kinks in casting. 

Now Available – Rock Bases

I'm proud to introduce the next set in my line of round lipped bases, creatively titled

Rock Bases. These are great to represent a mountainous region or to add some height to a model. There are several variations in each size with bases available in 30mm, 40mm and 50mm. 

The realistic texture was created using actual rocks. Cast from a urethane resin they're much easier to pin models to than real rocks and much lighter.  

Interview – David Freeman, Cipher Studios

I recently had a chance to talk with Dave Freeman of Cipher Studio. Cipher picked up Hell Dorado and has begun releasing it in English.

TE – For those that don't know what's your role with Cipher Studios? Could you provide some background on the company and your own experience in game development?

DF – I am the COO and Design/Development Manager at Cipher Studios. I spend most of my time doing scheduling, management of remote freelancers, editing, co-ordination of translation, and development of games/rules. I have also done our web design so far, meager as it is. Cipher Studios was founded in January of 2006 with Anima Tactics as its first product. I joined up in 2009 and we have been working to bring great gaming entertainment to the public since. As to my experience in game development, I worked at Sabertooth Games, a division of Games Workshop, for about five years. While there I managed organized play, was the lead developer on the Lord of the Rings Tradeable miniatures game, was the lead designer/developer on the Ultimate Fighting System CCG, made card sets for WarCry, the warhammer fantasy CCG, and the Horus Heresy and Dark Millennium incarnations of the Warhammer 40k CCG, as well as working on other unreleased game products. I have been a gamer since I was in grade school and have played most types of hobby games from RPG's to chit based strategy games. My favorite genre's are CCG's and table top war games.

TE – Hell Dorado seems to be picking up steam, do you have any updates as to when the rules will be released in the US?

DF – The finished layout files for the English book have been sent to the printer in the last few days. I hesitate to name any concrete date that we will have printed copies at this point, but it is off being printed right now!

TE – I've never played the French version of the game, but have oogled the minis for a long time. Are there going to be any significant changes to the ruleset? How comprehensive are the quick start rules, they seem to be a solid starting point for the game?

DF – We haven't made any significant changes to the rules system. The system that was in place is quite good, and I saw no reason to reinvent the wheel. The quick start rules are pretty comprehensive they give the basics of how combat and abilities work, anything that was missing is technical clarification and more complicated special rules. The special abilities section was written to only cover the figures that are in the starters for the game. The quick start rules have worked so far at teaching players the basics of the game, which was their goal. I am planning on making a PDF out of the complete English rules and scenarios sections and posting it at some point so players can easily refer to it as well.

TE – It seems as though the minis are slowly being released with the starter boxes and a few blisters available at the moment. Are there plans to ramp up the release of models, do you have a tentative release schedule?

DF – We are planning to do 5 releases a month for the foreseeable future. We have gotten a little backed up due to technical difficulties and getting some materials printed, but we seem to have most of that straightened out at this point. In the rest of this month and April you should see these figures hitting distribution ...

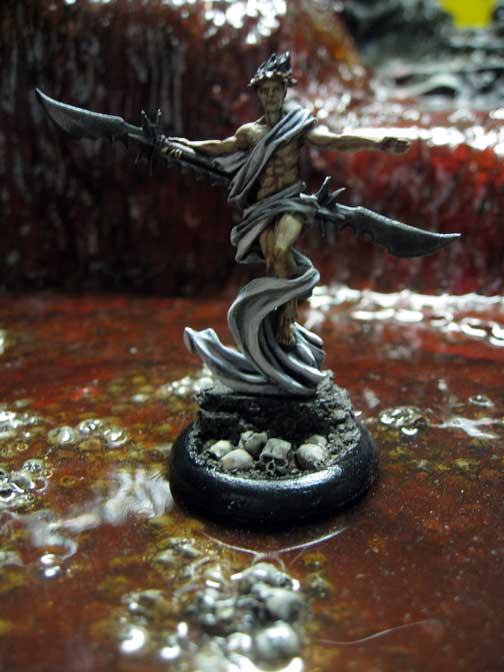
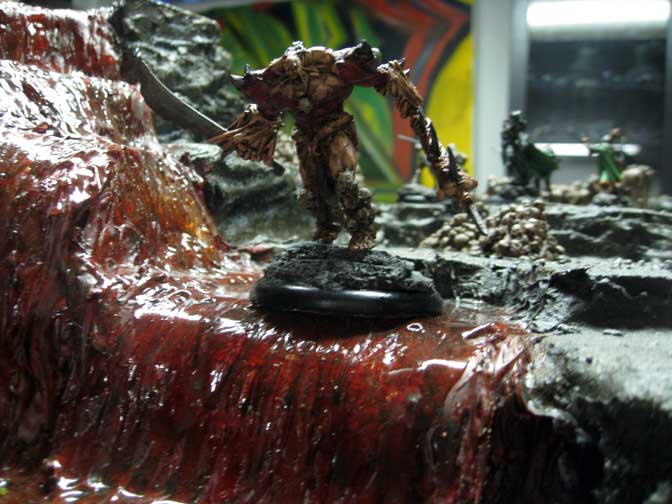
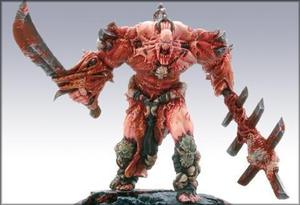
• Great Damned On of Wrath
• Saurav-Geet
• Blessed Warriors (2 in a blister)

• Sara Zingaresce (With 2 lemures)
• Blade Master, Hybrid
• Infernal Ambassador
• Retiarius
• Thirty Coins
• Dibbukim (2 in a blister)

• Lemure Pack B (3 in a blister)
• Husaym al Din
• Blades for Hire (2 in a blister)
• Damned Rank and File (3 in a blister)
• Arquebusers (2 in a blister)
• Succubus
• Jaws of the Deep
• Pillar of the Faith, Halberd

This is to catch up on the back up that I talked about earlier.

TE – What games do you currently play? How have they influenced your design?

DF – Well of course I play Anima Tactics and Hell Dorado quite a bit. I also play Warhammer 40,000, Space Hulk, Dominion, Dust Tactics, and Acquire fairly regularly. I own lots of games and it can be a challenge to play them all with any kind of regularity. On the professional note, I try and determine what makes any game I play fun, not necessarily just for me, so that I can bring things of that nature into my own work.

TE – What's your favorite model in the Hell Dorado range? Anima Tactics?

DF – Currently my favorite figures are Vincenzo Maculano de Fiorenzuola for Hell Dorado, and Marchosias for Anima Tactics.

TE – Cipher seems to be a fairly small company, do you think that makes thing more challenging or do you feel a leaner company keeps things running smoother?

DF – It really depends. In some situations being small allows you the agility to adapt and address issues. In others it means you only have limited resources and must make and execute realistic and achievable plans.

TE – How much of the original art from the French version of Hell Dorado will be in the new book? Is there much new material?

DF – For the most part we have kept the book almost exactly the same. It hasn't seemed to be a huge priority to develop brand new art when many players have not seen everything that was in the original book. We have started new asset development, but those are to be used in new releases and later books.

TE – Does Cipher have big plans for GenCon this year, if so can you share any details?

DF – We are currently discussing what we will be doing at Gen Con this year, unfortunately our plans aren't concrete yet so I can't share them.

TE – Is there anything else you'd like to share?

DF – Thank you for the opportunity to talk to you and your interest. I hope you, and all of the miniatures enthusiasts out there, enjoy Hell Dorado as much as I have!

Waterfalls ... stick to the lakes you're used to

Helldorado – Painting is almost wrapped up on my Hell board. I dry brushed the the whole thing with a lighter grey and tan. After that dried I used a water-based wood stain to shade the entire piece. The woodstain is cheaper than using inks or washes and gives a similar effect. To apply the stain I stipple it over the entire board, while it's still wet I take a rag and gently wipe off the stain. Paying particular attention to the edges and areas that would be worn to remove as much of the stain as possible.

Now that that's done, it's time to get started on the water effects. This is going to be the trickiest part of the process as I've never built a waterfall and the techniques I've found online all use different products.

I picked up a Scenarama water kit to see how they recommend building the waterfall. The kit is a bit pricey for what you get but I used a 40% off coupon at the craft store to get it for a more reasonable cost. It comes with some glossy water (which I assume is little more than a thick gloss paint) as well as a thicker paste that dries clear for texturing the water. They include a sheet of wax paper to build the waterfall with the thicker paste. After it dries you peel it off and attach to the area where the fall will go. 

I'm a little leary of this process as I don't think it's going to give me the effect I'm looking for. However since I have it and you create everything separate I'm going to give it a try.

The other option I've found uses clear acrylic caulk. Basically you follow the same process as the Scenarama kit, use wax paper or another nonstick material to build your fall and then attach it after it has dried. It seems like this might be the more durable choice, so I'll also be trying this method.

For the other areas I'll be using Envirotex light. While this is a costly material, I've had plenty of experience using it and feel confident that it will work for what I need it to. I think I'll be doing two pours of the epoxy, one to create a base for the water and a second after I've attached the falls. The tricky part is building up the pools where it will go to prevent them from running and flowing everywhere. To prevent this from happening I've used caulk to build up a lip, hopefully this will keep it where I want it to stay.

Caulk ... messy necessity

Helldorado – After checking a filling any odd gaps I found after putting some primer on my Hell Table, I'm ready to move onto to phase 2. I have a frame that fits around the board and need to create a seal that not only attaches the frame permanently but also creates a seamless seal. I decided to use Alex painters caulk, this is an acrylic product that cleans up with soap and water and is paintable. After attaching the frame I ran a bead of caulk along the seams and smoothed it with a wet rag.

While I had a tube of caulk open I also decided to work on the waterfall. From previous experience with water effects, it's VERY important to seal the area that the water will go on. I like to use caulk as it's cheap, fills the space and is somewhat sculptable. Basically I put the caulk on the table in the area that the water will go, and than take my finger and smooth it out. Once the area is covered I go back and use a tool to create swirls and flow patterns in the caulk. This will limit the amount of water effect you have to pour to fill the area. 

Once the caulk is dry it can be painted just like the rest of the board. To get the best effect out of Envirotex Light you need to create depth by painting the deeper areas darker. By mixing some ink with the water effects you'll be able to create even more depth.

On the painting table ...

Malifaux/Hell Dorado – To go along with the Executioner and Enslaved Nephilim I've been working on my client requested a Student of Conflict as well as some special tokens. He requested some dynamite counters, treasure counters and a bag of soul stones. He's also requested a double 50mm fire token. 

After re-reading what the tokens are I realized that I could use some of the blocks I've already cast to create a token set for him. I have some crates that fit nicely on a 30mm base as have just enough space to freehand TNT onto them. For the treasure tokens I have some small chests that also fit perfectly.

While working on that project I'm also getting some paint on a Saracen and Westerns box set for Hell Dorado. The Saracens are themed on the Genie from Aladdin. I've always liked that pale blue color and I think it works well with these models. The Westerners are borrowing a green, orange a white scheme that feels very Irish to me. As the board with be very earthy feeling I wanted to be sure the models were bright enough to stand out without looking clownish.

So far I think they're working and I only have a few details and highlights to go on them before I move into the next stage.

Building Hell

Hell Dorado – I've begun work on a board for Hell Dorado. After looking online for some examples of what the terrain should look like and searching for the terrain rules that should be in the english book if it's ever released, I came up with a plan. Well not really a plan but more of a general idea. This is going to be the first fixed terrain board I've done in a while and I want to be sure it's versatile enough to remain fun to play on while looking cool and incorporating some really dramatic fixed elements.

I had a piece of sintra with a frame that I salvaged from a graphic project that fell through. Luckily for me the piece I have is exactly 3' x 3' with a nice frame that goes around the edge. Also in my box of scrap I had a ton of 3" foam pieces left over from various projects. To begin I just randomly snapped the scraps into chunks and began placing them on the board. Once I had a general shape I used wood glue to secure them into place.

After letting it dry I added a few more pieces to smooth out transitions and create playable space. Once those sections were dry I took a dremel and began sculpting the rocks. This was a time intensive process and I was sure to have a figure on a 30mm and 40mm base on hand to be sure they would fit and be able to stand on the rocky sections. After finishing the carving I realized that the largest peak could accommodate a waterfall. After a bit more sanding I had created the basic shape of the river. 

The next step was to add some more texture to the flat areas. I began by roughly tearing sections of textured wallpaper to fit on the flat sections of the board. I secured these using wood glue. To transition from the wallpaper sections to the rocky crags I applied wood glue and sprinkled a mixture of sand a litter to create a rough texture. The trick to getting this right is to apply thin coats of glue and allow the sand to dry. Repeat until you've built up the desired thickness of debris.

Where the waterfall empties I'm creating a bed of skulls. Nothing says hell more than a river of blood and skulls. Using the mold I created for my bases I cast a whole bunch of skulls. Securing them to the board with tacky glue in all the areas that I plan to coat with water effect.

I've also taken the skulls and placed them in various nooks and cranies through out the board. I think small details like this really bring a piece to life.

I need to double check the bed of the water fall to be sure it's sealed properly so the water doesn't pour all over the place when I apply it. Ideally this needs to be done prior to painting. To paint I'm going to get some house paint mixed to match the grey I've used on the bases of my models. I've found the best paint has primer built into it so it adheres better. Painting on a thick primer and then applying paint causes some of the details to be obscured so I prefer to use an all-in-one.

Assembling Hell Dorado Starters

Helldorado – Over the weekend I was able to sit down and work on assembling three of the Hell Dorado starter boxes. While the miniatures are really great sculpts, the casting process is a bit weird. Their are odd channels which go to visible portions of the models, also some of the connections to the tab and the weapons are fairly large. What this means is lots of cutting and sanding before they are anywhere near ready to assemble. 

The models were fairly easy to pin (a necessity given the small joins) most of the arms have nice flat sections that match up easily and allow for easy drilling. 

Once I finished assembly I mounted the models to my new hell bases, and used some greenstuff to smooth the transition of the smoke and bubbles that some of the models have built into their bases.

Now Available – Twilight Emporium Bases

After shopping around for bases to use on my Hell Dorado miniatures, I gave up and decided to create my own. My problem was I wanted something with lots of skulls on the bases but I also wanted a rocky surface to mount the miniature to. It seems like most manufacturers make skull bases that consist of a bed of skulls.

After spending the weekend sculpting and crafting bases that would suit my purposes, I decided to make a mold and cast them myself. Now that I have a mold that will last for quite a while I'm going to start offering round lip base sets in my online store