Paid in Full: Commissions - How much is your time worth?

Random – Lately the number of inquires I've recieved about commission work has dramatically increased. Many of these questions have been about how to determine a price when doing commission work. So in an effort to answer these questions for the larger population, here's the basic principles I use when putting together a quote.

1. How much is your time worth? When considering doing "craft" projects that you intend to sell to others the first thing you need to consider is how much is your time worth. For the most part you're not going to make $16-$30 an hour painting models or building terrain. Even when painting to a Golden Daemon or Crystal Brush winning level the amount of time you put in usually won't equate to "real job" money. Most gamer's won't pay more to have a model painted then it cost them to purchase so keep that in mind when putting together a price. Also remember if you have a wife and kids or girlfriend your hobby time is probably limited. When I started this site I was between jobs and had much more time to build and paint stuff. Now my time is limited so it's important I enjoy every project I take on and be as efficient as possible so I'm not working for pennies an hour during my free time.

2. What are your material costs and how do you recoup them? Paint, primer, glue, sand all cost money. Good paint brushes and glue cost more. While it can take a while to burn through a pot of paint, you have to consider the costs when figuring your price. One thing I've instituted is buying new pots for army scale projects and billing them as a line item. Once you're done with the project your can give the remainder to your client in case they need touch up or add models they don't need or want you to paint.

Terrain Projects can get tricky as sometimes you use found materials and other times you need to buy foam and other raw materials. Most of the time you're going to buy in bulk and have a bunch of stuff you need to store. If you have limited room you might need to invest in space to store that stuff. Right now I'm not quite at that point but it's getting close.

3. What are your customers expectations? This is a big one. Some customers just want a three color minimum. While other might ask for table top quality expecting to be able to enter them in a juried contest. Managing those expectations and delivering as promised is huge. I've heard many horror stories from painters about unreasonable clients that make requests well beyond what the initial request was and then want to pay less because the quality is what was expected. On the flip side I've also heard numerous stories of painters that send over a quick shot of the base coated model only to have the client "love it and want to know how quick it will ship." That second one is rare but important to remember as some clients dont' want you best work. They just want some color on the models. Knowing this you can save yourself a ton of time.

4. How are you going to get it to the client? Nobody considers shipping costs. One more then one occasion I've  had to deal with customers complaining about shipping, "DUDE the flat rate box is only $5, why does it cost $20 to ship to me in Antarctica? You're trying to RIP ME OFF!" You also see this all over several companies forums. The reality is shipping is expensive, foam and packing materials are expensive. Tracking and insuring packages is expensive. And even it you do everything right the post office, UPS or Fed Ex will inevitably screw up on a one-of-a-kind rare product. It happens, sending boxes across the country or world has risks. Most of the time it's not an issue but when it is will be the one time you didn't insure or track a package. C.Y.A. 

While the post office and FedEx provide free boxes the packing material is not free. Even cheap foam is a $1-$5 a yard minimum. If you're shipping painted models wrap them in foam and pack them well. Otherwise it's likely to be damaged during shipping. For an order of several models you can quickly burn through a large amount of foam and tape. So figure in the cost of shipping and add a few dollars to cover packing materials otherwise it will eat into your already tight bottom line.

5. Don't get burned. When painting models this isn't as big a deal as if you don't get paid keep the model and resell it. So long as it's nothing to obscure you should be able to get at least 40-50% of the retail cost, more if you're willing to wait. But terrain projects are another beast entirely. Custom terrain is hard to sell once its built. Particularly if it's custom to specific client. After getting burned a few times I put forth a 50% nonrefundable deposit. That way if I have to go buy a bunch of supplies for a project I'm not going to be out of pocket if the client changes their mind or "is broke this month bro."

6. Be transparent. Have examples of your work and the various levels of quality and pricing tiers available. Put them out there for the work to see. Eventually people will start to connect with your work and ask about pricing. For example for a table top quality miniature from a skirmish game I typical charge by model size: 30mm - $8-$12; 40mm - $10-$15; 50mm - $15-$30. This gives a good starting point. But for an army level game it's unlikely you'll get that much per model. At this point most people want a "lower table top quality" which falls more in line with the 25mm- $2-$3, and goes up from there.

For terrain projects it helps to come up with some designs you can quickly replicate and make a bunch of them at once. Assembly lines are good for managing time and if you make something that can be used for several systems you diversify your client base. For example the swamps I sell in the online store I typically make 6-10 of them at a time. Since they use water effects it's better to mix a larger pot of it and pour all at once than to make small pot and have a bunch of waste. Having an existing stock also lets you focus on other projects and have a reference point for custom orders.

Being consistent helps you to manage your time and be able to quickly quote a price to a potential customer. I hope this answers any questions for aspiring painters and potential clients.


Brown Black really? – Step by Step Library Board (Part Four)

Relic Knights – Continuing my progress on this library board I've gotten some of my bookshelves assembled and smoothed out. Gluing them together I ran into some issues with gaps and shelves that are slightly different heights. I used some Dap spackle to fill these in.

After sanding them smooth, it time to paint. I found a dark brown satin finish spray paint to do the base coat. I have this crazy idea that the book shelves should be the same color as the Ikea book shelves I have in my game room. The problem I have is: What color is black brown exactly? It's not really a color at all at first glimpse it seems like I could take in in and have it color matched at Home Depot, unfortunately the effect seems to be from layering two colors so you get hints of brown when the light shines on it.

My solution was to spray them with a dark satin brown and then apply dark walnut acyclic wood stain. This did my basic shading for me and brought the color closer to what I was looking for. I'll tweak it more as I move into the detail painting of the shelves.

With the sections I've base coated so far I have a pretty decent area of the board covered and once I add in some statuary I think it will start to look more like what I've envisioned in my head.

Dinosaur Skeletons - A Quick Review

Random – So I needed a dinosaur skeleton for the library board I've been working on and didn't want to spend a fortune on a model. It's surprisingly hard to find a decent looking small scale skeleton model. I assumed I could just walk into a model store and grab one off the shelf. No such luck.

I did however find this Revel Cub Scout activity kit that looked like the final skeleton would be the right size. The catch of course was that it needed to be excavated. I figured this could be a fun activity for my daughter, and brought it home. She was immediately thrilled at the prospect of excavating a dinosaur and got right to work on this "novel idea."

After an hour and a half she had freed a single leg, and decided this wasn't a fun project after all. So I picked up the tiny hammer and chisel and got to work. It was entertaining for about 15 minutes. The tedious nature of the project should earn you merit badges by the boatload. If the creators of this activity intended to scare off any kids that think being an archeologist is all Indian Jones and Jurassic Park fun they succeeded. It's so repetitive and boring, just like the real thing I suppose.

Since I didn't really care about the activity I took the chunk of plaster into the garage and dropped it on the floor. This split the plaster into 4 smaller chunks. A few whacks with a rubber mallet turned the plaster to dust and I was able to retrieve my T-rex.

The model itself is easy to put together and looks pretty good next to my miniatures. I need to dig out the plaster remnants so it snaps together and then I can mount it to a plaque so it looks like Sue from the Field Museum.


Librarians vs. Pirates – Is it May yet?

Relic Knights – I was able to get in a second game of Relic Knights using my ghetto proxy set. This time around we played a 50 point game and had Esper Wells as the scenario. Essentially Esper wells is a capture the flag style scenario. There are 5 wells on the board and you have to run a model over to them spend your action to turn it your color. Pretty straight forward.

I took Kisa and Scratch, 2 Noviates and a Librarian to face off against Calico Kate, Squall, a broadside and some pirates. I was bummed to not have anything to spend my last 3 points on I guess Malifaux's Soulstone Pool has spoiled me in the regard. I think it'd be cool if you received held esper for points not spent, but I have a feeling it would break the game.

We finished the game in just under 45 min which is pretty amazing, after so many long drawn out games of other systems it's refreshing to be able to play a fast game and potentially get more in during game night.

After playing Doctrine I really like their mechanics pushing models out of ready is pretty tricky and requires some prior thought when setting up your que. I forgot that the Noviates have coordinated fire which means they didn't do as much damage as they should have. Kate's abilities seem to revolve around blowing stuff up and pushing models around so there was lots of models getting bashed into the crystal towers.

I'm still loving the Beta Rules for this game and I hope very little changes. On the Sodapop forums there is a lot of whining that their need to be squad rules but I'm not seeing it. Having low power scrubs acting alone is helpful to capture objects and run interference. Since this is a true skirmish game I would HATE to see it fall into units like Warmahordes.

Shelved - Step by Step Library Board (Part Three)

Relic Knights – With the basic board done it's time to populate it with terrain elements. I sat down and did some sketching to plan out what it is this board will need to feel like a library/school. Usually I don't really sketch anything when I'm building terrain as I like to play it by ear and build what I see looking at the parts I have to work with.

While that system has worked well for me in the past it also have some drawbacks, namely not having a solid plan means some projects just go on forever. I've also run into the problem of playing it by ear and having a piece that looks great but is impossible to store. 

After doing some thinking I decided that I will need several elements to make this board look and feel like a library. I also came up with some optional elements to make it feel more like a school, anytime a board can pull double duty with minor tweaks you should include that in your planning.

BOOKSHELVES – I decided the primary terrain element for this board is going to be various bookshelves. To make the best use of my time I decided on several configurations that could be easily repositioned to create a new layout and were small enough to be easily stored. I settled on a single-stack L shape, a double-stack L shape, a single stack S shape and a few straight sections.

STAIRS - I'm still looking for some inspiration on these. My first thought was to use wooden balls and build the stairs going around them. I think that could look mystical and cool, but I'm afraid they won't have enough height. I've been looking at using a tube and ringing the steps around that to give some more height and provide someplace for snipers to nest. 

STATUES - I need to find some cheap Egyptian style statues. I see this more as a library/museum of mystical power and history so incorporating some statues and other relic type items will give more scatter terrain and add a bit more character to the table. While the bookshelves I found are really cool a table of nothing but bookshelf is going to feel like a simple dungeon.

ARCHES - To help give the feel of being in a massive structure I'm considering building some arches. These will provide some more interest areas as well as some minor cover for long hallways. I'm not 100% sold on the idea yet but will  probably at least build one to see how it looks.

Here's the optional stuff. To try and get more life out of this board I'm considering adding some school elements.

DORMITORY - Essentially the idea would be to create some rooms (or walls) that can divide up sections of the board into rooms (essentially buildings on something this big). I have some beds that will make a good dorm room, they're just over 1" high so it will be a bunch of light cover in a small area that could be interesting.

LOCKER ROOM - I'm not sure about this one. On one hand I think it could be fun to build on the other I don't know how functional it will be in game terms. I'm going to revisit my sketches before I try to build anything.

BOILER ROOM - This will be easy a room full of pipes and techy looking things. Gives me the chance to pull in some additional sci-fi elements and add some grime to the table. I'm not sure it's necessary yet but as an option I like it.

STAGE - Most schools have stages for presentations and talent shows. If I build one this could potentially serve double duty as the Star Theater for Malifaux. Not sold on it yet but we'll see.

Tear Down the Walls - Relic Knights First Game

Relic Knights – I took my ghetto fabulous paper proxies out for a test drive last week and got in a really quick demo game of Relic Knights using the Beta Rules

First thing I didn't realize when setting up the game how imbalanced the starter sets are. When I made my proxies I did pogs for each of the models indicated in the starter set. Apparently that doesn't accurately translate into point costs in game (note to self reading is fundamental and math is hard). So take this with a grain of salt.

For the game we set up the Black Diamond Starter against the Cerci Speed Circuit Starter. Upon flipping the mission we had to play Tear Down the Walls with me as the attacker. What happened next is humorous when you realize that the Black Diamond has almost double the points as the Speed Circuit.

We deploy using the rules in the book so my opponent place a model then I place a model at least 9" away and repeat until everything is deployed. I set up my models so they can all see the objective from their starting positions. In my dash board I have Trooper, Trooper, One-shot, Trooper. My first activation I have zero purple cards so I discard my hand to gain esper on the trooper. My opponent zooms in a bashes a trooper which draws me cards.

Now having a mitt full of purple I activate my second trooper and shoot the objective. Because of One-shot's cadre ability I do 10 points of damage to the objective (only 40 more to go). When One-shot activates she does a super shot which is 13 point of damage. I wind up just rotating the troopers and One-shot in my dashboard destroying the objective after 6 activations. 

My impressions are this game is crazy fun. The starter boxes have a huge disparity in points per box. Once the game comes out you're not going to be able to fairly run starter box events, which is a bit of a bummer but good to know before people are spending their cash on models.

Second Terrain placement is huge you really can't leave any clear firing lanes to the center objectives otherwise a ranged list just owns this mission. (Which I guess makes sense if you consider it to be a siege)

I'm looking forward to playing another game of this with the points balanced out properly.


Faux Pas - Step by Step Library Board (Part Two)

Relic Knights – Part two of my guide to building a Doctrine Library board is dealing with faux finishes. I want my tile to look like marble specifically a white and purple checkerboard pattern. In order to accomplish this I need to refer back to the painting lessons I taught at Home Depot while I was in college.

To make a fake marble pattern you need 3 colors of paint, a sponge and a feather (or in this case small brush) if you want to vein the marble. 

Before you begin it's important to prime the board before you paint. I usually use a water based primer or a paint and primer all in one. Since I had a 2 gallon bucket of water based Kilz lying around I decided to use that first. When putting down your primer be sure to put a smooth even coat down and get into the grooves you carved previously. It you don't properly cover the foam you'll run into issues if you choose use any aerosol paint on the board.

After the primer has dried its time to paint. I'm going to start with the white tiles and paint the full board before going back to paint the purple tiles. 

To easily get a marbling effect you take your three colors and put down a heavy stroke of each. Then take you sponge (or blending tool) and blend the color together. When done properly you should get a transition that resembles the large veins in marble. While this is still wet take your brush or feather and drag it across with you accent color to add the thin veins in the marble. I'm using a metallic gold.

Depending on the effect you want you could just stop now and have a marble floor. I would suggest at least doing a wash once it's dry to bring out the lines, essentially you're creating the grout lines. For me I want a checkerboard look so I need to paint the purple.

For the purple I want it to look like a different material so I'm not doing a marble effect. Instead I'm going to paint it in a jewel tone almost like amethyst. 

Let's Learn – Step by Step Library Board (Part One)

Relic Knights – I'm super excited about the upcoming release of Relic Knights and while the game isn't slated for release until May 2013, I decided to get a jump on building a table for it. I've had a bunch of bookshelves that I picked up to detail the interior of some of my buildings sitting around for what seems like forever. At some point I gave up on detailing out each building because the details limited movement with the building to much. 

From past experience large buildings look cool on the board but they pose issues with storage. This time around I decided to use the system I did for the sewer board to create the shelf walls. Also taking what I learned from cutting out all those bricks with the sewer board and the huge time sink that became I decided to carve the tiles directly into the foam base. 

Materials Needed:

(4) 1"x4"x48" boards

(2) 1/4" dowel rods

(4) small corner braces

(1) 4'x8' sheet of 2.5" insulation foam

Wood Glue

Painters Caulk

Razor Knife 

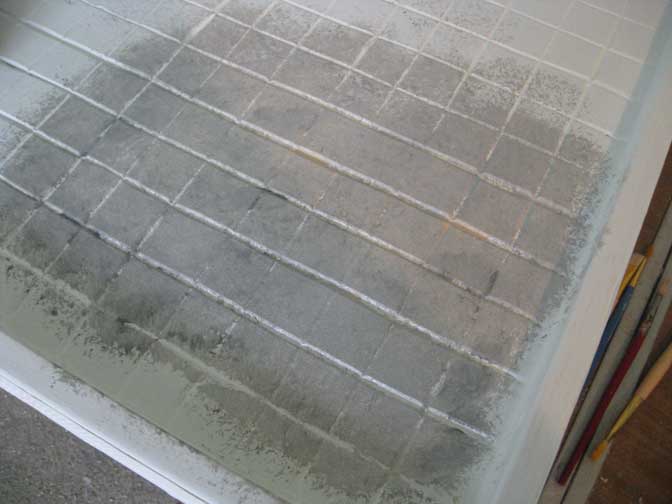
Step One: Carving the foam is easier when it's not attached to the wood frame. I measured out a 36"x36" square and carefully cut the foam to size. When cutting sheets of foam it's best to score it deeply and then gently apply pressure until it pops apart. After it's cut to size measure and mark the board every 1.5" repeat until you have a checkerboard drawn over the entire board.

Next you'll take a razor knife and hold it at a 45° angle and cut along one side of the line you carved. Repeat for the second side of the line. The goal is to create a v-shaped bevel along the grid. Continue until the entire board is carved with tiles.

Step Two: Building the frame is pretty simple. First measure (2) of your boards to 36" and cut them down. For the other (2) board you'll need to measure how thick your boards are. Even though the sign at Home Depot said the boards were 1"x4"X48" that is not really true. Much like the weight of a quarter pounder before cooking the boards shrink. Mine are about 3/4" of and inch thick, which means I need to cut my other boards to 37.5" long. 

At this point I then measure out an are 2.5" wide in the center of my boards to account for the space the foam will occupy. Install the corner braces in the middle of that space. Once you've completed this you should have a square frame the has 36"x36" interior dimensions.

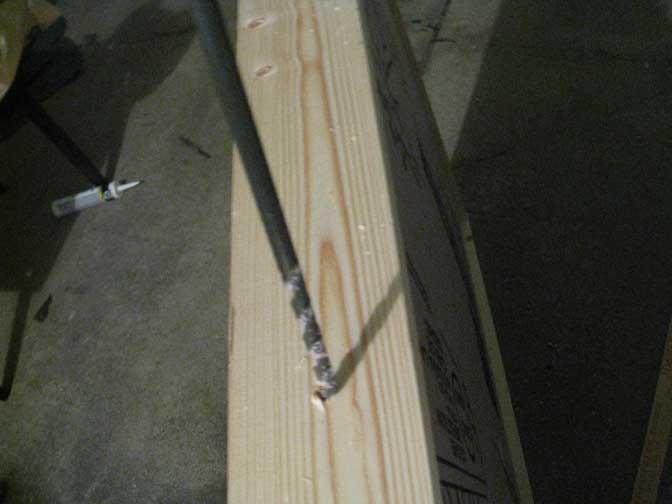
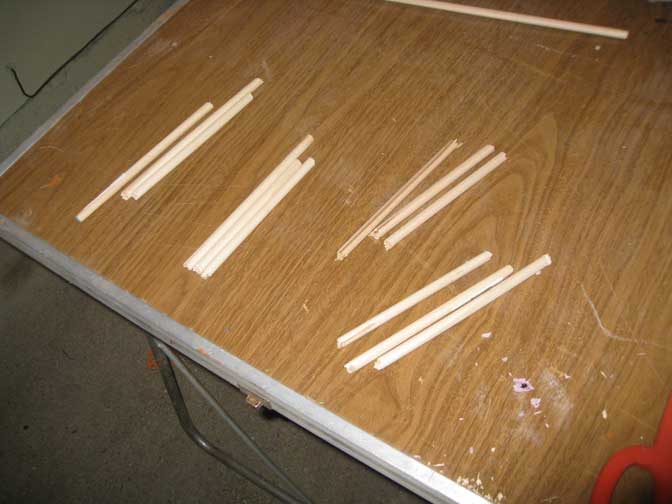
Step Three: To install the foam in the frame you'll want to gently push down on the foam until it pops into place. Align the top of your foam with the guidelines you created in Step Two. Now that your foam is level and center in the frame you need to create some support so it won't break when it is leaned on. Take your dowel rods and cut them into 5"-6" sections. Then put a 1/4" drill bit on your drill and drill (3) equally spaced holes along the edge of your board. 

Take your wood glue and slather it along the dowel rod, then insert the rod into the hole you just drilled. Tap it down with a hammer until it is flush with the edge of your board. Repeat until the board is pegged on all sides. This give a nice level of support and hold the board together. I've also added 2 finishing nails in each corner for extra support.

Step Four: This part may or may not be necessary. I prefer to do it as it adds another level of bond between the frame and the foam as well as creates a water tight barrier along the edge of the board. (I tend to do lots of water effect so I err on the side of caution. Take your painters caulk and run a bead along the edge of the board between the foam and wood frame. Then with a wet finger or sponge smooth out the bead so it is flush and fills the gaps. Repeat on the other edges of the board. After this side dries, flip the board over and repeat.

Step Five: Depending on how good of a wood cutter you are you may or may not need to fill the gaps with wood filler. I'm far from awesome at cutting wood (partially because I don't have a table saw) so I have gaps to fill. I also need to fill the dowel holes. Once the wood filler (or bondo if you prefer) has dried you need to sand it smooth. During this process you may want to round the lip of your board slightly to make it more comfortable to rest your arms on the edge.

Step Six: Details, since I'm making this board specifically for Relic Knights I want to do something to the frame to make it stand out. I found this drywall tape that looks like an after market vent grill or something. I used this on a spaceship deck before, this time I've used glue to wrap the edges of the board with this texture  to give it a bit more of a scify feel.

Ghetto Fabulous - Homemade Relic Knights Proxies

Relic Knights – The kickstarter seems to have really taken off and I'm looking forward to seeing this game produced. However May 2013 is a long time to wait. Luckily Sodapop has release the "preliminary" quickstart rules and cards on their site.

With a bit of work I've been able to create a 2D version of the game using these rules so I can try it out and hopefully get other people in my area interested in the game as well. Typically when I play test or proxy I find mini's that look similar and use them to represent other models. With Relic Knights there are a ton on large base models that aren't easily proxied with existing stuff I own.

To solve this problem I took the model card and printed them on label paper which I mounted to some heavy card and cut out a circle equal to the base size of the model. Essentially I created pogs for the starter box models plus a few extra for the doctrine as their starter box seems to be points light at the moment. 

Continuing with the label paper I printed the Esper deck on the same 8.5"x11" label paper and stuck them to some playing cards. You can ususally find some decent quality cards at a dollar store. I cut them out and stuck them to the playing cards. Odds are they won't hold up for long unless I sleeve them but at the moment they shuffle fine.

I printed the models stat cards on regular paper and put them in some penny sleeves. I imagine when the real game comes out top loaders will be preferred and they need two different sizes standard and the 3.5"x5", but for now the penny sleeves work just fine.

I of course plan on building a themed table for this but given the "models" I'll be using are flat pogs, I decided to create some 2D versions of the crystal structures that appear in the demo games I've seen. Indicating the size of them and cutting it out of heavyweight paper will serve it's purpose while I wait for the full game to come out.


Just Kicking It - Backing something cool

Relic Knights - While I'm not a huge fan of Anime, I do appreciate some aspects of the genre as a whole. I'll occasionally que up what ever the current title or series is available on Netflix instant que to have on while I'm painting. Inevitably it gets distracting as I have to watch more than I paint as the dialog is far less interesting than the visuals.

Currently on Sodapop Miniatures is running a Kickstarter campaign to release the Relic Knights line in plastic. While I've watched various projects go up and get funded I have always been on the fence about buying something before it's made. This time I decided to not miss the boat on all the bonus freebies and back the project.

From the gameplay videos I've seen the game is very fast paced and uses a card system to "pay" for attacks and blocks. This is very different then anything else I've played and I think it could be fun. The models are gorgeous and for the price of a single resin Relic Knight model you can have a full faction, for a little more you get two plus a book and tons of bonuses. If you haven't checked it out yet I suggest you do soon, there's less than 16 days left on the project.

Working in the Stockyard

MERCS – I've been working on building a dedicated MERCS table. Currently I'm feverishly working on building a massive amount of ISO shipping containers. My goal is to have at least ten of these built and painted for games of MERCS. 

What I like about these is the versatility they provide in setting up a table. They stack easily and can add a level of elevation that is consistent and simple. With MERCS using cards to measure it becomes tricky to use more complicated terrain as you can't get the card inside of buildings or around corners etc. 

To go with these I've picked up a Zuzzy mat. These are really great if you don't have space to store a full size table. The mats are nicely detailed and fairly simple to paint. 

It's so clear now...

I've begun experimenting with Crystal Clear casting resin. I was inspired by my friend Dave's (nerdelemental) current ice pillar project and decided to work on something similar. Dave was experimenting with using Envirotex Light to make casts which turned out really cool.

Snatching up his idea I visited the local plastics/SFX supplier to see if there was a material that might work better. They suggested trying Smooth-ons crystal clear series. To be honest looking at the giant red sticker on the box warning about toxic fumes I was a little nervous. The salesperson assured me it wasn't as difficult to work with as it seems, so I picked up a trial size to test out.

According to the box it's best when the material is less than 3" thick. My mold for Ice Pillars is pushing the limit but I figured why not try it out. Worst case I ruin my mold and have to make another one. At the same time I go out the mold I created for my rock bases to see what type of effect I could get.

Mixing isn't quite one to one so it's recommended to use a scale. Also it's important to gently stir the product to prevent bubbles. According to the instructions it takes 16 hours to cure. I found I could pop them out after 10 hours but they are a bit tacky. Lesson learned: put the bases on wax paper or some other nonstick surface the yellow bits are from a cardboard box I set them on ... doh!

The end result is pretty cool and I think I might offer them up on the online store once I work out the kinks in casting. 

Now Available – Twilight Emporium Bases

After shopping around for bases to use on my Hell Dorado miniatures, I gave up and decided to create my own. My problem was I wanted something with lots of skulls on the bases but I also wanted a rocky surface to mount the miniature to. It seems like most manufacturers make skull bases that consist of a bed of skulls.

After spending the weekend sculpting and crafting bases that would suit my purposes, I decided to make a mold and cast them myself. Now that I have a mold that will last for quite a while I'm going to start offering round lip base sets in my online store

In the desert you can remember your name.

I've begun creating some new terrain pieces for my large table (4'x6'). While I have several city blocks built for this table, after a while it starts to get a bit boring using ruins every game. The terrain I've built for Malifaux works fine on the smaller tables, however when spread out on a larger table it tends to look a bit sparse. 

I began by cutting green foam with a hot wire cutter. This is the easiest way to create rock formations that resemble something you'd see in the American west. Simply move the cutter in and out to create the striations in the rock face. Once these are cut and shaped, I mount them to MDF with wood glue.

To match the texture of the table I use a textured wallpaper as a base. This gives an interesting look without creating so much texture that models won't stand properly. Around the edges of the rock formations I used wood filler to createdebris piles where material would naturally collect. One the shape has been built up a give it a good coat of wood glue and cover it with a mixture of kitty litter and sand.

After that has dried overnight shake off the sand and use a dust whisk of soft bristly brush to knock off any loose material that didn't come off when you shook it.

I like to use Behr paint and primer for terrain projects. They can color match any of you model colors and have a good selection of the board. For desert terrain I like to use a terracotta color as a base. This can then be dry brushed with a light brown and cream to mimic the formations you find in the American west.

To finish off the project I like to apply some lichen and dead looking tall grass to areas that scrub may take hold. I use Tacky Glue or Super Glue for this. Either product with hold the material in place, but I've found that Super Glue dries faster and leads to better results for the tall grass. After everything is dry I spray it with Krylon Low Odor matte finish. This gives a durable coating that doesn't look glossy.

How I felt

Finishing – It's important to me that my models be complete. You spend so much time painting and basing your models, why would you leave the bottom of the base plain? For me I use a compass cutter and some self stick felt to complete the base. Not only does this give your model a finished look, the felt will help to keep them in place on the battlefield.

Finishing – It's important to me that my models be complete. You spend so much time painting and basing your models, why would you leave the bottom of the base plain? For me I use a compass cutter and some self stick felt to complete the base. Not only does this give your model a finished look, the felt will help to keep them in place on the battlefield.