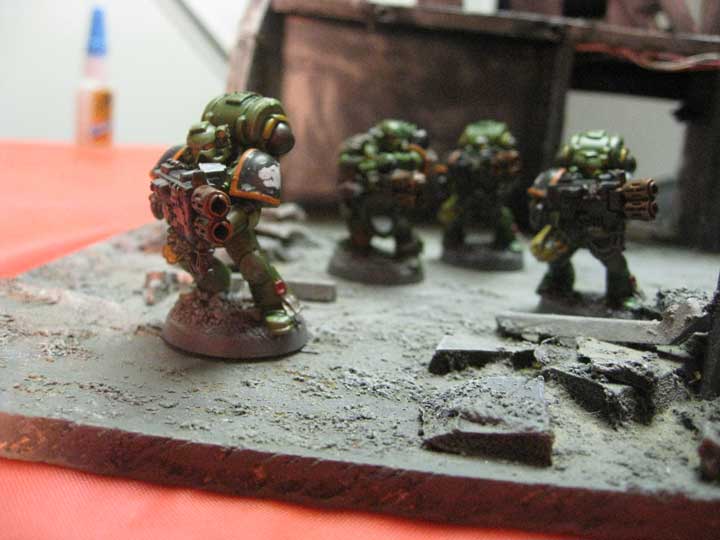
Salamanders or a close approximation
/Warhammer 40K – My latest large scale commission is in full swing. I finished up the three drop pods and ten terminators last week and delivered them to the client. I'm happy with how the paint scheme turned out, rather then go with the "official" Christmas green color I chose to go more of a muted lime green with orange and brass accents. I think they really pop with this scheme.
Sometimes an army scale project like this can be daunting. Over the years I've tried various techniques including painting one color on every model in the army and then moving on to the next until they're finished. This time around I decided to stick with 10 man squads. This would allow me to quickly focus on painting them to a tabletop standard as well as allowing my client to pick up each squad as it is finished and get them on the table.
Assembly line is really the best way to paint groups of models that are the same color. The models were provided to me primed and assembled, so I was able to get right into painting. A while back my mother-in-law found a great deal on the old GW foundation paints from a store that was closing. As such I had a bunch of pots of rather odd colors I don't ususally use. Of course the paint needed to be thinned out and refreshed as the old Foundation paints were thick to start with and old stock tends to separate a little. After adding some agitators to the pots and thinning them down I was ready to go.
To start I base coated each model with Gretchin Green, a weird sickly green color. Once that dried I gave them a wash with Thraka Green. While I'm speed painting like this I keep my light close to the table to speed up the drying process. By the time I finished the tenth model the first was ready for the next step which was painting the black/grey areas. I found that painting any black areas with a dark grey and washing with black gives a nice result that has a little depth. After the grey was dry I went back through and painted all the silver metallic bits, then went through and painted the brass. With that done the models are to a three color minimum. My client wanted a little more than that so I followed through and painted the orange trim and eyes, then the bone and parchment parts. After that was done a quick wash of black on the silver and grey bits, a wash of earthshade on the brass and these are ready to go.
The next step once these are dry is to apply the decals. This step can be a giant pain as the salamander decals don't like to lie flat on the shoulder pads. A small cut at the top of the decal helps to allow it to curve with the pad. I also like to use mirco sol and miro set when doing decals. I was of course out of it at the moment so white vinegar works in a pinch. This helps to soften the decal so it "melts" into the pad. Once the dry I go over them with a coat of clear gloss varnish. This helps to hide the edges of the decal and gives the pad a little more pop.
Baseing was a simple matter of brush on super glue. Dip in my box 'o sand, litter and random detrius. Shake off and paint with a dark grey. Drybrush lighter grey, repaint the edge to clean it up and they're done.
I use Kryon Matte finish to seal these. It gives a nice level of protection without being shiny.
So start to finish I was able to paint up (3) drop pods, (2) ten man tactical squads, (1) ten man terminator squad, (2) rhinos, (2) dreadnaughts, (4) multimelta marines, (1) terminator librarian, (1) captain, (1) chaplain and Vulcan over the course of two weeks painting from 9:30pm – 11:30pm every other night.


