
Putting Plastic Together ... fumless fallacy
/

Over the weekend I sat down and put together the blevy of plastic kits I've had sitting around waiting to put them together. While it's probably counterproductive to put together more stuff to paint before I finish my existing project load I needed to take a break from painting for a little while.
When assembling plastics it's important to use the correct glue. For most model kits the correct glue is plastic cement. (Super Dungeon Explore is an exception to this) Plastic cement causes a chemical reaction which softens the plastic and welds the two parts together into a solid join. This is more durable than a standard glue join and the models are unlikely to come back apart without serious repercussions. (notably truly broken pieces).
It's been some time since I had an assembly line going to put together a bunch of kits at one time and I forgot how messy plastics can be. Shaving the mold lines and sprue nubs left my workspace covered in plastic shavings. It's a good thing I set up in the basement where it's easy enough to sweep up the mess. The lesson to be learned here is to put a drop cloth down when doing mass assembly. It's also helpful to keep the shop-vac handily.
When choosing a plastic cement there are a ton of choices available. I prefer to stick with the "non-toxic" blue testors brand in the metal tube. It's cheap and easy to get and does a great job. The only problem is the tip is far from accurate and to much pressure on the tube means glue everywhere. I've heard there are better glues that only require a single drop with a pin to hold the plastics together. I have to assume they are also fairly smelly and toxic like the red tubes of testors.
Not feeling adventurous I stuck with the stand by blue tubes. Just because it's labeled "non-toxic" does not mean it doesn't smell. In fact the glue I was using had a very strong citrus odor that lingered well beyond the time it took for the glue to dry.
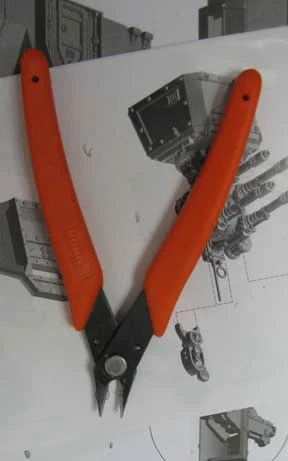
The next important tool to have on hand are a pair of side snips or sprue snips. These allow you to easily remove the pieces from the sprue. Don't twist the pieces off or try and carve them off with an exacto blade, you'll wind up damaging the part and probably gouging yourself with the blade. A good pair of hobby snips will cost you less that $15 and will save you much more than that cost in potentially damaged models. You'll also want to have some fresh exacto blades around to scrape off the mold lines.
With the proper tools in hand I went to work. Over the course of a few hours each night I was able to assemble Skullvane Manse, an Imperial Stongpoint, Dark Debts, Mr. Tanner, Mr. Graves and Santana Ortega. Next up I'll review these kits individually.


