Insta-Mold or it's Cheaper Equivalent

Kingdom Death – Ceramic Faces are a theme in Kingdom Death. Unfortunately the Survivor box I got only has ten 30mm base inserts. They're super cool but the monsters are on bigger bases and I want them to match. 

Some time ago I purchased this Japanese product (Oyumaru) for $4 off ebay. Apparently its the same as another product sold by CMON which is branded as Instant Mold. Essentially it's some type of plastic wax that you heat and press the part you want to copy into. Once it dries it's very flexible but holds the detail. You then press greenstuff into it and make a copy.

Once you pull the greenstuff out of the mold you have a pretty decent copy of the detail. I've been triming it to fit on the base of the models. I'll fill in to blank areas with sand and ballast to give it a bit more insterest than the plain faces have. 

Getting Crafty ... Decorating Deck Boxes

Relic Knights – I'm really happy with the Pro Dual Tower Deck boxes I picked up to store my Relic Knights stuff, however the black boxes are pretty plain. It's also a bit of an annoyance to have to open each box to see what's inside. In an effort to dress them up a bit I created some stickers to apply to the boxes. These help to distinguish the boxes from one another as they're all solid black.

I used some Avery Full Sheet Laser labels to print stickers of each faction symbol and the Relic Knights logo. This paper is supposed to stand up to the terrors the USPS puts packages through so I'm hoping it will stand up to some use. I may wind up reprinting them and sealing the stickers with a gloss varnish if they don't hold up, but I was in a hurry and just stuck them down. (Sometimes you just have to try something to see how it will look before you go back and do it right)

The adhesive seems to be holding pretty well so if the ink does the same I'll be happy. (Although I'm not holding my breath, this will be good enough for now.)

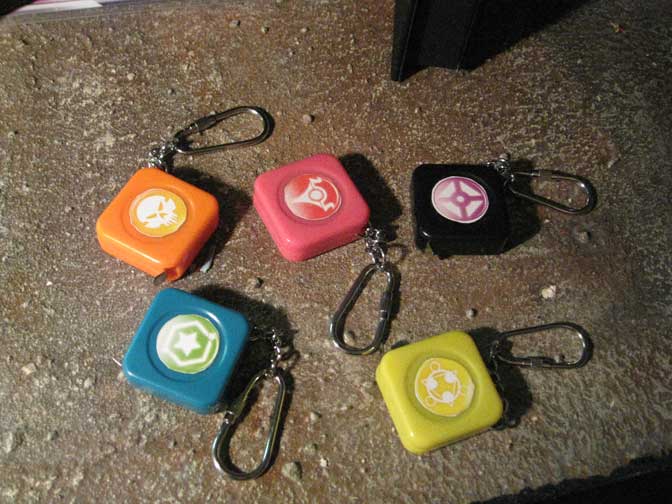
I also picked up a few keychain tape measures that I made little faction logos for and applied. I like that I know have a complete box with everything needed to play for the five factions I own. If I can ever get back out to other stores this will make it easy to demo the game and help build back the excitement of a few years ago when the kickstarter was live.

I really hope this game does well as I really like it and feel like there's plenty of potential for it to grow and have a decent market share in the already crowded skirmish game market.

What's in the Box? Storing Game Components

What's in the Box? Storing Game Components

Relic Knights – There are a lot of cards associate with Relic Knights; the deck, each character has 2 cards, the reference cards, objective cards, boost cards etc. There are also a bunch of acrylic tokens to mark the various thing you might need to mark during a game. And of course the Knight cards are oversized and need something to put them in as well. Oh yeah and you need a marker as well. That's a significant amount of stuff to keep together and transport. Here's the various solutions I've tried:

Read More

Art's and Crafts ... Logo designs

Recently I spent some time with my daughter teaching her how to make her own "silk-screened" t-shirts. This is a fun project which can be adapted to some tabletop applications; so I figured I'd share the technique.

Screen printing is a technique that can reproduce a design quickly and easily. Typically it is reserved for commercial applications. A while back Jo Anne's and Michael's sold a machine called a Yudu that was supposed to offer a easy low cost way to do silk screens at home. Unfortunately the cost of the materials for the machine was pretty ridiculous compared to buying you own supplies from an art store so it failed and was discontinued. 

This is a bit of a bummer as a family member had one that I used to make shirts for promoting this site. If you needed to make a couple dozen shirts it worked great.

Anyway, my daughter wanted to have a few shirts with logos printed on them and paying $20 a shirt from Hot Topic for something that wasn't exactly what she wanted was out of the question. So dad decided to share a trick with her that I used to use in art school.

For this project you'll need:

• Freezer Paper

• Hobby Knife and fresh blades

• Foam Brush

• Iron (preferable not your wife's expensive fancy one)

• Acrylic Paint

• The thing you want to print on 

Freezer paper is available at any grocery store it comes on a big roll for a few dollars. Essentially it's a heavy wax paper that is used when freezing meat. 

Step one is to print out (or draw) your design. Solid one color designs work best until you get more skilled. 

Step two is to tape the design to a piece of freezer paper slightly larger than the design you want to print.

Step three carefully cut out your design. Remember the parts that you want to have color need to be removed.

Step four iron down the negative version of the design. Be sure to not use steam you want the wax to stick to the shirt.

Step five use a foam brush to gently apply paint. Your want a thin even layer if it gets to heavy the design will crack when washed. (Alternatively you can use a credit card to squeegee the paint across the design, this is tricky and if you didn't create a good seal the paint will bleed.)

Step six carefully remove the freezer paper, this is easier to do when the paint is still tacky.

That's it six easy steps to create a unique design. This would work well on canvas army bags or anything else you might need to brand with your faction logos.


Lost in the Warp ... Shiny Syndrome

You may have noticed lately my blog has been all over the place. (Well probably more than just lately ...) I think I may have a problem. Many of you may have the same problem ad you may or may not have realized that you're suffering from it yet. I believe I may have a terminal case of Shiny Syndrome.

As with any problem Step One is admitting you have a problem. I've realized I very rarely complete a project. I'm constantly distracted by a new idea or a new shiney thing and I neglect to finish my own projects. This isn't really a problem when I'm doing commissions as I have a true deadline as well as a "reward" for finishing what I working on. However when it comes to my own personal projects my deadline is really "when I have time". I also have this annoying habit of getting things to a "playable state". This means getting the base colors down on a unit so I can play with them and not feel self conscious about having bare minis on the table. The problem with this method is it becomes a vicious circle where I never have the drive to paint my own stuff to completion as it's "good enough" for this weeks game. 

My other problem is getting distracted by this week's new hotness. Anytime a new game comes out or I listen to a positive review on a game I start obsessing about it. Reading everything I can until I get to the point where I MUST own it. Sometimes this works out for the best and the game becomes a staple that I can bring out regularly and get games in with a variety of opponents. Other times I pick up everything and can never convince anyone to try out the game (Resident Evil Deck Building game I'm looking at you). 

With the advent of Kickstarter and crowdfunding this problem has only increased. Especially with the games that get over funded to the point where you look at the cost and simple "can't refuse" a deal that good. So you go all in and wait. And wait. And wait. Eventually a giant box of stuff arrives at your door and the feeling of being overwhelmed sets in. Why did you buy this when you still haven't finished the piles of stuff filling up your game room.

________________________________________

Now that I've identified I have a problem, step two is coming up with a solution. The easy answer would be pick up the pace and get it done. The problem is getting it done will never happen if Shiny Stuff keeps stealing my attention. So the answer becomes a bit more complicated.

Step Two Phase One: First and foremost I need to swear off Kickstarter. While the deals can be amazing the amount of work each one will entail once I have it in hand is ridiculous. Hopefully barring any further delays I'll have Relic Knights, Deadzone and Kingdom Death in hand by Christmas. That alone is a couple hundred additional models I'll need to paint and assemble. Having just received the Chibi Dungeon stuff I'm already overwhelm with just trying to clean them up and assemble them. Hopefully the other stuff I'm expecting with be cleaner and easier to assemble but even if they are it's a ton of stuff. As my mother-in-law like to say, "You'll go broke on a good deal."  With Kickstarter this can't be more true, the time investment is huge even though the monetary investment isn't.

Step Two Phase Two: Admit your limitations. While I might have a cool new idea several times a week there's no way I have the time to bring every idea to completion. Accepting this fact and focusing on the best ideas that will be most relevant to my limited hobby time is key to getting this in check. The second part of this is accepting that I have limited hobby time. As an adult with family and work obligations the amount of time I have to play games is limited, which means I can't play every game I want to. This one is really hard because so many things interest me. But if I can allocate my time to a handful of projects and complete them I'll feel more accomplished and less overwhelmed.

Going Platinum, Baby - Mold Problem Solved

Terrain Making – After having several of my OOMO molds fail on me I was bummed out. The ones that failed on me were mostly components that I had built from other kits and used the molds to replicate my work rather than starting from scratch every time. I'm more or less just a hobby caster so I needed to find an expert to help me out. Luckily the TFB Plastics the shop that I usually pick up my supplies from has a really knowledgable staff.

After explaining my issues he suggested using a platinum cure instead of a tin cure silicone. Apparently the tin cure like OOMO is a cheaper silicone that is only supposed to hold up for 50+ pulls if you properly care for your molds. (I got much more that that with my base molds, but anything with undercuts was far less) The product he suggested is called Mold Star which should last for 400+ pulls. I was excited as the OOMO lasted quite a long time and the Mold Star was only $5 more per 1 lb. kit.

Once I got it home and set up my masters I mixed up a batch and used my vacum chamber to removed the air bubbles. Since it has a 50 min pot life I had plenty of time to degas the silicone before pouring. While mixing I noticed the color of this material is the same as the Hirst Arts molds which explains why their molds seem to be much stiffer than the ones I made in my intial runs. I used the 15 Slow version of Mold Star which meant four hours to cure, I decided to leave it overnight just to be sure.

After popping out the mold I'm really happy with how it turned out the material is much stiffer so it should hold up better against the rigors of resin casting. 


Smells like ... Vinegar (Decal Tips)

Warhammer 40,000 – As promised the next step is actually applying the decals. One of the tricks I've learned over the years is to use Micro Set and Micro Sol. This nifty products help to melt the decals into the model so you don't get that weird halo line that needs to be painted over.

Step One: Paint the area you plan on applying the decal to with a gloss varnish. This serves two purposes, first it gives you a pretty smooth surface to apply the decal to. Second something about the Micro products reacts with the varnish to help the decals melt in. This might be completely a rationalization on my part as I'm no scientist but it's the way I do it and it seems to work great.

Step Two: Put down the Micro set on the area you want to place the decal. Paint it on with a soft brush. 

Step Three: Slide the decal in place. At this point I gently dap with a paper towel to remove excess liquid.

Step Four: Gently apply Micro Sol over top over the decal and leave it alone. The Micro Sol will soften the decal and cause it to "melt" into the paint.

Step Five: Once it's dry apply a second coat of gloss varnish. This will protect the decal from damage. If you desire a matte finish apply that after the gloss has dried.

Pretty simple really. A small bottle of either product will last you forever, I picked mine up years ago and still have an almost full bottle of each.

So how did the laser decal paper hold up? The answer is pretty good. I only had minor problems with the toner coming off and was simple enough to paint over the decal with some thinned down paint. I highly recommend this style decal paper over the more readily available inkjet papers.

Putting Plastic Together ... fumless fallacy

Over the weekend I sat down and put together the blevy of plastic kits I've had sitting around waiting to put them together. While it's probably counterproductive to put together more stuff to paint before I finish my existing project load I needed to take a break from painting for a little while.

When assembling plastics it's important to use the correct glue. For most model kits the correct glue is plastic cement. (Super Dungeon Explore is an exception to this) Plastic cement causes a chemical reaction which softens the plastic and welds the two parts together into a solid join. This is more durable than a standard glue join and the models are unlikely to come back apart without serious repercussions. (notably truly broken pieces).

It's been some time since I had an assembly line going to put together a bunch of kits at one time and I forgot how messy plastics can be. Shaving the mold lines and sprue nubs left my workspace covered in plastic shavings. It's a good thing I set up in the basement where it's easy enough to sweep up the mess. The lesson to be learned here is to put a drop cloth down when doing mass assembly. It's also helpful to keep the shop-vac handily.

When choosing a plastic cement there are a ton of choices available. I prefer to stick with the "non-toxic" blue testors brand in the metal tube. It's cheap and easy to get and does a great job. The only problem is the tip is far from accurate and to much pressure on the tube means glue everywhere. I've heard there are better glues that only require a single drop with a pin to hold the plastics together. I have to assume they are also fairly smelly and toxic like the red tubes of testors. 

Not feeling adventurous I stuck with the stand by blue tubes. Just because it's labeled "non-toxic" does not mean it doesn't smell. In fact the glue I was using had a very strong citrus odor that lingered well beyond the time it took for the glue to dry.

The next important tool to have on hand are a pair of side snips or sprue snips. These allow you to easily remove the pieces from the sprue. Don't twist the pieces off or try and carve them off with an exacto blade, you'll wind up damaging the part and probably gouging yourself with the blade. A good pair of hobby snips will cost you less that $15 and will save you much more than that cost in potentially damaged models. You'll also want to have some fresh exacto blades around to scrape off the mold lines.

With the proper tools in hand I went to work. Over the course of a few hours each night I was able to assemble Skullvane Manse, an Imperial Stongpoint, Dark Debts, Mr. Tanner, Mr. Graves and Santana Ortega. Next up I'll review these kits individually.

Let's Learn – Step by Step Library Board (Part One)

Relic Knights – I'm super excited about the upcoming release of Relic Knights and while the game isn't slated for release until May 2013, I decided to get a jump on building a table for it. I've had a bunch of bookshelves that I picked up to detail the interior of some of my buildings sitting around for what seems like forever. At some point I gave up on detailing out each building because the details limited movement with the building to much. 

From past experience large buildings look cool on the board but they pose issues with storage. This time around I decided to use the system I did for the sewer board to create the shelf walls. Also taking what I learned from cutting out all those bricks with the sewer board and the huge time sink that became I decided to carve the tiles directly into the foam base. 

Materials Needed:

(4) 1"x4"x48" boards

(2) 1/4" dowel rods

(4) small corner braces

(1) 4'x8' sheet of 2.5" insulation foam

Wood Glue

Painters Caulk

Razor Knife 

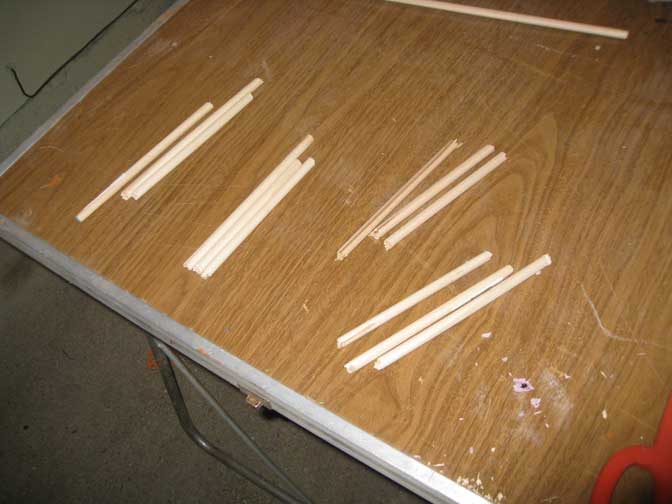
Step One: Carving the foam is easier when it's not attached to the wood frame. I measured out a 36"x36" square and carefully cut the foam to size. When cutting sheets of foam it's best to score it deeply and then gently apply pressure until it pops apart. After it's cut to size measure and mark the board every 1.5" repeat until you have a checkerboard drawn over the entire board.

Next you'll take a razor knife and hold it at a 45° angle and cut along one side of the line you carved. Repeat for the second side of the line. The goal is to create a v-shaped bevel along the grid. Continue until the entire board is carved with tiles.

Step Two: Building the frame is pretty simple. First measure (2) of your boards to 36" and cut them down. For the other (2) board you'll need to measure how thick your boards are. Even though the sign at Home Depot said the boards were 1"x4"X48" that is not really true. Much like the weight of a quarter pounder before cooking the boards shrink. Mine are about 3/4" of and inch thick, which means I need to cut my other boards to 37.5" long. 

At this point I then measure out an are 2.5" wide in the center of my boards to account for the space the foam will occupy. Install the corner braces in the middle of that space. Once you've completed this you should have a square frame the has 36"x36" interior dimensions.

Step Three: To install the foam in the frame you'll want to gently push down on the foam until it pops into place. Align the top of your foam with the guidelines you created in Step Two. Now that your foam is level and center in the frame you need to create some support so it won't break when it is leaned on. Take your dowel rods and cut them into 5"-6" sections. Then put a 1/4" drill bit on your drill and drill (3) equally spaced holes along the edge of your board. 

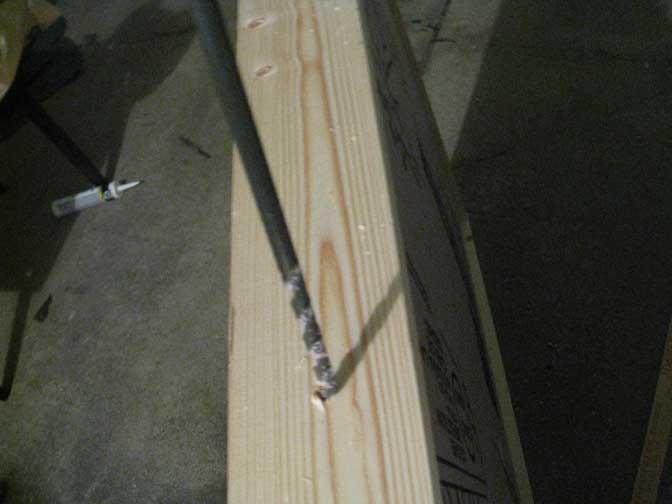
Take your wood glue and slather it along the dowel rod, then insert the rod into the hole you just drilled. Tap it down with a hammer until it is flush with the edge of your board. Repeat until the board is pegged on all sides. This give a nice level of support and hold the board together. I've also added 2 finishing nails in each corner for extra support.

Step Four: This part may or may not be necessary. I prefer to do it as it adds another level of bond between the frame and the foam as well as creates a water tight barrier along the edge of the board. (I tend to do lots of water effect so I err on the side of caution. Take your painters caulk and run a bead along the edge of the board between the foam and wood frame. Then with a wet finger or sponge smooth out the bead so it is flush and fills the gaps. Repeat on the other edges of the board. After this side dries, flip the board over and repeat.

Step Five: Depending on how good of a wood cutter you are you may or may not need to fill the gaps with wood filler. I'm far from awesome at cutting wood (partially because I don't have a table saw) so I have gaps to fill. I also need to fill the dowel holes. Once the wood filler (or bondo if you prefer) has dried you need to sand it smooth. During this process you may want to round the lip of your board slightly to make it more comfortable to rest your arms on the edge.

Step Six: Details, since I'm making this board specifically for Relic Knights I want to do something to the frame to make it stand out. I found this drywall tape that looks like an after market vent grill or something. I used this on a spaceship deck before, this time I've used glue to wrap the edges of the board with this texture  to give it a bit more of a scify feel.

Shrinky Dinks

Game Aids – I first experimented  with Shrinky Dinks while playing Warmachine/Hordes. It is so important to keep track of spell effects that some type of counter has to be used. We started off with colored beads and/or noting it on the card but over the course of the game they became difficult to remember. This resulted in lots of bad plays and "Woah, I didn't know that – instead I'm going to..." Around the same time Gale Force Nine made tokens for the game, for many players this was a Godsend. I on the other hand didn't care for them, sure they were easy to get and had most everything you needed; but they were also tiny, hard to pick up and expensive.

As luck would have it I came across Ink-Jet Shrinky Dink paper at a craft store. With my 40% coupon I bought them and figured it wouldn't hurt, I also found self-stick felt that same day. It took some experimentation but I eventually found that if you make something about 2"x2" it shrinks to the correct size. Also when you chose colors make sure to go lighter than you want them to be. They get significantly darker once they shrink.

My first tokens were for my Cryx force and I made them cog shaped and circular. (Bad idea...circles don't shrink correctly and you get ovals). After Hordes came out I made them for my Circle Orboros and Everblight forces. I've been really happy with them, they're easy to pick-up, large enough to be able to read and relatively inexpensive to make.

After our first few games of Malifaux I came to the realization that spell effect counters were needed. So I sat down and read through the book making note of any spells that stuck around. I decided on a simple hexagon shape, Bleeding Cowboy as the font and scanned in the faction symbols.

Once they're printed out you bake at 300 degrees for 5 minutes or so and you're done. Seal them with a gloss spray and you're ready to game. I prefer to apply self-stick felt to the back of them. This not only makes them look more finished but also makes it easier to pick them up.


How I felt

Finishing – It's important to me that my models be complete. You spend so much time painting and basing your models, why would you leave the bottom of the base plain? For me I use a compass cutter and some self stick felt to complete the base. Not only does this give your model a finished look, the felt will help to keep them in place on the battlefield.

Finishing – It's important to me that my models be complete. You spend so much time painting and basing your models, why would you leave the bottom of the base plain? For me I use a compass cutter and some self stick felt to complete the base. Not only does this give your model a finished look, the felt will help to keep them in place on the battlefield.