Labor Day Special

I just added the new Clear Resin 50mm Ice Pillars and 50mm LED Flickering Flame markers to the online store. They're on sale right now for just $10. After the sale I'll have to increase the price to account for materials costs but in celebration of the Labor Day Holiday you can get your now for a special price.

Due to expected demand please allow up to 2-3 weeks for delivery.

Song of Fire and Ice

Malifaux – My experiments with clear resin have finally come to fruition. I finished up my Snowstorm and have made enough Ice Pillars to get through a game with him. 

I've also gotten a technique for doing clear flame wall/growing fire tokens. Painting them with ink mixed with clear varnish makes a realistic looking flame. By adding a LED light to the token it glows and looks pretty good. The lights I've been playing around with were ok but I found some flickering tea lights that create the perfect glow for flame effects.

Of course the mechanism with the switch was far to large for my existing flame markers so I sculpted a new taller version that actually looks more like a raging fire than the previous version.

After casting the clear flame with a urethane resin I dremmeled out the bottom of the base to insert the dissected LED tealight. With that super-glued in place I began painted the flame with the ink mixture detailed above. Once that's done it's just a matter of sealing them again to tone down the gloss. I'll probably offer these up in my online store once I have a quantity built up, but the time a materials to create these is significantly more than the simple plaster versions so the price will be a bit higher.

Malifaux – Forging along with my experiments in clear resin I've begun to attempt to cast my flame wall markers in clear resin. My goal is to eventually have these light up. The initial casts were slightly flawed due to the ridiculous humidity. However I think they will work fine for the experiment. 

I'm going to mix ink with a clear varnish to paint the flames. I think that will not only give me more control over where the color goes but also be a bit more durable. After painting is completed I'm going to drill out a space to insert a LED bulb.

Burning down the house

Malifaux – The Rising Powers book introduced a new type of token used to represent a growing fire in some of the interior locations. The nice thing about the size of the token is it matches up with the size Crid's flame wall spell. Over the course of the game you could potentially need 10-12 of these counters, rather than use generic blank bases I've been working on creating some 3D tokens that will better represent the event.

For the event I'm running Feb 5th, one of the tables will be the Star Theater and will use the growing fire special event. With the event drawing close I needed to come up with a way to quickly create multiple flame counters.

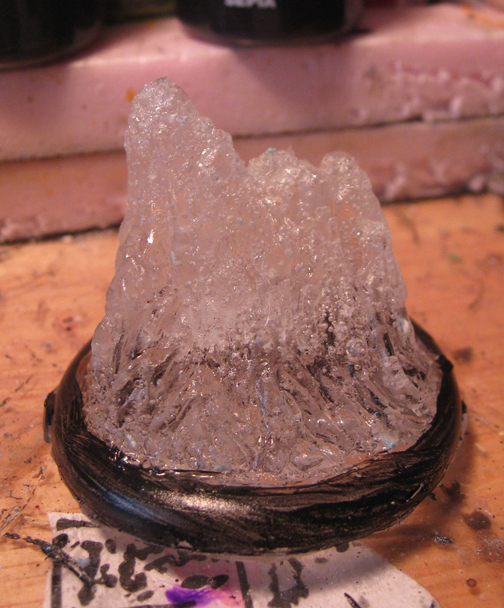
To begin I first sculpted the flames on a 50mm base. I used green foam to bulk out the shape. From there I than sculpted the flames using a 2 part epoxy (I've found the construction grade stuff you can buy at a hardware store works great for terrain). To sculpt the flames I rolled the epoxy into small sausage shapes. By layering the sausage shapes you can create a texture that looks flame-like. Once that base dries use green stuff to add additional detail.

The next step is to create a mold of the sculpt. To do this I use a 2-part silicon and create a simple mold. I mount the base into a plastic cup and pour the silicon into the mold. Once it's cured pop of the master and cast using dental plaster.

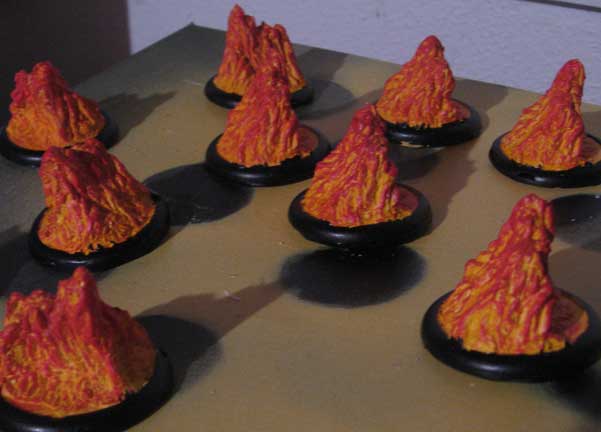
Painting is pretty quick. I like to spray the yellow base and than do the blends of orange and red. To tie them together I do a final wash of yellow ink.

Following these steps you can make multiple flame tokens or if you want to save even more time check out the online store.