The Doctrine is in ... More Relic Knights (Prep Work)

Relic Knights – Next up in the assembly que is the Doctrine. I've received word that one of my clients will be needing this set and he wants to do a flagstone them for his bases. So, before I can build them I need to make up the base set so I can quickly crank these out.

Using the base inserts provided with the kickstarter I traced out the sizes I'd need from an existing cast. After some sanding and trimming I'm pretty happy with how they look. So to save some time I'm going to make a silicon mold of these so I can duplicate them quickly and easily.

Going Platinum, Baby - Mold Problem Solved

Terrain Making – After having several of my OOMO molds fail on me I was bummed out. The ones that failed on me were mostly components that I had built from other kits and used the molds to replicate my work rather than starting from scratch every time. I'm more or less just a hobby caster so I needed to find an expert to help me out. Luckily the TFB Plastics the shop that I usually pick up my supplies from has a really knowledgable staff.

After explaining my issues he suggested using a platinum cure instead of a tin cure silicone. Apparently the tin cure like OOMO is a cheaper silicone that is only supposed to hold up for 50+ pulls if you properly care for your molds. (I got much more that that with my base molds, but anything with undercuts was far less) The product he suggested is called Mold Star which should last for 400+ pulls. I was excited as the OOMO lasted quite a long time and the Mold Star was only $5 more per 1 lb. kit.

Once I got it home and set up my masters I mixed up a batch and used my vacum chamber to removed the air bubbles. Since it has a 50 min pot life I had plenty of time to degas the silicone before pouring. While mixing I noticed the color of this material is the same as the Hirst Arts molds which explains why their molds seem to be much stiffer than the ones I made in my intial runs. I used the 15 Slow version of Mold Star which meant four hours to cure, I decided to leave it overnight just to be sure.

After popping out the mold I'm really happy with how it turned out the material is much stiffer so it should hold up better against the rigors of resin casting. 


Window Pain (More progress on Downtown Malifaux)

Malifaux – In an effort to speed up my building process I decided to build some window frames. Initially I planned on buying some plastic rod and an miter box to cut and assemble each window. Unable to find a miter box I liked at the few hobby stores I visited I decided to wing it and make the cuts freehand. After ruining several attempts when the plastic wiggled, I decided this was a terrible idea.

Luckily while I was at the craft store picking up more Shrinky-Dink paper, I wandered into the jewelry aisle. Every now and then you can find some interesting charms that work well for terrain project. I happened to find some mini photo frames that were exactly the size I wanted for my window. After getting over the ridiculous price they wanted I remembered the pocket full of 40% off coupons I had and made my way to the register.

Getting the parts home I realized I would need to cut and grind the hoops off the top of the frames. I also would need to cut some rod to make the window panes. (no 45° cuts here) I realized that purchasing a bunch of these and hand crafting each one would be cost and time prohibitive, so I made four versions of windows and prepared them for casting.

I considered casting these out of clear resin but decided against it for this project as the buildings are not going to be functional. Cutting holes into gatorboard is tricky and I dont' want to risk destroying what I've already built to reverse engineering a lighting plan. 

These turned out pretty good and I think I'll offer them up in the Online Store once I have a sufficient stock cast up.


Red Chapel District (Downtown Malifaux Part 3)

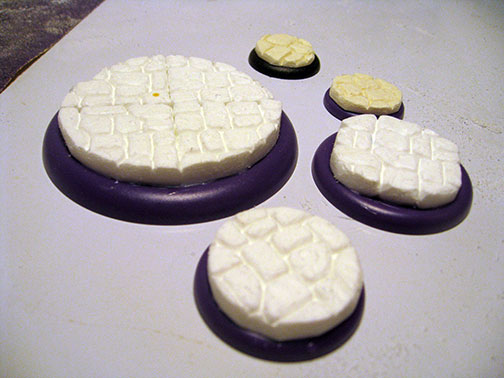
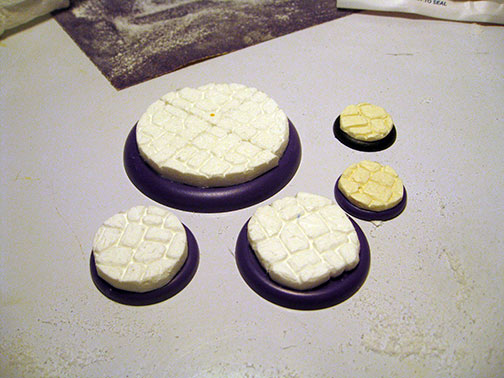
Malifaux – Having cast up my road sections and some brick wall section I've begun the time intensive portion of this project. I probably would have better luck if I made my road sections with notches to fit together like a jigsaw puzzle. However I didn't and am going to have some serious gaps to fill in. I think ultimately this is going to strengthen the entire project (as well as subtlety add no slip areas).

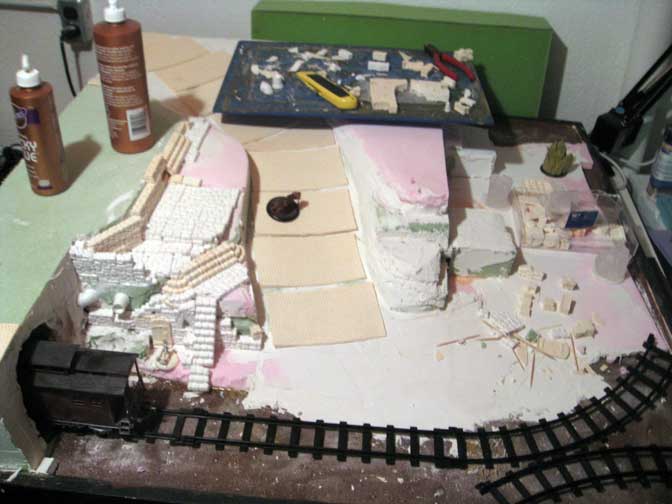
While waiting for the resin to set I decided to begin adding blocks to the board. I like the idea of a city built on a city on a city, which according to the fluff so far seems to be the case. The newer areas are built from renovated old buildings or simply built on top of the existing structures. I imagine it to be like Jerusalem or another ancient settlement in which multiple cultures have occupied the same area over the course of centuries. 

With that in mind I began adding flagstones and fieldstone walls to one area. The fieldstone is going to represent the older structures and or buildings cobbled together from existing material. I'm going to use the gothic stones for new structures like the train tunnel and bridges. Hopefully I'll be able to make these work together and not look like a jumbled mess.

The first area I've been working on is the stairway along the main street. As this leads down near the tracks I wanted to create a maintenance room. This could lead down to the sewer or just serve as an area for rail workers to rest. I imagine small rooms like this throughout the city hidden in forgotten places server as hideouts for near-do-wells, the poor and forgotten or laborers. 

I've also decided that the buildings will not be permanently affixed to the board. Dragging it back and forth from my garage to basement (for sanding etc) I learned that I can't go much higher with the board and still be able to go up my narrow stairwell. I'm really glad I didn't block in the buildings before learning this. So now my focus is to build the basic board and texture it appropriately. This will allow me to swap out buildings and build a ruined version of them to represent the Slums and Quarantine Zone as well.

Malifaux – Forging along with my experiments in clear resin I've begun to attempt to cast my flame wall markers in clear resin. My goal is to eventually have these light up. The initial casts were slightly flawed due to the ridiculous humidity. However I think they will work fine for the experiment. 

I'm going to mix ink with a clear varnish to paint the flames. I think that will not only give me more control over where the color goes but also be a bit more durable. After painting is completed I'm going to drill out a space to insert a LED bulb.

To hell with it ...

Helldorado – The hell board is just about complete. I finished the waterfalls and did my pours of water effects. Now all that's left is to go in and add some small details. Painting the skull piles, adding ripples to the water and touching up some spots. I'm really happy with how this board has turned out especially since I didn't really have a plan when I started.