Blade Runner-esque City Scape

Blade Runner-esque City Scape

Terrain Building – Blade Runner really set the tone for me as to what a dystopian future would look like. Dirty, crowded and dark. Ultimately that's the look I'm going for with my city table. Ideally this terrain will be "useable" across several different rules sets like 40K, Necromunda and Batman as well as any other random "near-future" sci-fi games I might find myself interested in. 

Read More

Built to Fail ...

Warhammer 40K – Lately I've been playing a fair bit of 40K. With the new marine book I've rekindled my love for the game. Regardless of GW's pricing and corporate policies the game itself is enjoyable and fun. Sure their are some weird rules and some careless editing that can cause confusion and pain during a game but overall it's just plain fun.

With my 4'x6' board currently dominated by the near future city I've been working on (I swear I will post progress sooner or later) many of my recent games have been played using this board. For as packed full of terrain as it is the games have gone pretty smooth. For the first few we just played the building interiors as impassible terrain and kept the fight in the street. While this worked well it seemed to be missing something.

In my most recent game we decided to delve into the big book and figure out how in tact buildings are supposed to work. In previous editions the rules for buildings were pretty vague and left much to the obligatory house rules. This time around they actually put some thought into the rules and gave pretty solid guidelines on how they will work. Essentially buildings are treated similar to a vehicle in which you can shoot a structure and cause damage to it which in turn effects the units inside. The guidelines base the armor value on the size of the structure and its function which then determine how many models can fit in it, how many fire points and what type of protection it offers.

Since my board is mostly 9"x9" structures that represent a habblock or business district each building is essentially the same as a drop pod. Which you would think means they are pretty filmsy however in practice they are anything but.

We played a three player game with two marine players facing off against a guard army. The set up seemed to favor the marines as the guard player was forced into a corner dominated by a large complex. Essentially three different buildings consisting of multiple stories with bridges. As it turns out the guard player was able to fit most of his army inside the buildings making it very hard to shoot them. Over the course of six turns he stayed holed up in the buiding taking pot shots out the doors. Duting the last turn i was able to score a penetrating hit on the building finally and caused catostrophic damage. This killed off over 50% of the guys in the building and caused those on the roof to tumble to their death. Pretty game changing if this had happened earlier in the game it would have been devastating, this late in the game it didn't do much.

I like the rules for in tact buildings and think they add a lot of flavor to the game. I also like that they have a certain amount of risk/reward built into them. Sure you can take advantage of holing up the whole game but one luckily shot could bring the whole thing down around your ears. I'm tempting to build a force geared to taking out structures to see what kind of impact that will have on the game when using this board.

Go Big or .... Near Future 4'x6' Board Progress

Terrain Making – After making the initial 3'x3' city block board with 3"x3" squares I decided that I needed to go all out and do a 4'x6' table. Between the two smaller near future boards I've been working on I have enough buildings to populate a larger area. I've always wanted to do a full city so I decided now is the time to do it. Having been successful with the smaller board I have a good grasp of what works and what doesn't. I made a quick trip to Home Depot to pick up a 1" thick sheet of insulation foam to act as the topper for my 4'x6' table. A quick stop at Michael's for some clean sheets of foam core and I was ready to go.

After trimming the insulation foam to fit within my tabletop I then measured out a 3"x3" grid over the entire surface. Once the grid was in place I moved the buildings I have around on the board until I was happy with the layout. My goal was to have some straight road sections without have a clear shot straight across the board. From prior experience, city blocks set up on a standard grid make for boring battlefields as their are to many "kill zones" that allow over watchers or snipers to control to much of the board. With the layout I settled on there are enough blind spots to offer cover from the various sniper nests.

The tedious part of the job took me two nights of cutting 3"x3" squares of foam core. While I probably could have just painted the grid on to these I find having the physical separation of the individual blocks to be more visually pleasing. Once I cut them all to size I set off with a large bottle of tacky glue and began gluing down the foam core to the insulation foam base. This process took another night of tedious work but the final result fit exactly what I had in mind.

I then cut out storm drains from granny grate and glued them in place at various points along the street sections. Little details like this help to bring the whole city to life. I opted to not include sewer drain covers at this time. I may change my mind before painting begins but right now I don't think I want to add them.

Once everything had dried overnight I took the sheet out to the garage and began applying the sand texture. For this I use a gallon of wood glue. I've found that wood glue adheres to the foam pretty good and dries solid enough to withstand the rigors of gaming. Working in sections I paint the glue down with a wide brush and then liberally coat the glue with sand. More is better at this point, you want to have the sand piled on thick enough so it will sink into the sand and give you the texture you want.

After this dries for a few days (you have to be sure the glue has set otherwise you'll get weird marks in the final texture) I use a shop vac to remove the excess sand. If you're smart and clean the shop vac prior to vacuuming the sand you'll be able to salvage the excess for the next project. 

After everything dried I painted the whole board with Behr Premium Paint + Primer. I find this covers well, is durable and comes in colors that match my other paints. After the base coat I went in with my airbrush and painted everything else. Starting with black I slowly worked up highlights to get a decent transition for the concrete slabs. Overall I'm happy with the results thus far.

3x3 - 3x3 - 3x3 - 3x3 - 3x3 ...Repeat

Terrain Making – While I love my 3'x3' Zuzzy mat I decided to build a 3'x3' base board to go with this near future stuff (Ideally I'll also be able to use it with Deadzone). I used the same wooden framework and insulation foam core as I've done with my Malifaux boards.

While waiting for the caulk to dry I started cutting out 3"x3" squares to build the city blocks for this board out of 1/4" foamcore. With small sections I don't think I'll run into a warping issue with the foamcore but just in case I applied my glue generously.

I figure using 3"x3" squares to build the foundations will give me an interesting look that serves the dual purpose of creating a grid for Deadzone. (As I've said before with the amount of games I like to play making the terrain as multipurpose as possible save me some space.) The 3"x3" slabs of concrete will also help to create a sidewalk for the various buildings as well as clearly define the roadway.

After glueing the squares into city blocks and defining the streets and alleyways, I cut some drains out of granny grate and glued them down onto the street. Once that had dried overnight I used some wood glue and play sand to texturize the street. With the high humidity this took quite a bit longer to dry than it normally does.

While waiting for the glue to dry I started cutting the basic shapes for more city buildings. The last few I made didn't fit into the parameters for Deadzone terrain exactly so I decided to make some additional buildings that match up with the grid. I kept 3.5" high as my standard for the height of A floor of a building and kept all the lengths multiples of three. They seem to work pretty good and I'm considering adding several stories to each of the buildings. 

To paint the whole thing I picked up a quart of Behr Premium Paint and Primer in a color called Pencil Point. This is a nice deep gray that only requires one coat to cover and improve overall adhesion. I like how thick the paint is as it helps to fill weird gaps and seal the sand to prevent chipping.

More Airbrush Action - Near Future Terrain

Terrain Making – I'm getting the hang of using the airbrush with the second set of buildings for the Near Future board. It seems that consistent pressure and paint gives a smoother finish than short controlled bursts. Which is odd because it goes against everything I've been taught but hey ... whatever works.

After lining the seems with a dark gray I went back in with a white to do the bulk of the painting. I think both buildings took me less than twenty minutes to cover with a solid base coat with basic shading. 

Next I went in and painted the details with a traditional brush to pick out signs and metallic parts. My plan is to go back in and add some glow effect with the airbrush around the light globes.

Let's Go Shopping ... More Near Future Terrain

Let's Go Shopping ... More Near Future Terrain

Terrain Making – With the exterior of the two larger structures in a playable state I've moved on to building some smaller buildings to fill in the board. On a 3'x3' including all the structures might make for a cluttered board however in small scale skirmish games cover is key to a good game. Without it you'll fall victim to the sniper on a roof more often than not.

Read More

Airbrush Action - Learning on the Fly

Terrain Making – Last Christmas I received an airbrush kit from my in-laws, nothing super fancy but just a simple starter kit as I've been meaning to try airbrushing terrain. Being as most terrain elements are fairly large painting with a regular brush can take some time and effort to smooth thing out. Up until now the kit has sat in my basement next to the "pressure pot" (that I also received as a gift) that I need to pick up the pipe fittings to convert it to a proper "casting pot."

I postponed busting out the airbrush until now because airbrushing has a huge amount of set-up and takedown work. First I needed to clear out the garage to avoid potentially over spraying on stuff I didn't want to be painted or have a chalky misting of overspray on. 

Next up was learning how to take apart and reassemble the brush. When I was a kid my mom bought me a cheap plastic airbrush that didn't last long as the tips were plastic and didn't have instructions on how to clean/take them apart. After slowly destroying that airbrush from lack of care I lost interest in it and moved on to traditional brushes. As an adult with an appreciation for "having nice things" I spent a long time watching videos and reading articles about how to take car of the brush. All of them insisted on taking it apart and reassembling it clean so you don't mess it up.

Armed with a few drop cloths and the near future terrain I prepared my spray room and set everything up. In order to feed paint through and airbrush you have to thin it down. I chose rubbing alchohol as it dries fast and doesn't mess with the colors to badly. (Note: old thick paint will not thin down no matter how much you thin it. The chunks will clog the nozzle and force you to take everything apart and clean before you can spray again.)

So after cleaning the chunks out of my nozzle and a trip to the store to buy fresh paint and empty flip top bottles, I was ready to paint. I used the house brand of Michaels craft paint which is pretty thin to start with. Mixing it 50/50 with rubbing alchohol yeild me with a thin paint that sprayed without splattering. 

Don't Fence Me In ... Near Future Progress

Terrain – Plugging away at my near future board I began work on the truck depot/shipping yard. I love containers as them make easily transportable terrain that can realistically be arranged in a variety of layouts to create interesting battlefields. They also provide a plausable area to be fighting over, i.e. this thing we all want is in one of these cargo containers. 

Other than the containers the only major element for the section of the yard I want to build is a chainlink fence. I've seen this done several different ways, some use granny grate, onion bags, screen material, or toule. Each method has its own merit but for my purposes I think granny grate is going to work the best for my purposes. 

They make granny grate in several sizes, I like to used the smaller grate as deck material or industrial walkways, the larger size looks better for fencing.

I started with a balsa wood frame work and built the sections to be 6"-8" long I feel making them this way I'll be able to rearrange the fencing to accommodate various scenarios and layouts. One of the things I've learned over the years is that flexibility is the way to go. Spending hours on a large fixed terrain piece can yield some stunning results however when it's all said and done that larger fixed terrain piece becomes a hindrance as it will only fit in some  areas and will have a major impact on whatever game it is featured in. (Or on the flip side it will be avoided in any game it's featured in because it's difficult to navigate or any number of other reasons.)

In addition to the straight fence sections I will need to add a gate at some point as well, and with the gate I'll need some type of guard shack/check point. Right now I'm going to avoid that as I can set up this layout so only a portion of the dockyard/shipping depot is featured on the board.

If You Build It ... More Progress Near Future Board

Terrain – I was able to get more work done on the Near Future board. I added more exterior details the the club and put a coat of primer on the exterior. When building a project like this I like to brush on a coat of primer to verify how things are going to look and see if I need to sand or fill any gaps. With the variety of colors and materials I'm using inevitably there will be some rough spots that need further attention. Luckily there weren't to many with this piece so I'll be able to fix them quickly and move on to blocking in the basic paint colors.

Also on my table recently was the apartment/office building. I was able to add more geometric shapes to the exterior and give it some interesting details. The interior received some additional attention as well with the addition of interior walls and doors. I haven't decided on how I want to furnish this yet and in an effort to getting the table into a playable state as quickly as possible I'm going to hold off on furnishings until the exteriors are all done.

For the roof I added and access door and a billboard. I think this gives some interesting areas of cover on the rooftop as well as some additional character to the building. I probably need to add some HVAC units to the rooftop as well but I'm not sure I want to add that much clutter to the rooftop yet. The next step is brush on some primer an see how the overall building looks before I do anymore work.

After a few test runs I realized I probably need to add more access doors to the building. I'm on the fence about doing it as I want the buildings to pose a tactical challenge rather than just be a protective tunnel to avoid what's going on in the street. Most likely I'm going to concede to functionality as the point of a cool terrain set is to have fun interactive games. (This is why it's a good idea to test drive terrain before you finish it.)

While this project is taking me longer than I anticipated I'm really happy with how it it progressing. My goal is to produce enough pieces to populate a 3'x3' board before creating additional elements to eventually fill a full 4'x6' table. I've always wanted to have a realistic looking set of city terrain and this project is seeing that dream come to fruition. 

I'm glad to have found some games that work well with functional buildings instead of the generic war-torn wasteland that has been my MO for urban terrain in the past. Also as is usually the case by building some interesting terrain, my gaming group is more likely to adopt new systems and try new things. This terrain set should be functional for MERCS, Judge Dredd and Relic Knights (when it comes out).


Practice Makes Perfect - Judge Dredd Dry Run

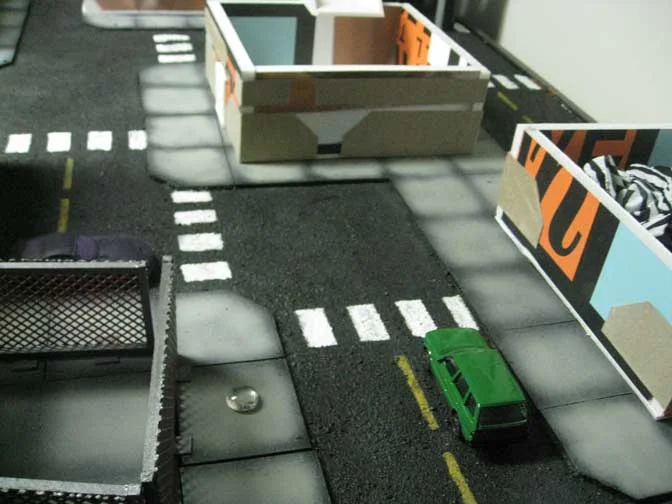
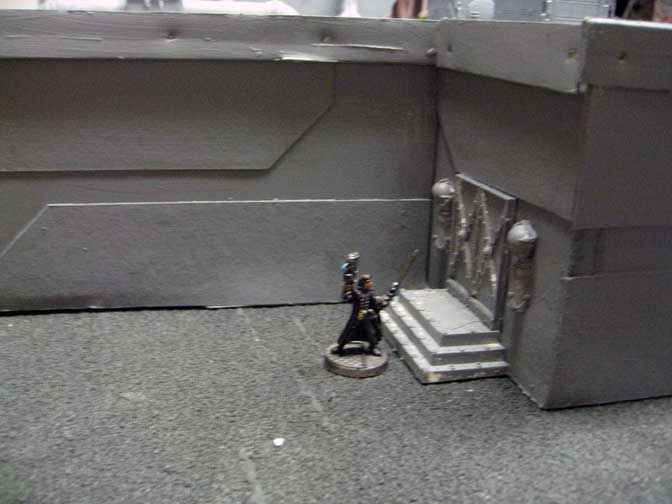
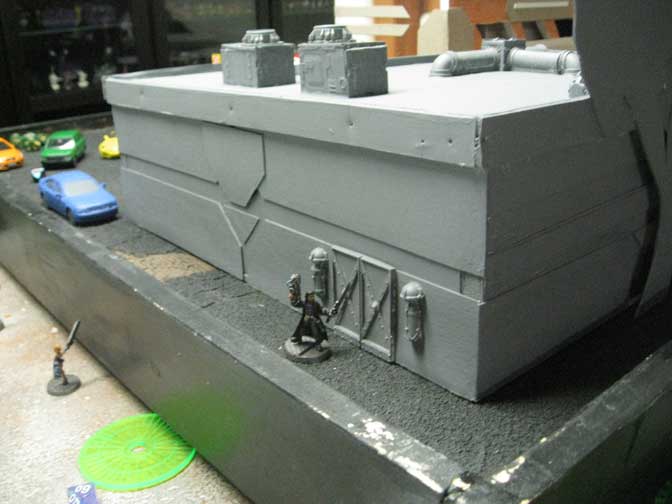
Judge Dredd – Before I went any further with my near future board I wanted to get a dry run of Judge Dredd in to make sure that it was going to be functional for the campaign my group is starting shortly. My big concerns were about the size of the buildings and how functional the removable roofs would be. I also was slightly concerned about my limited amount of scatter terrain on the board. 

We're going to be running the campaign as multiplayer games rather than one-on-one so that added another level of concern to the functionality. Typically multiplayer tends to bend these types of systems to the breaking point however that's the way my group likes to play so we deal with and house rule anything that breaks the system.

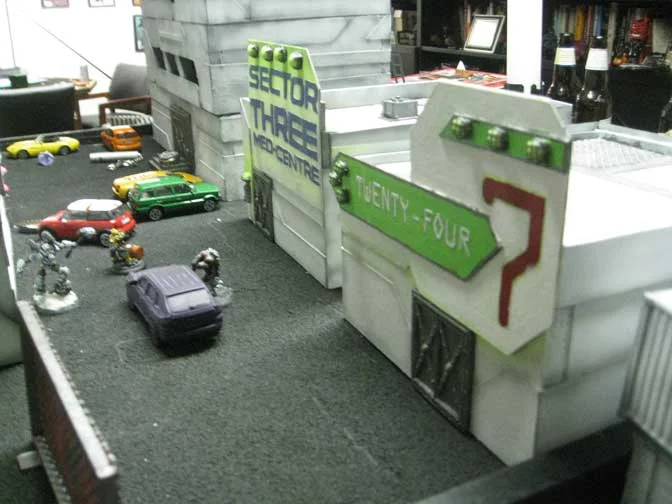
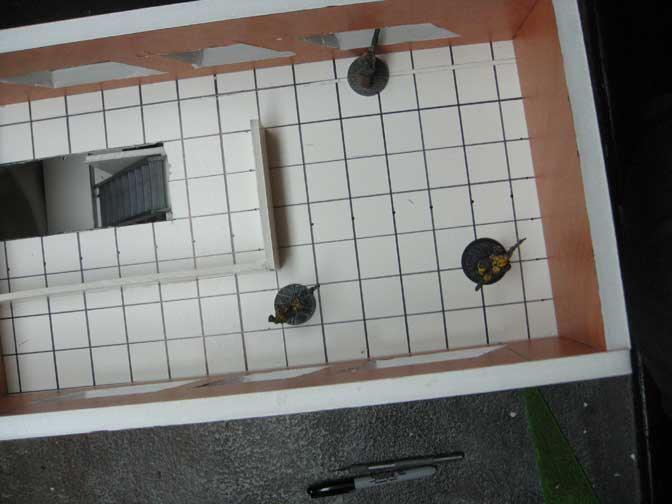
We set up a three player game with each force clocking in at 500 credits. The forces included the Justice Department, Ape Gang (proxied), and a Lone Vigilante (MERCs Proxie). To test out the game we chose to just play last man standing and collect points for what you took out. Set up had two players in adjacent corners with the third in the center of the opposite side of the table (using a 3'x3'). 

The game progressed quickly with the Judges arresting a chimp early on, and then spending the rest of the game trying to keep up as the Apes converged on the apartment building where the lone vigalante was holed up. Ultimately the Apes won out with a single chimp facing off against the last judge standing, laser guns are no joke as they bypass most armour.

After the game I realized that I was referencing an older version of the pdf I had printed out and my other players had a newer version, slightly annoying as the newer version of the rules could have provided a different outcome but ultimately not a big deal for a trial run.

The system is fairly simple once you get the hang of it. Every model has 2 actions they can do each turn these can be movement, shooting, melee or special actions. You activate each model in your force and once they've all gone your opponent activates all their models. 

Moving is the same as any other system you move up to your move stat. Average movement seems to start around 5" which can be increased on heroes when they level up.

Shooting is an opposed D10 roll where the shooter adds their shooting score and the target adds their agility, if the shooter is higher they hit. The target then takes an armor check rolling a D10 and adding their armor bonus subtracting the AP of the weapon if the result is 10 or greater they suffer no damage. If the score is less then ten they suffer damage equal to the damage stat of the weapon. 

Melee is slightly different; it includes a move and then both models role their melee dice and add their melee bonus whoever scores the highest wins the combat. For every die that is higher than their opponents highest die they score a hit. Armor checks are the same as shooting. If a model is armed with a weapon that can parry you can force your opponent to re-roll a single dice. (which in our case changed the results of several close combat fights)

Special actions are all the things that add flavor to the game. They include attempting arrests, psi powers, hiding, jumping, alert status (overwatch essentially) etc. The offensive actions require opposed tests similar to shooting for the most part willpower vs. willpower. The other special actions are a catch all for anything else you want to do in the game, they also cover the needs of special scenarios and interacting with terrain.

After the battle you roll for your models that were taken out to see if they survived, were maimed etc. This includes charts for heroes and a simple 4+ roll for minions. The latest update to Block Wars includes a chart for models arrested while laying in a campaign.

Then depending on which campaign mode you're using you gain credits, the system in the core book gives each force a percentage increase for each battle. The Block Wars supplement introduces a territory system similar to Necromunda. After you cash in you can buy new recruits or better equipment. 

I feel like the dry run went well, however as with any game that has the rules online as pdfs you have to keep up with the updates unless your group agrees to just use what ever you've printed out. The bonus with it being a free pdf is that Mongoose is actively making revisions to improve the game play experience and adding additional forces to the supplement as they create them. 


Deluxe Apartment in the Sky ... Near Future Progress

Terrain – I'm trying to spread my time on this project so I can keep the various structures in the same state of completion. With previous projects I've been gung ho and plowed through until completion, which resulted in some less the optimal terrain pieces for actual game play. (Notably the Qi & Gong and Ressurectionist Lab, both have some spots that are hard to navigate during the game notably because of fat finger syndrome)

For this board I'm trying to get each piece to a semi finished state to play some test games before I move into painting. Because something that looks cool and fits the models doesn't necessarily mean it will be a fun piece of terrain to play games on. 

My major concerns with the apartment building lie with models moving around inside. While it was easy enough to build the floors to be stackable and removable, I'm not sure how much scatter terrain is needed inside the building. Sure it will look cool to have it fully furnished, but will it hinder gameplay?

One of the issues I have with all the laser cut MDF buildings that have popped up in the market as of late is the last of interior details. If this is an apartment complex, how do you get to the second floor? Catwalks on the exterior of the building are pretty inefficient and unlikely, unless the buildings are scavenged together from junk. Sure it makes for decent cover and what not, but then so does just building a bunch of random shapes like a paintball field. Not exactly realistic (in a game with alien soldiers wielding chainsaws and laser guns realism is key ... right?) which for some reason bugs the hell out of me.

To attempt to solve this I build a stairwell within the apartment building. It took a bit of trial and error but eventually I found a location that would be easy to move standard human size models up and down as well as be able to replicate the firefights that happen in said stairwells all the time in movies.

In the year 2000 ... Building a Near Future Board

Terrain – I've begun the groundwork for my near future board. After doing a few sketches and looking at the large amount of laser cut terrain available in the market today I decided to pull some inspiration from these designs. While I really like the look of the laser cut mdf I can't justify the cost when I can build eactly what i want myself. Sure it might be easier to just buy and glue together a kit (probably will go that route in the future...) but I'd like to build everything from scratch for this board.

After laying out some paper shapes on my Zuzzy mat I got a rough idea of what type of layout I wanted to create. My thought is to create a slum/industrial area and I drove around Detroit for some inspiration. In many seedier neighborhoods you have truck depots/shipping yards that but up against residential areas and also feature some of the less desirable businesses. For my purposes this is going to be the ideal battleground. The structures I have planned are a three-story apartment building, liquor store, gentleman's club and a fenced in shipping yard; combined with the variety of 1:43 scale cars I've found I'll be able to detail out the neighborhood easily.

The first step was determining a size for my buildings as there are several different systems I plan on using this board for it was important to make sure the scale made sense for everything. In MERCS the movement cards are about 3.5" long, so I used that as my basis for the height of a standard wall, this way it's easy to determine how many MP it takes for a model to ascend a level. Most other systems have 4"-6" as a standard move so this size will work with them as well.

I happen to have a bunch of 1/2" gator board that I saved from a dumpster (technically) which I decided to used as the basis for my walls. The nice thing about gator board is it has a styrene skin which holds up better than paper. This board is very dense and provides a sturdy foundation for the walls, especially when cut down to small sections like these buildings. It is however difficult to cut as the plastic skin is so durable it will take a few passes with the blade before you get to the foam.

After messing around with a few designs I came up with a look I like for the apartment building and have begun cutting out the windows and cutting cardstock to detail the exterior of the building. I'm going to give the impression of concrete formed material with some geometric patterns. I think this will look futuristic enough without going over the top.

I also cut out the walls for the club. I went with an "L" shape that can break up the table in some interesting ways. My plan is to fully detail out the interiors of these buildings and add removable roofs so you can easily enter and exit them.

Next steps are to continue detailing the building exteriors and devise a method for stacking them that won't be to difficult to remove during game play.