Rep your Guild

Rep your Guild

Magic the Gathering – Using the freezer paper method I made a T-shirt to rep the three Ravinica Guilds that I like the most. Orzhov, Dimir and Azorius cover the color pairings that typically like to play and by doing them in purple and grey it matches the coloring of the sleeves in my cube. Really, I just wanted something to wear when I play commander and my favorite deck of the moment is Black, White and Blue with Oloros at the helm.

Read More

Life on My Finger

Review – CritSuccess finally delivered the Life Counter ring that was part of their Dice Rings by Aarron Kickstarter. I have to say it was worth the wait. The ring is a chunky double band with a wave washer in the middle so you can click the dial to the correct numeral. The construction is similar to the standard dice rings they produce so the quality is very nice. It does take a little while to get used to the rings as the edge is straight and not a rounded comfort band like my wedding ring. This aside they do wear nicely and work as promised.

I'm looking forward to getting some games of EDH in soon so I can use the ring to track my life. Although with my current Orlos deck I might be breaking 100 life fairly quickly so I'll have to come up with a way to track that as the ring will only go up to 99. 

While wearing it around I realized that the ring is also useful for tracking other things such as using it as a turn counter during tabletop games, or a wound counter for a multi-wound model. The possibilities are quite numerous and having it always available on your finger makes it very handy.

Gamer Gear - Showing Your Colors

Random – A while back I did a few custom jerseys, at that time i had ordered a few for myself that I never got around to to designing the final look and feel. In an effort to tie up loose ends I finally had a chance to revisit the project.

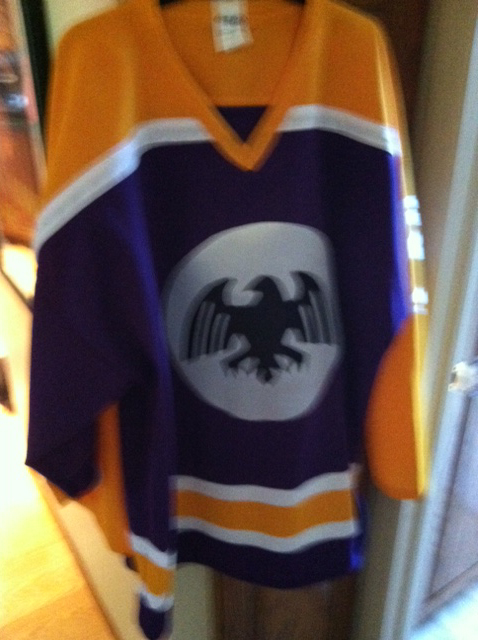
I had ordered a throw back black LA Kings jersey, this is the one with the bright yellow, white a purple scheme. It just so happens that the colors match up with my Twilight Ravens Space Marines perfectly. Part of my problem was the chest on this jersey is so large that the standard embroidery hoop wouldn't be able to handle the stitching. So I let the project sit on the back burner until I could come up with a better solution.

Recently I found some heat bond in a box of fabric while cleaning out the basement and realized this would be the perfect solution for my oversized logo needs. Heatbond in a glue that comes on a roll. You iron it on to the back of a piece of fabric and then once it cools pull off the carrier sheet and it leaves the glue attached to the fabric. You can then cut your design out of the fabric and iron it down to create a permanent bond.

After some experimenting I settled on doing my raven logo on a white shield for the front of the jersey with the Astartes Numeral Three on the back and sleeves. I primarily run my marine lists using my third company so I figured I'd represent with the jersey. 

With the extra fabric I had on hand I also cut out the logo to put on a plain gray hoodie. Honestly having unique gear to wear while your playing adds a bit to the overall experience.

While the heat bond is a permanent solution I really wanted to have the appliques finished with a satin stitch around the edges. Luckily my mother is a skilled freehand quilter and offered to do the stitching for me once I explained my conundrum. 

I'm happy with the way these turned out and am eager to play some 40K with my new gear.

Art's and Crafts ... Logo designs

Recently I spent some time with my daughter teaching her how to make her own "silk-screened" t-shirts. This is a fun project which can be adapted to some tabletop applications; so I figured I'd share the technique.

Screen printing is a technique that can reproduce a design quickly and easily. Typically it is reserved for commercial applications. A while back Jo Anne's and Michael's sold a machine called a Yudu that was supposed to offer a easy low cost way to do silk screens at home. Unfortunately the cost of the materials for the machine was pretty ridiculous compared to buying you own supplies from an art store so it failed and was discontinued. 

This is a bit of a bummer as a family member had one that I used to make shirts for promoting this site. If you needed to make a couple dozen shirts it worked great.

Anyway, my daughter wanted to have a few shirts with logos printed on them and paying $20 a shirt from Hot Topic for something that wasn't exactly what she wanted was out of the question. So dad decided to share a trick with her that I used to use in art school.

For this project you'll need:

• Freezer Paper

• Hobby Knife and fresh blades

• Foam Brush

• Iron (preferable not your wife's expensive fancy one)

• Acrylic Paint

• The thing you want to print on 

Freezer paper is available at any grocery store it comes on a big roll for a few dollars. Essentially it's a heavy wax paper that is used when freezing meat. 

Step one is to print out (or draw) your design. Solid one color designs work best until you get more skilled. 

Step two is to tape the design to a piece of freezer paper slightly larger than the design you want to print.

Step three carefully cut out your design. Remember the parts that you want to have color need to be removed.

Step four iron down the negative version of the design. Be sure to not use steam you want the wax to stick to the shirt.

Step five use a foam brush to gently apply paint. Your want a thin even layer if it gets to heavy the design will crack when washed. (Alternatively you can use a credit card to squeegee the paint across the design, this is tricky and if you didn't create a good seal the paint will bleed.)

Step six carefully remove the freezer paper, this is easier to do when the paint is still tacky.

That's it six easy steps to create a unique design. This would work well on canvas army bags or anything else you might need to brand with your faction logos.


Diceless Dice? You gotta have these.

Ok so this Kickstarter thing is pretty crazy. I'm a little bummed about the timing of some of these bigger ones and the wait from kick to product in hand is agonizing. 

That said I came across this little gem. That's right never again will you be caught without dice. Just slip them on and you're good to go. I think having the D6 one with pips would be a classy way to proclaim your gamer pride but the life counter one seems like a must have for MTG players.

I can't wait to come across a 40k player with 20+ rings on their hand trying to spin for rapid fire.

Jersey Sure

Malifaux – So I finally finished up the Neverborn Hockey Jersey I was working on. Figuring out the front logo was a bit more difficult than I anticipated as just embroidering it to the front of the jersey wouldn't give the look I wanted. The jersey looks really great and I'm pretty happy with the results.

As a follow up to this I just wanted to direct people to another post which detailed the process of making the jeresey. This was a custom job and I have no intention of mass producing these, however I'm always on the look out for new and interesting projects so if you're looking for something special please just use the email me link to contact me directly to discuss the project. 

Some of the other projects I've done are motorcycle style patches for a gaming club, custom dice bags, award patches, jerseys and other random things.

Product Review – Chessex Custom Dice

It's no secret I'm a huge fanboy. I love stuff that fits with my faction of choice in games, be it buttons, dice, shirts or pins. Unfortunately it's not easy to come by this stuff for every faction or game system. 

I've used Chessex Custom Dice for several projects and have always been happy with the results. The process is fairly inexpensive and really easy. All you have to do is send them a jpg or eps file of the logo or design you want and they can engrave it on the dice. The catch is the logo has to be one color, as it's not a photographic process.

Also it seems like logos that are more solid show up better than things that are outlined. Important to keep in mind as a few of my friends have ordered dice that just have thin outlines and they're pretty hard to read. 

There is a limited selection of colors but for the most part you can find something to fit your needs. I've used them to create six-sided dice for my 40K army and have found they seem to roll better. Of course when using rending lightening claws it's always great to see a bunch of ravens show up. 

I recently found out that they can also customize ten-sided dice. Having recently got into MERCS I have been looking for dice to match the color scheme of my chosen factions. After doing some research I found that ordering a set of ten customized dice isn't really that much more that buying a good set in an odd color. 

Overall I'm really happy with how they turned out. And having something cool and different that no one else has is well worth the $15 a set they cost. I highly recommend the custom dice service as they have the best quality and price of any manufacturer that I've looked at.

Extreme Gameroom Makeover (part 4)

The end is nigh! Just about finished with the gameroom makeover. The cabinets are up. The miniature display cases need glass shelves and lights but look way better than the old cases.

Next up is to find a reasonably priced loveseat and ottoman. Since the gameroom will double as an entertainment room, we've kept added a small microwave for popcorn and what-not.

Finally the sofa and coffee table/game table were delivered and I can call this project finished. The first sofa we chose wouldn't fit down the stairs, so after looking around a bit we found a sofa that comes apart. It's pretty cool as it's essentially three chairs connected by a rail system so getting it down to the basement was a snap. The coffee table we chose has a button you push that lifts it up to standard table height and has 4 wedge shaped stools that also have storage. I think this will wind up replacing my card table for most board game nights.

Extreme Gameroom Makeover (part 3)

The flooring is just about done. I'm really surprised at how easy it was to install. We went with Trafficmaster Allure in cherry for the floors. It's a relatively inexpensive product that is readily available at Home Depot Stores. I looked at other options but considering it was to be installed in a basement game room this made the most sense. 

Installation was easy, just clean the floors and start laying down the plank. Each piece has a sticky strip that grips to the next. Going around polls or weird angle was a huge pain in the ass but otherwise it was smooth sailing. If I could have cleared the entire basement out and bought enough product, I could have done the entire room in a few hours.

Next up is the shelving and entertainment consoles. I went to Ikea to pick up the TV stand and bookshelves, of course its going to take several trips as my little car can only hold so many giant boxes.

Short rant, I really hate when stores are set up to trap you in there. If you go to Ikea to buy something and don't print directions from the website, you have to search the showroom to find the items you need and then travel to the storage area to locate the product. I find that to be really annoying. The other thing that bugs me about the store is the graphic design. On numerous occasions I've heard it said, "Ooh Ikea has such sophisticated design it's so clean." That's a load of crap the design is simple because it's cheap, they used the same look and feel for every item in the store. Rather than have words in the instructions it's all images, I'm sure it's because they don't want to pay for translation. In short, the design keeps the cost down and looks consistent but it's not really customer friendly. Rant over.

Using the crappy instructions I struggled through and built the TV stand. Only had to take it apart twice ... guess you get what you pay for. It looks nicer and has better construction that similar items you'd find at a discount chain (k-mart, meijer) but it still is just particle board with a laminate finish. It works for a basement or apartment, but if you own a house and are decorating regular living spaces I'd spend the extra on real wood furniture.

Team Seamus

Adding to my ever expanding wardrobe of gaming gear is a football jersey. Every few years I create a new jersey for my fantasy football league. In the past I've had a Cryx Jersey and Black Legion Jersey made. In honor of my current gaming addiction I've had a Resurrectionist Jersey made. 

The font is an outlined version of "Blood Crow" which doesn't seamlessly translate to applique very well. I really like how it turned out and it's a nice change from my standard black. It's tricky ordering blank jerseys from uniform suppliers because the ones that are meant to be actual uniforms don't really fit well without pads and they tend to have a large steel-mesh grid rather than the standard dazzle material. Which means if you get that you'll need a t-shirt under it.

In other news I'll be starting a big project after I wrap up the game room renovation. It's inspired by this project. So I'll be posting step by steps once I begin.