Baseline ... Knowing where to start

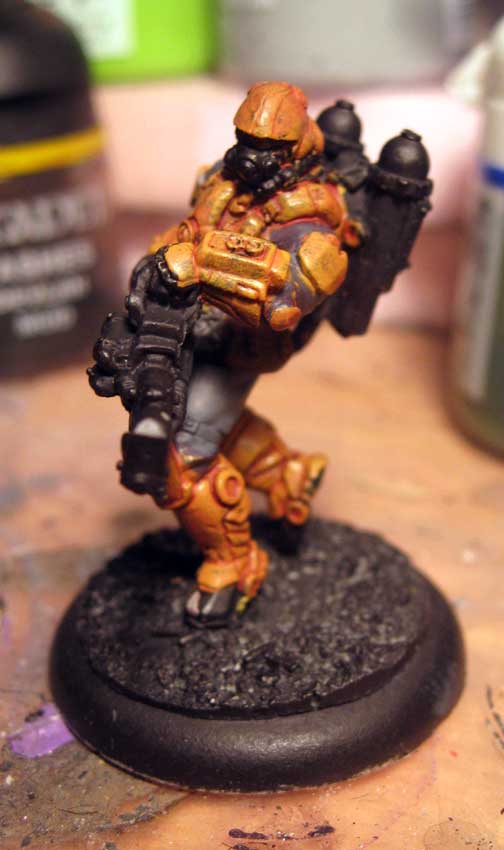
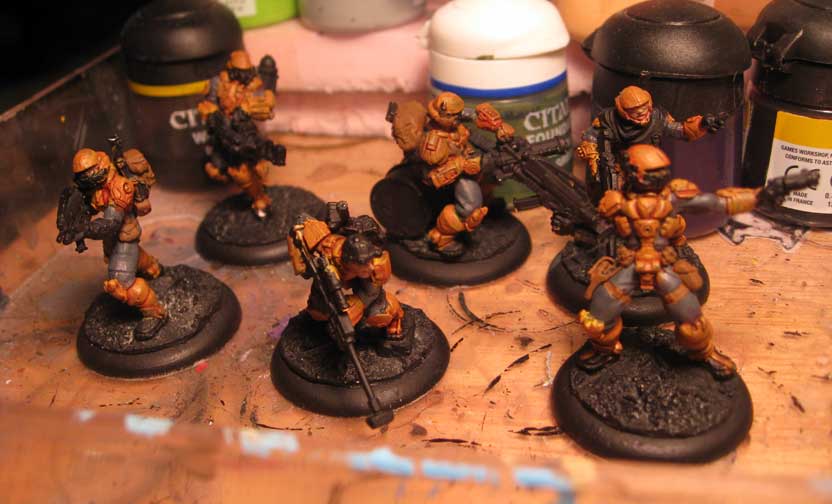
Warhammer 40,000 – I've been working on my Space Marine army off and on since 2005. In that time I've continued to build and base coat models for this project without actually finishing anything. I've finished lots of other projects but this pet project is the one that I can never just finish. I think it's probably a subconscious thing as I've told myself this is going to be my go to 40K army (also I set my goal at finishing a company, eventually an entire chapter ... maybe). I'll have my Slaaneshi Daemons as a backup but this is going to be the one army that I will hold onto and use going forward. Which means is I ever finish it I won't have things to build for 40K, silly as it is since new stuff comes out constantly for marines which means I'll always be adding something I think that might be what holds me back.

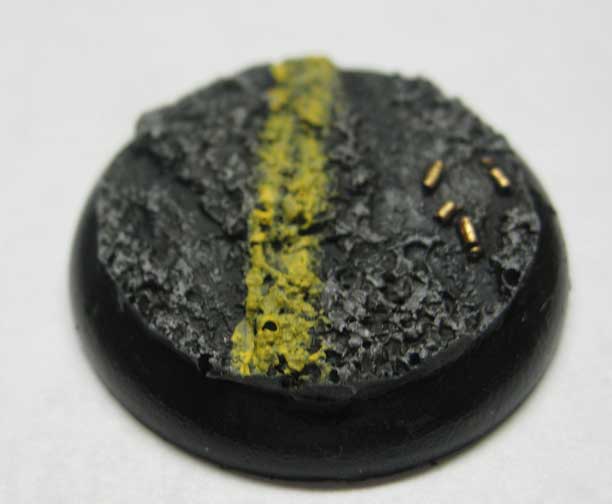
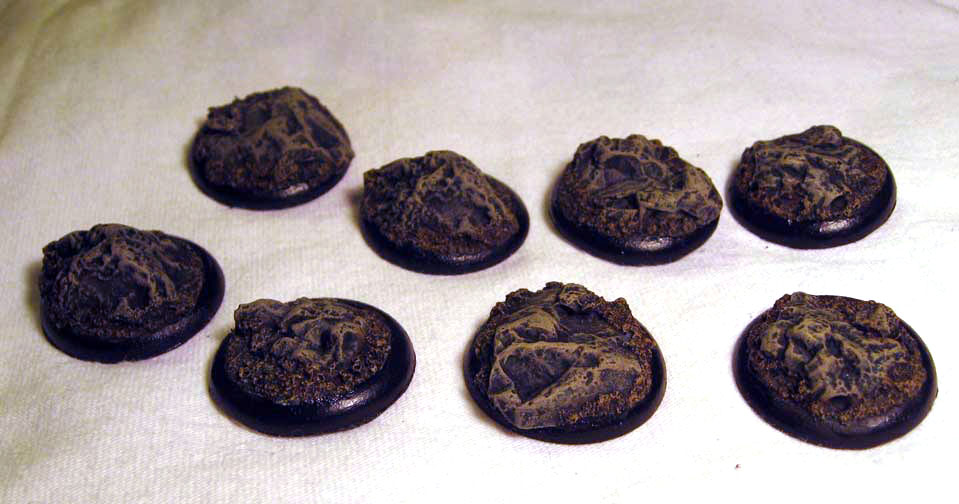
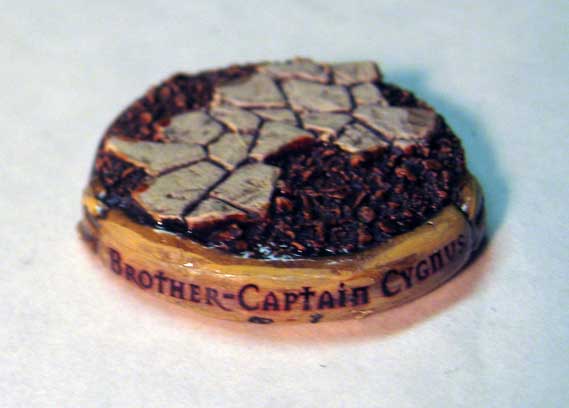
Anyway the point is to finish this project I need to know where to start. I've tried a few different goals, doing a unit at a time, building a core list etc. None of these have kept me on track, so what's my baseline? Bases of course! When I decided to do a company I went and made little name decals for every marine in my army, these will fit on the little scroll I sculpted on the front of each base. [Interesting fact: the name of each battle brother in my force is based on the genus or species of a bird.] 

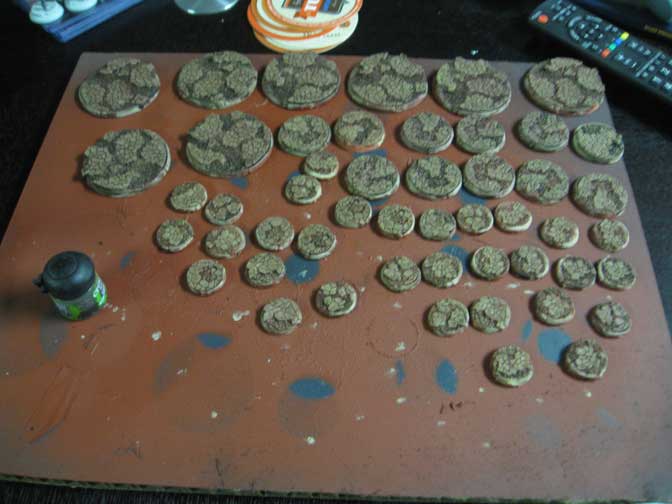
My thought is if I finish painting all the bases and put the names on them I'll be motivated to finish up the squads so I can pin them to their final base and seal them with matte varnish. I started the tedious process of painting the bases and realized that I ran out of chestnut ink. Given this army has been in progress for almost a decade I've run into the issue of paints and inks being discontinued. Unfortunately there's not a good GW replacement for Chestnut ink, none of my local stores carry Reaper paints so I had to go to their website and order them direct. This time I'm stocking up with enough to finish the project (just in case).


Hell Yeah!

Helldorado – The english rulebook is finally available for pre-order. Looking forward to picking this up as the quick start rules seem geared more towards someone who has played the game before. I really like the setting and the models and can't wait to see what the full ruleset is like.

I've made a bit of progress with my skull piles and bone walls. Simply priming them brown and a quick two color drybrush got them to an acceptable level. I think I need to wash them and paint some highlights on to bring it up to a standard to match the rest of the board however.

Magnets ... how the f@!# do they work?

Malifaux – Recently I began work on a new commission. The customer wanted modular magnetic bases, that could swap models from 40mm bases to 50mm and a set to swap 30mm models to 40mm. The idea being only having to assemble and paint one set of coryphee and two sets of spiders. The desire is for an industrial feel appropriate for the setting.

To begin I sorted through some potential components that would serve the purpose. I settled on industrial grating with field stone. The general feel is similar to some other sets of gothic/technology bases I've seen. After measuring and being sure the models could attach to a removable element of the base, I began construction. 

For the Coryphee I created a platform for the crouching one to stand on and a half globe for the pirouetting one to attache to. The half globe fits into a vent fan nicely. One of my goals for this project was to create bases that could be fully painted without the elements attached and still look good. 

The spiders were going to be an issue. I had to find and element that was sturdy enough to mount them to without them ripping off the base. After looking through my bits I remembered the Hirst Arts pipes. These are chunky enough to fit a magnet and sturdy enough to give plenty of mounting points. 

After completing the base work I began experimenting with magnets. I didn't want to just sink the magnets into the bases, as from past experience they do come lose over time. So I made a quick mold of the base and half filled it with resin. Than I put the magnet in and filled the mold. After a few tries I found the correct depth needed for the magnet to maintain attraction. Next I made a quick mold of the elements and repeated the process. TIP: Mark your magnets with a north and south side before you begin. I didn't do this with my first test and the pieces repelled instead of attracting. While my wife found this hilarious, it's a pain to try and figure out after the fact.


Busy like a YellowJacket

MERCS – I've had some time to work on my second MERCS crew. To me the  CCC are more or less the generic "hero" faction in the game. They're really solid all around and seem to be more forgiving tactically than the other factions. I picked them up at the same time as my KemVar with a special deal on the MERCS site.

I've found that anytime you want to get your playgroup into a new game you have to pick up at least two of the factions. If you don't odds are you're not going to have anybody to play with, unless the game turns out to be a surprise hit that takes off (or has a long standing following). 

I decided to paint my CCC in a scheme close to what it pictured in the book. This is partially because I've always wanted to do a yellow "army", and partially because I really like having "official" schemes with a game that is just starting to gain a following. 

To begin I assembled and cleaned up all the models. The MERCS miniatures don't have terrible mold lines like some models but with this group I did come across quite of bit of flash. Mostly it seems to be from channels on the thinner bits. I than pinned the models to my "Imported from Detroit" base set. Given the home base of the CCC an urban base set seemed to be the best choice. After the glue dried I primed them using Duplacolor Black Primer. I've really grown found of this primer as it comes in several colors and goes on smooth, I've also never had an issue with it fuzzing up.

To block in the color I use Adeptus Battle Gray and Iyanden Darksun foundation paints. I really like the coverage these provide. They do require some thinning as out of the pot I find them to be far to thick. I then used Baal red as a wash on the yellow to bring out the detail. From here it's just a matter of picking out all the details and working up the highlights.

To create the Asphalt on the bases I used a dark gray, dry brushed with a light gray and washed with two coats of black wash. The shells were picked put with copper, washed with Devlan Mud and highlighted with gold. If you'd like to pick up your own set of these bases they're available in the online store.

It's so clear now...

I've begun experimenting with Crystal Clear casting resin. I was inspired by my friend Dave's (nerdelemental) current ice pillar project and decided to work on something similar. Dave was experimenting with using Envirotex Light to make casts which turned out really cool.

Snatching up his idea I visited the local plastics/SFX supplier to see if there was a material that might work better. They suggested trying Smooth-ons crystal clear series. To be honest looking at the giant red sticker on the box warning about toxic fumes I was a little nervous. The salesperson assured me it wasn't as difficult to work with as it seems, so I picked up a trial size to test out.

According to the box it's best when the material is less than 3" thick. My mold for Ice Pillars is pushing the limit but I figured why not try it out. Worst case I ruin my mold and have to make another one. At the same time I go out the mold I created for my rock bases to see what type of effect I could get.

Mixing isn't quite one to one so it's recommended to use a scale. Also it's important to gently stir the product to prevent bubbles. According to the instructions it takes 16 hours to cure. I found I could pop them out after 10 hours but they are a bit tacky. Lesson learned: put the bases on wax paper or some other nonstick surface the yellow bits are from a cardboard box I set them on ... doh!

The end result is pretty cool and I think I might offer them up on the online store once I work out the kinks in casting. 

Now Available – Rock Bases

I'm proud to introduce the next set in my line of round lipped bases, creatively titled

Rock Bases. These are great to represent a mountainous region or to add some height to a model. There are several variations in each size with bases available in 30mm, 40mm and 50mm. 

The realistic texture was created using actual rocks. Cast from a urethane resin they're much easier to pin models to than real rocks and much lighter.  

Welcome to the Cause

MERCS – I recently started assembling and painting my KemVar squad for MERCS. The Miniatures are really nice and easy to assemble. There are very few pieces to glue in place and the parts that do need to be glued are easy to pin. I'm not a huge fan of the dreadlock head as it seems out of place for the look of the rest of the troopers. Luckily the assault trooper comes with two heads, so it was a simple matter of swapping them.

I was amazed at how little flash and mold lines there were on the models I put together. The quality is impressive. My only real issue was a bent gun barrel on the sniper, but that was easily fixable. To base the models I'm using the Rock Bases I recently created. The background info on KemVar lists them as being based in South America, so I'm going to use the Rock Bases to create a jungle feel for them. Which also seems appropriate since they have Predator style stealth suits.

For color choice I chose to stick with something very similar to the scheme pictured in the book. I like the green and white as it stands out on the tabletop and will tie in with the base once it's finished. Since I used black primer I'm working with the GW Foundation paints for the base colors. They offer excellent coverage and a quick wash will get them tabletop ready fairly quickly. From there it will be a matter of painting the highlights and upping the overall quality of the models. 

The nice thing about the game is you only have six models per faction so it's easy to take the extra time to get them right and still get the models on the tabletop quickly. I'll be posting more photos as I progress. The CCC is next on the list as soon as I can finish my "Imported from Detroit" base set (asphault, tires and bullets shells).

Assembling Hell Dorado Starters

Helldorado – Over the weekend I was able to sit down and work on assembling three of the Hell Dorado starter boxes. While the miniatures are really great sculpts, the casting process is a bit weird. Their are odd channels which go to visible portions of the models, also some of the connections to the tab and the weapons are fairly large. What this means is lots of cutting and sanding before they are anywhere near ready to assemble. 

The models were fairly easy to pin (a necessity given the small joins) most of the arms have nice flat sections that match up easily and allow for easy drilling. 

Once I finished assembly I mounted the models to my new hell bases, and used some greenstuff to smooth the transition of the smoke and bubbles that some of the models have built into their bases.

Now Available – Twilight Emporium Bases

After shopping around for bases to use on my Hell Dorado miniatures, I gave up and decided to create my own. My problem was I wanted something with lots of skulls on the bases but I also wanted a rocky surface to mount the miniature to. It seems like most manufacturers make skull bases that consist of a bed of skulls.

After spending the weekend sculpting and crafting bases that would suit my purposes, I decided to make a mold and cast them myself. Now that I have a mold that will last for quite a while I'm going to start offering round lip base sets in my online store