How to Make a Monster ... Chaos Spawn

How to Make a Monster ... Chaos Spawn

Warhammer 40,000 – Chaos Spawn are one of the creepier units in the Chaos Marine army. One two many "gifts" or disappointing your patron can result in becoming a gibbering monster. Of course it also can be the fate of anyone who attracts the Ire of a sorcerer so its important to have a few around.

Read More

Going Berserk ... Night Lords Shock Troops

Going Berserk ... Night Lords Shock Troops

Warhammer 40,000 – Khorne Berserkers and excellent shock troops, if you can get them into combat they tear through infantry with ease. Which means they're an excellent addition to my Night Lords force. In order to force sweet leadership checks casualties need to occur, these guys will deliver.

Read More

Off the painting table - Speedy Salamanders

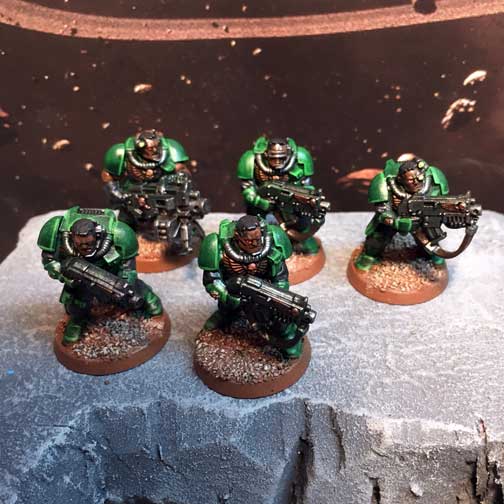
Warhammer 40,000 - Green is good. I find it really fun to paint models for my Salamandar client. He always seems to come across models from all different periods of the space marine range. Painting them at the same time I can really appreciate how far the Predator Kit has come from the hybrid metal plastic kit based on the original plastic rhino. I'm happy that the rivets on the tanks have been reduced and don't feel so clunky.

Also in this batch are several versions of the landspeeder kit. The metal plastic hybrid, a pure plastic older kit and the most recent variation of the kit (which is a dream to put together compared to the older kits).

With all five of these speeders I had to figure out a way to mount multimeltas to both the rail and on the hull. The meltas come from a variety of sources since unfortunately the current kit doesn't include two of each weapon option.

The scouts are a basic squad with bolters to act as a basic troop unit with a little bit of extra range.

Chemical Romance - Guild Ball Alchemists WIP

Chemical Romance - Guild Ball Alchemists WIP

Guild Ball – I put together an alchemist team for a client with some additional union players recently. Much like the Hunters Guild I did previously these models went together smoothly and look really good. For the paint scheme my client was concerned about having two teams that were primarily green. To solve the issue I'm using a medical looking pale green and copper as the general scheme. I think it's going to look pretty cool as the green color is similar to what happens to copper as it ages.

Read More

On the painting table ... Centurions

On the painting table ... Centurions

Warhammer 40,000 - It seems like I started these ages ago but they've sat on my shelf with the parts waiting for me to wrap them up. Well after playing two different 3,000 point games of Warhammer 40K recently I was a bit embarrassed to be fielding not only unpainted but unfinished models. I was pretty happy with how they worked out so I blocked out a section to time to glue the extra pipes and hoses onto them and get at least a basic coat on paint on them. 

Read More

Missing Hell's Belles - Making them work

Missing Hell's Belles - Making them work

Relic Knights – It sounds like all the Hell's Belles packages in the Relic Knights kickstarter were mispacked. This is a bit of a bummer and unfortunate that this game continues to be plagued with missteps on the distribution end. It sounds like Sodapop will be taking care of the missing parts issues once CMON finishing their obligation to ship the pledges to the backers.

Read More

Needs more Grav Cannon

Needs more Grav Cannon

Warhammer 40,000 – After playing in an apocalypse game I've decided I need to built the rest of the Centurions that I received for Christmas. I wasn't a huge fan of them at first but after seeing them strip hull points from a titan like they were a pair of pasties at the gentlemen's club. I need to have two units of them.

Read More

Centurions ... Make the most of them

Centurions ... Make the most of them

Warhammer 40K – As I continue my attempt to put together as much of the marine stuff I've had laying around as possible I began work on my Centurions. Like the rest of the world parts of the kit really bothered me. The whole weapons just strapped on the bottom of a giant powerfist (that's not really a powerfist) looks ridiculous.

Read More

Orange Fumes ... building again

Orange Fumes ... building again

Warhammer 40K – I had some time in the workshop to myself recently and I've been able to assemble some of the plastic kits that have been begging for attention. While this does somewhat go against my FINISH THEM initiative I feel that since they are for the same army getting them assembled will count towards that project.

Read More

One Man Wolf Pack ... Building Vigilantes

One Man Wolf Pack ... Building Vigilantes

Judge Dredd – As part of the preparation for our Judge Dredd Campaign I needed to build some Lone Vigilantes. Part of what makes the Dredd ruleset so attractive is it allows you to build anything you want. With open ended talents and a fairly generic weapon system your can create a hero to fill any niche. You want superman, you can make him (not quite as god-like but a dude that can fly, is super strong and shoot laser beams); Green Arrow – build a guy with lots of accuracy and arm him with a suction cup gun and proxy his bow using any number of guns; the skies the limit so long and you're fairly creative. The only major limitation I've come across is the need to take the Rich talent so you can spend the full 500 points on your initial character otherwise you start at a disadvantage and will need to hire mercenaries to fill in your handicap which might not suit the feel of character you're going for.

Read More

Special Salamander - Captain Pellas Mir'san

Warhammer 40,000 – A while back I painted up a Salamanders force for a friend. He's really liking the list he has but as of late has decided he wants to add some different force commanders. I let him look through my Badab War books and he really liked the two characters available to him in the book.

The first character is a special dreadnaught, Bray'arth Ashmantle. This beast of a commander is pretty cool and Forgeworld makes a model for it. 

The second Salamander character is Captain Pellas Mir'san, which currently does not have a model. When I first looked at this guy during 5th edition he seemed pretty mediocre, cool concept but he didn't really change the force to much. Looking at him in 6th edition with Challenges, his abilities get significantly better. Essentially he's a duelist armed with two power swords and a combi-flamer. If he's in base with and enemy character he can either gain the +1 attack or deny the enemy an attack. Pretty nifty.

To build him I rummaged around in my bitz box to find the correct parts. I had an extra captain from Assault on Black Reach that I thought would make a passible base for the conversion. Next up were two power swords, one that came with the captain model and another that I think was from the force commander box. Since his hands would be full with the swords I decided to build a predator style combi-flamer to mount over his shoulder. By attaching it to the backpack he looks similar to the tech marine models, which ties in with the Salamanders forge father look.

After a bit a clipping, sanding and welding the plastic together I have a pretty cool model to represent this character.

Paid in Full: Commissions - How much is your time worth?

Random – Lately the number of inquires I've recieved about commission work has dramatically increased. Many of these questions have been about how to determine a price when doing commission work. So in an effort to answer these questions for the larger population, here's the basic principles I use when putting together a quote.

1. How much is your time worth? When considering doing "craft" projects that you intend to sell to others the first thing you need to consider is how much is your time worth. For the most part you're not going to make $16-$30 an hour painting models or building terrain. Even when painting to a Golden Daemon or Crystal Brush winning level the amount of time you put in usually won't equate to "real job" money. Most gamer's won't pay more to have a model painted then it cost them to purchase so keep that in mind when putting together a price. Also remember if you have a wife and kids or girlfriend your hobby time is probably limited. When I started this site I was between jobs and had much more time to build and paint stuff. Now my time is limited so it's important I enjoy every project I take on and be as efficient as possible so I'm not working for pennies an hour during my free time.

2. What are your material costs and how do you recoup them? Paint, primer, glue, sand all cost money. Good paint brushes and glue cost more. While it can take a while to burn through a pot of paint, you have to consider the costs when figuring your price. One thing I've instituted is buying new pots for army scale projects and billing them as a line item. Once you're done with the project your can give the remainder to your client in case they need touch up or add models they don't need or want you to paint.

Terrain Projects can get tricky as sometimes you use found materials and other times you need to buy foam and other raw materials. Most of the time you're going to buy in bulk and have a bunch of stuff you need to store. If you have limited room you might need to invest in space to store that stuff. Right now I'm not quite at that point but it's getting close.

3. What are your customers expectations? This is a big one. Some customers just want a three color minimum. While other might ask for table top quality expecting to be able to enter them in a juried contest. Managing those expectations and delivering as promised is huge. I've heard many horror stories from painters about unreasonable clients that make requests well beyond what the initial request was and then want to pay less because the quality is what was expected. On the flip side I've also heard numerous stories of painters that send over a quick shot of the base coated model only to have the client "love it and want to know how quick it will ship." That second one is rare but important to remember as some clients dont' want you best work. They just want some color on the models. Knowing this you can save yourself a ton of time.

4. How are you going to get it to the client? Nobody considers shipping costs. One more then one occasion I've  had to deal with customers complaining about shipping, "DUDE the flat rate box is only $5, why does it cost $20 to ship to me in Antarctica? You're trying to RIP ME OFF!" You also see this all over several companies forums. The reality is shipping is expensive, foam and packing materials are expensive. Tracking and insuring packages is expensive. And even it you do everything right the post office, UPS or Fed Ex will inevitably screw up on a one-of-a-kind rare product. It happens, sending boxes across the country or world has risks. Most of the time it's not an issue but when it is will be the one time you didn't insure or track a package. C.Y.A. 

While the post office and FedEx provide free boxes the packing material is not free. Even cheap foam is a $1-$5 a yard minimum. If you're shipping painted models wrap them in foam and pack them well. Otherwise it's likely to be damaged during shipping. For an order of several models you can quickly burn through a large amount of foam and tape. So figure in the cost of shipping and add a few dollars to cover packing materials otherwise it will eat into your already tight bottom line.

5. Don't get burned. When painting models this isn't as big a deal as if you don't get paid keep the model and resell it. So long as it's nothing to obscure you should be able to get at least 40-50% of the retail cost, more if you're willing to wait. But terrain projects are another beast entirely. Custom terrain is hard to sell once its built. Particularly if it's custom to specific client. After getting burned a few times I put forth a 50% nonrefundable deposit. That way if I have to go buy a bunch of supplies for a project I'm not going to be out of pocket if the client changes their mind or "is broke this month bro."

6. Be transparent. Have examples of your work and the various levels of quality and pricing tiers available. Put them out there for the work to see. Eventually people will start to connect with your work and ask about pricing. For example for a table top quality miniature from a skirmish game I typical charge by model size: 30mm - $8-$12; 40mm - $10-$15; 50mm - $15-$30. This gives a good starting point. But for an army level game it's unlikely you'll get that much per model. At this point most people want a "lower table top quality" which falls more in line with the 25mm- $2-$3, and goes up from there.

For terrain projects it helps to come up with some designs you can quickly replicate and make a bunch of them at once. Assembly lines are good for managing time and if you make something that can be used for several systems you diversify your client base. For example the swamps I sell in the online store I typically make 6-10 of them at a time. Since they use water effects it's better to mix a larger pot of it and pour all at once than to make small pot and have a bunch of waste. Having an existing stock also lets you focus on other projects and have a reference point for custom orders.

Being consistent helps you to manage your time and be able to quickly quote a price to a potential customer. I hope this answers any questions for aspiring painters and potential clients.


Grime Darkness – 40K on the horizon?

Warhammer 40,000 – Having dodged the bullet and sold off my Chaos Marine stuff prior to temptation seducing me into buying giant metal dragons and deformed gun beasts, I didn't expect to be playing 40K anytime soon. I still have my Space Marine army and Slaanesh Daemons that are still in need of some painting love. With the marines I have enough units completed to field a fully painted list, not necessarily the units I want to run but a functional army non-the-less. 

Recently my good friend called me up out of the blue and asked how much to paint a Space Marine army. I was pretty shocked by the request as he had sworn off any army scale mini games a while back and has stuck by it. Then I remembered he had picked up a Marine force for the Badab campaign I tried running after Forge World released the campaign books. Initially he had planned on painting them himself as Salamanders and during the process he remembered he hates painting.

As such I now have several custom built drop pods, and a unit of ten terminators on my painting table. Since paying customers always come first some of my projects are going to be taking a back seat while I finish this up for him. Luckily he just wants a tabletop standard finish so I won't be slaving away at these for long. (He's also happy with how he assembled them so I won't be cleaning any mold lines or assembling anything, since he wants this on the cheap.)

I'm pretty sure once he has his force painted up he's going to want to play some games. And while I'm in the grime dark mindset I might need to finish up some of my own units. Storm Raven I'm looking at you ... (as well as considering a Storm Talon ... sigh)

On the painting table ...

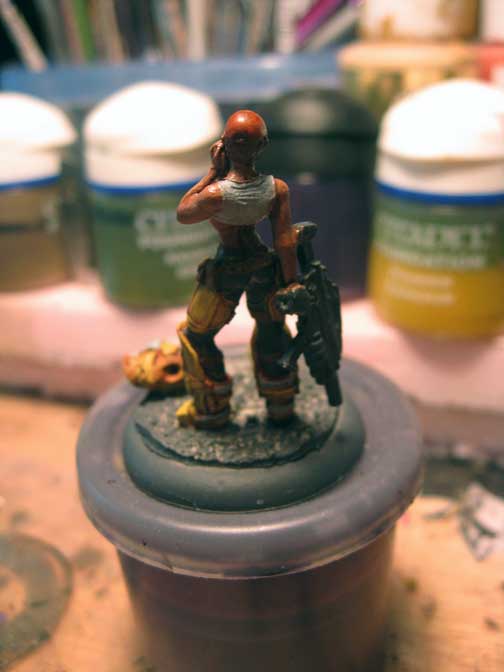
Malifaux – After trying a few games with a single Dead Doxy I decided they would work better as a pair. Currently I have the Dead Justice as one and I've "converted" Collete to act as my second Doxy. 

To "convert" the Collete I didn't really want to do much as I really like the model. So I did a few minor alterations to the model, I drilled a bullet hole in her back with a pin vice and added a nasty gouge on her leg. Minor thing like this will add to the effect I hope to create with paint. I also twisted her arm and adjusted to hand to be holding a skull and spine. This seemed to be in line with a "magic trick" Seamus would like.

To paint I've been using the same technique as the other zombies I've been working on. A thinned down GX foundation base followed by a wash and highlights gets the models to tabletop quality quickly. From there I will add detail and smooth the transitions as time permits. My goal with any model I use in game is to get paint on it before I used it. While I might not actually finish the model for quite some time at least I have something that looks passable on the table rather than primer grey or bare metal.

On the painting table ...

MERCS – So I didn't find out about MERCS until well after the game was released. Which is a bummer because the limited edition model that was released with the pre-orders is really cool. So feeling left out I decided to make my own. I started with Kabuki miniatures Bug Hunter and added some more MERCS flavor by cutting up a CCC leader and demo.

Replacing her Alien style gun with the gun from the CCC Demo was fairly easy. I than removed the head and torso from the CCC leader to add to the base. So far I'm pretty happy with the overall effect. 

Magnets ... how the f@!# do they work?

Malifaux – Recently I began work on a new commission. The customer wanted modular magnetic bases, that could swap models from 40mm bases to 50mm and a set to swap 30mm models to 40mm. The idea being only having to assemble and paint one set of coryphee and two sets of spiders. The desire is for an industrial feel appropriate for the setting.

To begin I sorted through some potential components that would serve the purpose. I settled on industrial grating with field stone. The general feel is similar to some other sets of gothic/technology bases I've seen. After measuring and being sure the models could attach to a removable element of the base, I began construction. 

For the Coryphee I created a platform for the crouching one to stand on and a half globe for the pirouetting one to attache to. The half globe fits into a vent fan nicely. One of my goals for this project was to create bases that could be fully painted without the elements attached and still look good. 

The spiders were going to be an issue. I had to find and element that was sturdy enough to mount them to without them ripping off the base. After looking through my bits I remembered the Hirst Arts pipes. These are chunky enough to fit a magnet and sturdy enough to give plenty of mounting points. 

After completing the base work I began experimenting with magnets. I didn't want to just sink the magnets into the bases, as from past experience they do come lose over time. So I made a quick mold of the base and half filled it with resin. Than I put the magnet in and filled the mold. After a few tries I found the correct depth needed for the magnet to maintain attraction. Next I made a quick mold of the elements and repeated the process. TIP: Mark your magnets with a north and south side before you begin. I didn't do this with my first test and the pieces repelled instead of attracting. While my wife found this hilarious, it's a pain to try and figure out after the fact.


WIP – Master of the Forge

Warhammer 40K – I've been working on a conversion to have a Master of the Forge on a bike with a conversion beamer. I based the chassis on a tutorial I found on Bolter & Chainsword. I made a few modifications to the gun mount, namely using a wench section from the Vindicator kit as a weapon mount. The hole in the wench was also exactly the same size as a teleport homer pipe so it was easy to snap it into place. For the conversion beamer I'm using a Necron heavy guass cannon. Once the model is painted I'll put some yellow or blue neon rod in the weapon barrels.

The rider used the basic bike legs, torso from the vehicle sprue, Dark Angels techmarine head, apocarthy backpack, tentacle from a defiler and servo arm from a servitor. I had to remove the one of the sensors on the backpack to fit it on the bike. After carefully cutting off the offending piece I mounted the sensor to the cannon. For the servoarm I carefully bent the tentacle and heated it under a lamp to hold the curve. I then pinned it to the backpack and attached the servitor arm to the end of the tentacle with a pin. 

I'm looking forward to using this model as it will allow me to field up to 6 dreadnaughts, as well as being a cost effective mobile weapons platform.

WIP ... The Breach

Sorry for the delay in posting. Things have been pretty crazy for me as of late. Lots of new projects in the works.

First up I picked up the Western Express Toy Train from Toys R Us. This is the perfect size for Malifaux. It comes with track, an engine, cars and a silly half building that could probably be repurposed.

The project is to recreate the train seen in the Malifuax Rule book. I began with the engine and a plastic skull. I attached the skull to the front of the train as a base for sculpting the ram's head. From there I used an inexpensive epoxy putty to bulk up the skull and create the basic shape. I used a bit of plasticard for the cow-catcher/grill and bulked it up with the putty as well. So far it's taking shape nicely, the next step is to clean it up and detail the skull with green stuff and find something to add some boilers and pipes.

In other news I'll be running demos at the World Steam Expo in Dearborn, Memorial Day Weekend. Anyone interested in seeing my terrain and tables in person should try and make it out. I'll be running demos, Saturday from 5pm-11pm and Sunday from 11:00am-4:00pm and 5:00pm-10:00pm. There's going to be tons of other stuff there from what I've heard and they'll be doing things at the Henry Ford/Greenfield Village. This is also the weekend that Greenfield Village does the Civil War Remembrance so there will be plenty to do in the area.