On the painting table ... Psychedelic Fur

On the painting table ... Psychedelic Fur

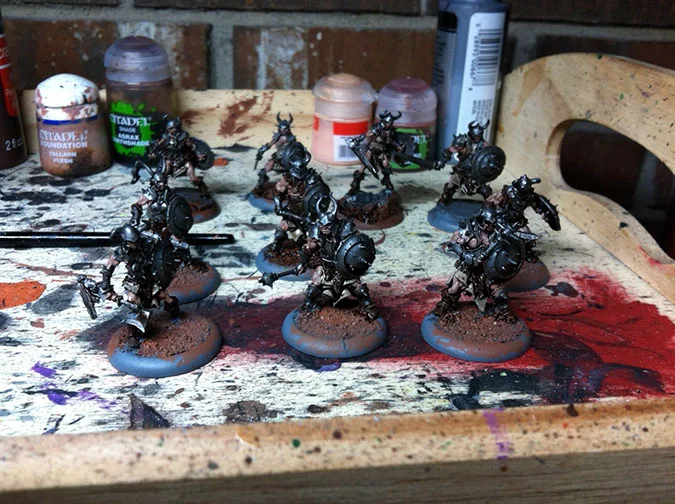
Dungeons and Dragons – I've got some more paint down on the demon project. My client requested a blue pink blend on this minotaur which reminds me of Pantone's Dual Color of the Year. It should look interesting once I get the blending right, but at the color block stage it reminds me of a weird blacklight poster.

Read More

Off the painting table ... Barbaric

Off the painting table ... Barbaric

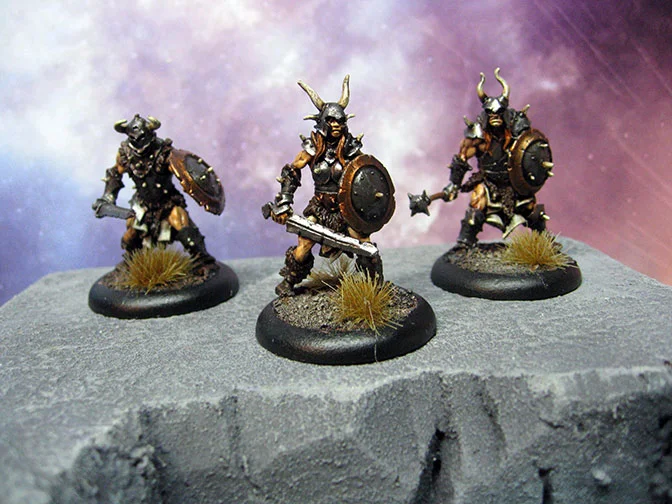
Dungeons and Dragons – These brutal looking guys are now on their way back to my client. I'm really happy with how they turned out. I tried to keep a fairly monochromatic scheme with these so they'll fit in with most any scenario. The bases vary a little bit to represent a dungeon, wasteland and generic exterior location. 

Read More

A Different kind of Dark Elf

Book Review – With the exception of Dark Sun and Dragonlance I never really got into the various flavors of D&D, most of my knowledge of these worlds wa based on what I heard second hand, read in a random Dragon magazine or saw online or in-store. In fact my only real exposure to Dark Elves was with GW variety in which they are the evil emo kin of the happy forest dwellers. I really enjoyed the Malleous Darkblade books with an evil character as the protagonist and was expecting something similar with the Drizzit books. 

A friend gave me the first volume to read after I asked for some info on Drizzit to flesh out some home brew Super Dungeon rules for the Impact Miniatures I should have in hand any day now. He apparently owns all the collectors editions of the collections and insisted I'd enjoy them.

The first volume collects the first three R.A. Salvatore novels into one massive tomb. The binding and printing on this book is very nice and it has a fancy foil dust jacket. High quality like this is something you'd expect from a collector's edition. The only thing missing are some illustrations of the covers to separate the books. When I think of collector's edition I want art just one of my pet peeves I suppose.

Anyway onto the actual review, this may contain spoilers but given they were printed so long ago I'm not to concerned. If you haven't read them yet I'll try to keep this very generalized.

The first book opens with a Dark Elf family besieging another preparing to sacrifice the third son who is about to be born. (For some reason they can only have two noble males in a house, females run everything in Drow society) For me the first half of this book drug on and on very slowly, so much so I almost put it down. If you feel the same carry on because the massive back story is important in character development. Eventually the focus of the book turns to the main character Drizzit and things get more interesting.

Essentially Drow (Dark Elf) society lives underground and worships an evil deity called the Spider Queen, females run everything and their is a fixed cast system that the evil house mothers are always scheming to improve their standing in society and in the eyes of their evil goddess. To do this they must completely eliminate their opposition or face elimination themselves. Much like the Dark Elves of the Warhammer world this entire race is pure evil. Except for Drizzit, he is the exception to the rule and as such causes his family no end of trouble because he refutes the evilness of their society. Eventually he exiles himself and sets off to find his way in the world. Of course trouble and tragedy follows him everywhere he goes despite his best intentions.

The books were well written, if not a little bogged down in the details and back story. I suppose it was necessary to show why things were the way they were and set the stage but compared to a typical Black Library book the pacing was almost a crawl for most of the three books. I'm sure if I read these long ago I would have had a different felling about the pacing as it seems even with older movies going back to watch them now they feel slow compared to more current films.

Anyway the real reason I wanted to read this was to get some ideas to create a hero for Super Dungeon Explore using the Impact miniatures. My thought is to have his potion summon/unsummon the panther which will act as another hero while on the board with a static attack number and Drizzit will have a 3 button push attack called Blade Storm that hits everything within two squares of him. Still a little rough but the general idea is sound and fits with what I've read.

If you haven't read these books yet they are worth checking out, or at least picking up from the library.

Diceless Dice? You gotta have these.

Ok so this Kickstarter thing is pretty crazy. I'm a little bummed about the timing of some of these bigger ones and the wait from kick to product in hand is agonizing. 

That said I came across this little gem. That's right never again will you be caught without dice. Just slip them on and you're good to go. I think having the D6 one with pips would be a classy way to proclaim your gamer pride but the life counter one seems like a must have for MTG players.

I can't wait to come across a 40k player with 20+ rings on their hand trying to spin for rapid fire.

On the Painting Table - Christmas Joy?

Malifaux – I picked up a Reaper Krampus model to use in some holiday scenarios for Malifaux. What's a Krampus? Click here to find out.

To use this as the model represented in the Wyrd scenarios I needed to mount it to a 60mm base. The reaper model is a bit on the small side and looked a little unimpressive on that size base. I decided to use one of my rocky bases and add some undelivered presents to the base. I think this helped to describe the scene and set a tone for the model. 

After basing it up I added some addtional sand and gravel to smooth the transition point where the boxes had been glued to the base. I quick shot of primer and it was ready to paint. Looking on the internet it seems there are several colors that the Krampus typically comes in: black, white or red. I decided to go with the traditional red devil look as I feel that will really stand out against the snow I plan on applying to the base.

Paid in Full: Commissions - How much is your time worth?

Random – Lately the number of inquires I've recieved about commission work has dramatically increased. Many of these questions have been about how to determine a price when doing commission work. So in an effort to answer these questions for the larger population, here's the basic principles I use when putting together a quote.

1. How much is your time worth? When considering doing "craft" projects that you intend to sell to others the first thing you need to consider is how much is your time worth. For the most part you're not going to make $16-$30 an hour painting models or building terrain. Even when painting to a Golden Daemon or Crystal Brush winning level the amount of time you put in usually won't equate to "real job" money. Most gamer's won't pay more to have a model painted then it cost them to purchase so keep that in mind when putting together a price. Also remember if you have a wife and kids or girlfriend your hobby time is probably limited. When I started this site I was between jobs and had much more time to build and paint stuff. Now my time is limited so it's important I enjoy every project I take on and be as efficient as possible so I'm not working for pennies an hour during my free time.

2. What are your material costs and how do you recoup them? Paint, primer, glue, sand all cost money. Good paint brushes and glue cost more. While it can take a while to burn through a pot of paint, you have to consider the costs when figuring your price. One thing I've instituted is buying new pots for army scale projects and billing them as a line item. Once you're done with the project your can give the remainder to your client in case they need touch up or add models they don't need or want you to paint.

Terrain Projects can get tricky as sometimes you use found materials and other times you need to buy foam and other raw materials. Most of the time you're going to buy in bulk and have a bunch of stuff you need to store. If you have limited room you might need to invest in space to store that stuff. Right now I'm not quite at that point but it's getting close.

3. What are your customers expectations? This is a big one. Some customers just want a three color minimum. While other might ask for table top quality expecting to be able to enter them in a juried contest. Managing those expectations and delivering as promised is huge. I've heard many horror stories from painters about unreasonable clients that make requests well beyond what the initial request was and then want to pay less because the quality is what was expected. On the flip side I've also heard numerous stories of painters that send over a quick shot of the base coated model only to have the client "love it and want to know how quick it will ship." That second one is rare but important to remember as some clients dont' want you best work. They just want some color on the models. Knowing this you can save yourself a ton of time.

4. How are you going to get it to the client? Nobody considers shipping costs. One more then one occasion I've  had to deal with customers complaining about shipping, "DUDE the flat rate box is only $5, why does it cost $20 to ship to me in Antarctica? You're trying to RIP ME OFF!" You also see this all over several companies forums. The reality is shipping is expensive, foam and packing materials are expensive. Tracking and insuring packages is expensive. And even it you do everything right the post office, UPS or Fed Ex will inevitably screw up on a one-of-a-kind rare product. It happens, sending boxes across the country or world has risks. Most of the time it's not an issue but when it is will be the one time you didn't insure or track a package. C.Y.A. 

While the post office and FedEx provide free boxes the packing material is not free. Even cheap foam is a $1-$5 a yard minimum. If you're shipping painted models wrap them in foam and pack them well. Otherwise it's likely to be damaged during shipping. For an order of several models you can quickly burn through a large amount of foam and tape. So figure in the cost of shipping and add a few dollars to cover packing materials otherwise it will eat into your already tight bottom line.

5. Don't get burned. When painting models this isn't as big a deal as if you don't get paid keep the model and resell it. So long as it's nothing to obscure you should be able to get at least 40-50% of the retail cost, more if you're willing to wait. But terrain projects are another beast entirely. Custom terrain is hard to sell once its built. Particularly if it's custom to specific client. After getting burned a few times I put forth a 50% nonrefundable deposit. That way if I have to go buy a bunch of supplies for a project I'm not going to be out of pocket if the client changes their mind or "is broke this month bro."

6. Be transparent. Have examples of your work and the various levels of quality and pricing tiers available. Put them out there for the work to see. Eventually people will start to connect with your work and ask about pricing. For example for a table top quality miniature from a skirmish game I typical charge by model size: 30mm - $8-$12; 40mm - $10-$15; 50mm - $15-$30. This gives a good starting point. But for an army level game it's unlikely you'll get that much per model. At this point most people want a "lower table top quality" which falls more in line with the 25mm- $2-$3, and goes up from there.

For terrain projects it helps to come up with some designs you can quickly replicate and make a bunch of them at once. Assembly lines are good for managing time and if you make something that can be used for several systems you diversify your client base. For example the swamps I sell in the online store I typically make 6-10 of them at a time. Since they use water effects it's better to mix a larger pot of it and pour all at once than to make small pot and have a bunch of waste. Having an existing stock also lets you focus on other projects and have a reference point for custom orders.

Being consistent helps you to manage your time and be able to quickly quote a price to a potential customer. I hope this answers any questions for aspiring painters and potential clients.


One the painting table ...

Malifaux? – Recently I picked up Scuttlebones, Undead Crab from Reaper Miniatures. This is a pretty odd miniature, which doesn't really seem to fit in Malifaux (probably why they don't have one ... duh). I however really thought this was something cool I'd like to paint so I picked it up. 

Assembling the thing is a giant pain, as is to be expected with anything that has a bunch of small spindly legs. The main body comes in two pieces which go together easily. Attaching the legs not so much. After drilling our the leg joins and scraping down the ball joints I was able to wedge the leg into the holes to create a pretty strong join. The claws suffer from the same issue but after a bit of work I got them to fit. 

I mounted the crab to one of my Skull bases and was able to position it so almost every leg attaches to the base. I like how the pose turned out as it looks like it's scuttling over the rocks.

After the primer dried I base coated it with Foundation Orange followed by several coats of Ball Red Wash. This gives it a nice red-orange color. I them painted the highlights and toned the whole thing down with a light wash of Devlan Mud. 

For the base I decided to paint it a rich earthy color like Bayou Mud. A bit of static grass and water effect and it's almost done.

Not sure what I'm going to do with it, maybe I'll give it to Breadcrab to use as a Rogue Necromancy. He seems to has a seafood fetish and just started playing Ressurectionists. 

Red Chapel District (Downtown Malifaux Part 3)

Malifaux – Having cast up my road sections and some brick wall section I've begun the time intensive portion of this project. I probably would have better luck if I made my road sections with notches to fit together like a jigsaw puzzle. However I didn't and am going to have some serious gaps to fill in. I think ultimately this is going to strengthen the entire project (as well as subtlety add no slip areas).

While waiting for the resin to set I decided to begin adding blocks to the board. I like the idea of a city built on a city on a city, which according to the fluff so far seems to be the case. The newer areas are built from renovated old buildings or simply built on top of the existing structures. I imagine it to be like Jerusalem or another ancient settlement in which multiple cultures have occupied the same area over the course of centuries. 

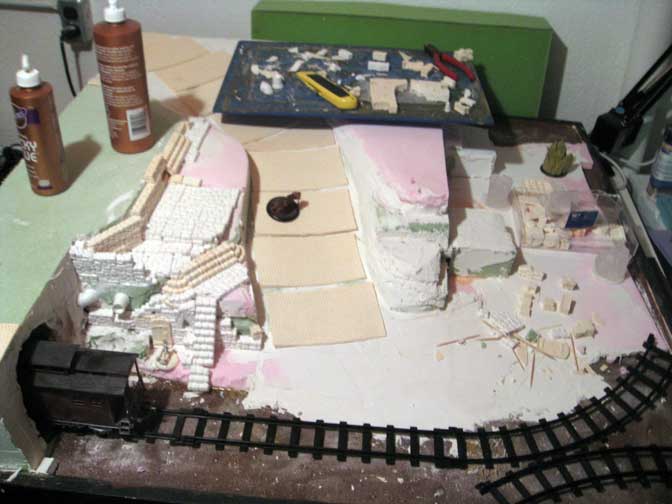
With that in mind I began adding flagstones and fieldstone walls to one area. The fieldstone is going to represent the older structures and or buildings cobbled together from existing material. I'm going to use the gothic stones for new structures like the train tunnel and bridges. Hopefully I'll be able to make these work together and not look like a jumbled mess.

The first area I've been working on is the stairway along the main street. As this leads down near the tracks I wanted to create a maintenance room. This could lead down to the sewer or just serve as an area for rail workers to rest. I imagine small rooms like this throughout the city hidden in forgotten places server as hideouts for near-do-wells, the poor and forgotten or laborers. 

I've also decided that the buildings will not be permanently affixed to the board. Dragging it back and forth from my garage to basement (for sanding etc) I learned that I can't go much higher with the board and still be able to go up my narrow stairwell. I'm really glad I didn't block in the buildings before learning this. So now my focus is to build the basic board and texture it appropriately. This will allow me to swap out buildings and build a ruined version of them to represent the Slums and Quarantine Zone as well.

Choo Choo Catchu ... Tunnel of Love

Malifaux - Having sanded down the rough shape of the downtown streets, it's time to work on the actual plan and making it work. I want to add the train (which is still unfinished...) that I was working on for a possible Breach location (lost interest in that project ... for now) to this project. As I fleshed in the rough shape of the mountain/hill I left an area for a tunnel. 

To build the tunnel I'm using the Hirst Arts gothic bridge mold. This mold can create a nice arch which will serve as the tunnel opening. 

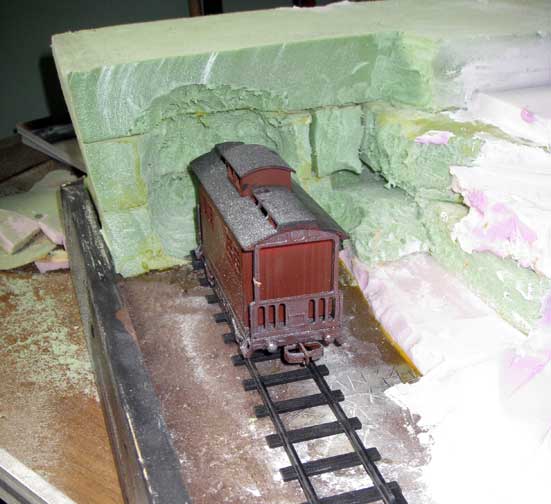
Before I can build the tunnel however I need to blast out the interior. So out comes the trusty dremel to bore out the tunnel from the green foam block. You're probably wondering why I didn't just cut the arch out of the foam before I glued it into place. Well there are two good reasons: 1. I'm trying to create this board in a somewhat organic way so that it feels more like the city filled in around the existing terrain (in other words I didn't have a solid plan and got impatient) 2. By building a solid block to begin with it should in theory be stronger than if I had cut a glued an empty arch into place.

The question that come up next is do I bore al the way through to the other side or do I make it a faux tunnel that isn't functional. As the "bridge" over top is about 6" wide I don't think making the tunnel functional is going to have much effect on game play as it's to wide to comfortably move models under. However if it goes all the way through there is the coolness factor of having the train coming through the tunnel.

Ultimately coolness wins out. My initial though was to smooth and finish the sides of the board edge to match the black base, but I think it's potential more of an enjoyable experience to see the edge of the board as rough earth. Maybe...

Downtown Malifaux - Stage 2

Malifaux – I'm getting ready to move into stage two of my downtown board. I still have several other items that I'm going to need to cast and/or sculpt but I'm getting antsy to start the larger portion of the project. 

Because this is going to be a fixed terrain board I need to do some prior planning before moving ahead with it. A few rough sketches give me the general idea of how I want the board to lay out. I'm not going to go into detail with the buildings at this point because I'm more of a hands on visualizer.

I have a base board that I built previously, I was never really happy with the way it turned out so rather than build a new base I'm going to reuse this one (much like a painter with a canvas). Step one is to build up the elevations to fit what I'm envisioning.

The goal is to have a gently sloping winding road traversing the center of the board. One side of the board will be a higher elevation than the other and I want to work a railroad tunnel into that side of the board as well. The far side of the board will be at ground level with a number of staircase in the alleyways. 

The trick is going to be fitting everything I want on the board while maintaining playability. I'm not sure if finishing the building interiors is going to work or not. While I'd love to detail out each structure interior it seems like it may make the board more difficult to use. From past experience lifting a level makes things shift and slide. 


Downtown Malifaux - Stage One ... Revisited

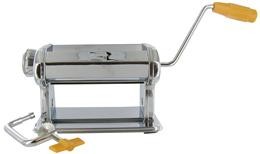
Malifaux – So I came to the realization I suck at using a rolling pin. After several attempts I've broken down and bought a "craft" pasta machine. Luckily as was able to pick it up for 40% off retail and I think I'm going to get quite a bit of use out of this tool.

While I was at the craft store I also picked up a brick of sculpty to try out with the machine. I'm a little nervous that milliput or greenstuff will get stuck in the machine. 

Working the machine is simple enough you set how thick you want the clay, stick a blob on top and turn the crank. Voila perfectly uniform flat clay. Of course there's a bit more to it than that but the basic idea is that simple.

So now that I can produce uniform flat sheets of clay it's time to go back to the drawing board and create the cobblestone sheets. I used the same technique as before, bent pipes to create the bricks. Patience is key as if you screw up the pattern you'll wind up starting over from scratch. After two tries, I slowed down and got the results I wanted.

After baking the clay for 15 min. it's ready to mold. Well, almost ... the baking/cooling process caused the edges to curl slightly. So I stored the dry baked sheets under a stack of old text books for a few days to eliminate the curl. 

Next the master for the mold must be glued down to the casting box to prevent it from floating up during the molding process. Because this is a large flat surface area the odds are it will float in the silicone mixture so to save myself from that potential headache I'm going to be sure to glue this down to a sheet of plasticard the exact size of my mold box (a 5x7 acrylic box frame)


Downtown Malifaux - Stage One

Malifaux – After this year's family vacation I have a boatload of inspiration images for the next big project I'm going to do. My goal is to build a super detailed fixed board based on the town of Eureaka Springs, AK. During my visit to the town I was really impressed with the cramped vertical feel of the town. I think it will make for an interesting game board. I've been leery of doing a fixed terrain board since the tend to get boring after a while. However I think I'll only bring this one out for special events or con demos. 

This time around I'm going to plan ahead and build all the individual components before I begin.  I want the cobblestone to match the bases I've used for my Ressurectionist forces, so first things first I need a way to create lots of cobblestones that can be used for the street. Having learned my lesson with the sewer board, I ruled out cutting individual stones. The process was far to time consuming and won't give me exactly the look I want.

So off to the craft store. After looking around at various options that might work I settled on some brass tubing. The tube is of course a tube, so I had to carefully bend it into a rectangular shape. I did this with two different size tubes so I could create some variety in the pattern. 

I then mixed up some miliput (apoxy sculpt might be a better choice but this was 40% off) and roll it out into a large smooth flat area. Once that's done it's a simple matter of taking the tube and pressing the pattern. Repeat until the area is covered.

This didn't work out as well as I had hoped so before I move on I need to research a better way to flatten the putty. I think a clay roller might work ... unless we have a pasta maker lying around.

Once I solve the flatness issue, the next step will be to cut this into squares (or a large section) and make a mold. This will allow me to quickly duplicate the process to cover the streets. I'll also create some optional pieces to create more interest like man-hole covers and grates. 

Undead Horses, couldn't drag me away

Malifaux – A while back I picked up some undead horse from Reaper. I intend to use them for a special "Doner Party" Scenario. They also look pretty cool pulling the supply wagon, so I think I'll get some use out of the models. I based them the same as the rest of my Ressurectionist models with a Victorian-style cobblestone base. I'd probably be better off putting them on a wasteland or ice base for the scenario, but I'm all about getting multiple uses out of a model.

To paint the horses I started with a base of Deneb Stone, from the foundation line. I then did a wash of Ogryn Flesh followed buy a wash of Leviathan Purple. This created the bruised flesh color I wanted. I then mixed up a light beige highlight color and applied that to the model. And followed that with a light Sepia wash. After some minor highlights the skin is complete. 

I painted the muscles and exposed guts with a deep crimson and followed that up with the same washes as above. I'll go back in a add some of my "any color red" highlight and a touch of gloss varnish to finish up.

The hair was painted with a dark gray followed by a black wash. (easiest way to paint black IMHO).

Now Available – Rock Bases

I'm proud to introduce the next set in my line of round lipped bases, creatively titled

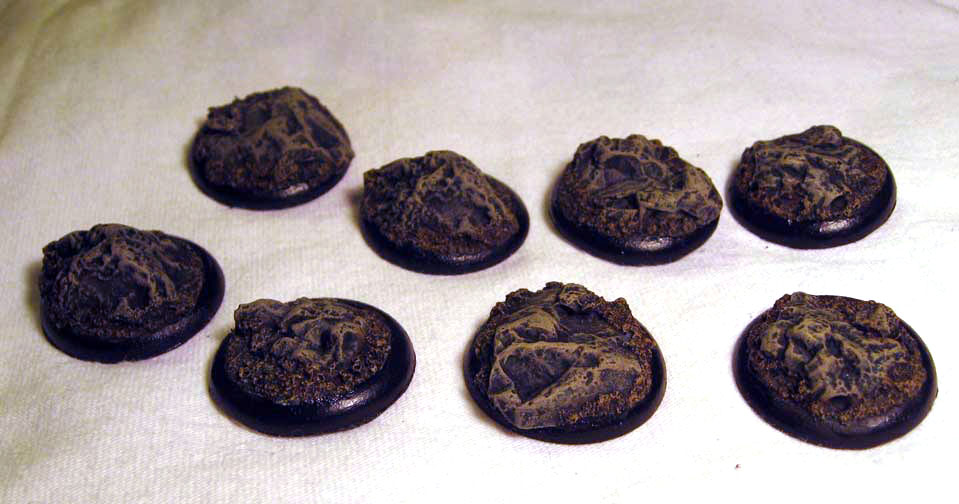
Rock Bases. These are great to represent a mountainous region or to add some height to a model. There are several variations in each size with bases available in 30mm, 40mm and 50mm. 

The realistic texture was created using actual rocks. Cast from a urethane resin they're much easier to pin models to than real rocks and much lighter.