Leviticus Tactics

This special guest tactics article was written by our local Leveticus player, Rob [Phoenix on the Wyrd Boards]. I've been thinking about painting up a Levi list to make use of all my Res models and asked him to provide some tactics.

Rob is a very skilled player and has won several large events in both Malifaux and Warmachine, including several of the Gencon Events.


Spells & Their Uses:

Blessing of Desolation – 7 of crow or tome to cast. Gives an automatic trigger of Desolate Warping for Steampunk Abominations (SPA) and Desolation Engine (DE); automatic trigger of paralyze for Arachnid Swarms; and automatic trigger of Rot for many Resurectionist models.

Entropic Transformation – 7 of anything to cast. One of the best spells in the game. No resist and any model with 2 wounds or fewer is sacrificed (no slow to die!) and you get a Waif or SPA depending on model type. 

Necromatic Unmaking – 9 of anything to cast. 3 wounds to any model and can target in melee. If the model dies you get a free SPA and it doesn’t generate counters. 

Unnatural Wasting – 7 or crow or tome to cast. Only spell of his with a gun symbol (Ranged Attack) but one of his best. Any model hit with 7 or less wounds is in range for Entropic Transformation. 9 or less wounds and Necromantic Unmaking will finish them off. Only spell of his that doesn’t harm him.

Generally I use Necromantic Sacrifice to get Levi in line for a shot with his spells and then throw three at whatever model I want dead that turn. 

(0) Actions and Their Uses.

Desolation – Generally a good option if you’re surrounded or in the middle of their army. I would tend to throw out three spells and then do that as a finishing move to kill him off for the turn or to finish off any low wound models his spells damaged.

Deaths Lessons – This is the one I prefer to use regularly. It’s a great way to check and make sure you’re going to have the right suits coming up for spells.

Army Composition:

Rusty Alyce – 8 stones for a major utility piece. She allows you to draw two additional cards each turn even though Levi’s rule is draw 0. She can also create additional SPAs for your army. I generally use her Bag of Tricks to cast Booby Traps turn 1 in order to kill Levi off for a new hand. (2 traps, 2 necromatic sacrifice, 3 deaths lessons, 1 closing phase)

Jack Daw – My new favorite model. The bonus to hand size means you will almost always have the right suit in your hand. He is almost indestructible as long as you have cards in hand. I tend to send him flying forward to cast his (0) aura Severed Ties. This prevents any model within 6” from cheating fate or using soulstones to add to duel totals. This fact plus Levi’s cast of 7 makes it very easy to get his spells where they can’t be resisted easily if at all.


Necro Punks – Leap and quick movement. These models I tend to bring along for claiming objective scenarios such as destroy the evidence. Rusty can also cast burn out on them so they gain reactivate as well.


Kill Joy – Since Levi and his Hollow Waifs come back any time they are sacrificed or killed they make excellent models to sacrifice to bring him into play. Since he is placed now he isn’t slow and should be able to wreck some havoc.

Steampunk Abomination – if you start the game with 4 you can start them in a diamond shape and just keep them advancing up the board using Keep Pace. You push the three Keep Pace into the front of the model that advanced and then advance the next and so on. Be sure to place one that has yet to go this turn in the center front basing the other 3 or you risk leaving one behind. Generally I use the 3rd models 2nd action to combine them into the Desolation Engine (DE). This is so that the DE gets a full activation as it replaces the models and gains the high number of AP on any of the models. Something should be in melee range at this point to attack 3 times. 

Desolation Engine – Takes a wound every time it activates (important to remember) but it has a built in trigger to heal however much damage it does so pretty easy to keep alive. Great damage potential, high Cb (paired). It’s a solid model for Levi to use. If it creates an extra 2 SPA when it dies the two it creates will let you form a new one right away.

Ashes and Dust – After I’ve played him a bit I’ll have some ideas. Want to see how things work in actual game play not just theory.

Hollow Waif – Always companion with Levi or at least make it go first. I tend to keep mine back where it’s hidden from ranged or magic attacks. Remember the only way to remove Levi is to have him and all Waifs on the board dead on the same turn. Try to get a second Waif out as soon as possible.

Set-up and Activation Order:

Set up is highly dependent upon what your strategy and schemes are. Generally though Levi is across the table from something big he wants dead and Alyce is within 2" to get the bonus to hand size.


Activation order turn 1 is pretty much everything goes and then Levi goes. The reason for this is so that if they moved something up pretty far he can potentially take a model out turn 1.


On further turns order depends on what is being presented. If there is a solid target Levi can go after early on I tend to take it as long as the Waif is out of harms way. If there is a chance the Waif can die I try to have Levi go later in the turn to be sure atleast one of them is on the board during the closing phase.

I hope this helps you Levi players who are trying to figure out what to do with him. It seems that activation order is extremely important to this list. From what I've seen Rob able to do with him, the errata (or nerfing as some people whine) hasn't had a major affect on the viability of the list. 


Special Guest Painter

My daughter, Elizabeth,  has always been fascinated with the hobby. Since she's been old enough to pick up a paint brush she's wanted something little to paint from the game store. Of course she started out just globbing on the paint how she wanted and refused to take any hints. As she's grown and watched me paint, she's developed a pretty steady hand and has begun becoming interested in techniques to help her improve.

A few years ago she found some articles about the Harlequins from 40K. Immediately she asked if she could get one of the models to try and paint "good." Needing to pick up some stuff from the store anyway, I conceded and let her get a model. I set her up with her own painting station and showed her how to paint. Eventually she decided she wanted her own army and has several boxes of Eldar that we got from various sources. We developed a simple paint scheme that she could easily reproduce and set about painting several squads.


Of course being 9 at the time she lost interest and up until recently they sat in a box. Out of the blue she asked about painting again and has discovered the beauty of washes. She's just about finished with that first Harlequin now and asked if I'd post it up on my site. 

Hobby on the road...

I just got back from a nice vacation in Gatlinburg, TN. It's a very interesting place to vacation because there's the natural beauty of the Smokey Mountain National Park and the super commercialized downtown tourist trap. I got a ton of great shots that will most likely become inspiration for some future projects. 

While on the road I decided to try and find a cool game store and see what gaming is like in other areas. I found Sci-fi City at a mall in Knoxville. The store is really cool and has an excellent selection of product. They have an Xbox Lounge, multiple gaming tables, comic books, board games, hobby supplies and a large selection of collectibles and t-shirts.

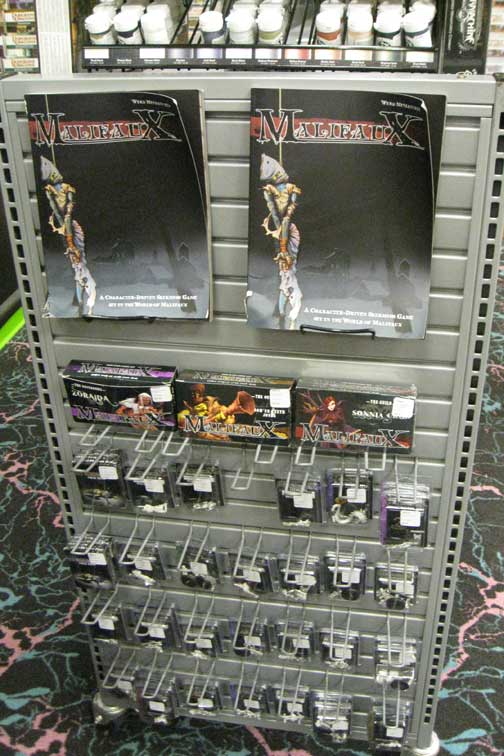
It's obvious from the store front that the owners take pride in their shop and know how to make and impression. The entry-way looks like a spaceship portal and the first thing you'll notice are the nicely crafted game tables. I was impressed to see that there's a table reserved solely for Maifaux. The Malifaux selection was pretty basic and it didn't look like they had the full line, but it was displayed prominently. They also had a large selection of Gamesworkshop product as well as the full line of Privateer Press. 

On a side note/rant:
I don't know how people can stand the sales tax in TN though, it's almost 10%, which made me a little sick to my stomach when they taxed groceries as well. WTF is up with having multiple types of sales tax? That alone made me glad to be back in Michigan.

More Neverborn

Malifaux – To pair with the Ortega family commission that I've been working on is a Lilith's brood crew. I've blocked in the colors and started with the washes. My client wants them to have ebony skin with read hair, green eyes and purple. At first I thought this was going to be a really weird scheme to pull off, but after experimenting with different mixes and shades I think I've found the solution. 

I started with a dark gray skin tone and then used a black wash to build up the skin to almost black, this way when I go back to do the highlights and detail work they won't become too gray. For the hair I'm going with a orange color that will be subtly different on each of the models. Lilith will be decked out in a white corset with a purple cape. The mature will have white hair and a purple toga.

Rather than having traditional metal weapons, my client requested that the sword be made of bone. This is going to be interesting to keep the white and bone contrasting without clashing to badly. Inspiration hit me at a knife store in TN, where they have knives with many different types of blades on display. I'm going to do the blades similar to a "stag" antler color, much like the knife my wife gave me for our anniversary [ happily married for 2 years :) ].

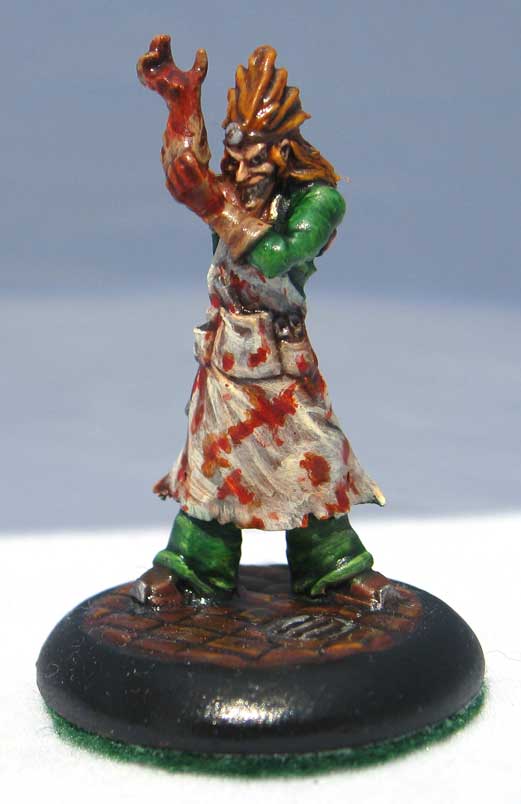
The Doctor is in ...

Malifaux – Building McMorning's lab has been quite the challenge. Casting and assembling the Hirst Arts Graveyard is a tedious and time intensive process. The results are really great and worth the time it takes to mold and cast them. I feel like I've already got my money's worth out of this mold just on this project. In addition I  made my own mold of a wooden door I found in my bits box. Making several of them saved time in creating doors and the style adds to the creepy castle feel I wanted to achieve. (If I build a Guild Holding Facility I'll reuse this mold.)

I built the base walls out of black foamcore. To avoid warping I used some square dowel rods to brace and support the structure. I noticed with the Qi & Gong that the large unsupported walls bowed slightly. My hope is to have the solid wood supports prevent this. Before construction I scored brick lines in all the wall sections. To frame in the doors I cut brickwork out of a heavy cardstock. [ TIP: If you check with retail stores and make friends with the managers you can usually get them to give you their old signage. Sometimes it's made out of styrene and sometime really heavy pressed stock. ] Framing the door covers up any gaps. 

I used the same heavy stock to frame in to walls, and will also use it to cover any exposed foam. Eventually I'll add rivets to make the framing look like heavy iron bars. The flooring is also framed with the same heavy card stock. For the ground level I used a textured wallpaper that looks like cobblestone. On the second floor I used needlepoint mesh and framed the edges with plastic card.

Throughout the structure I've applied multiple pipes and exposed ductwork. This adds a level of detail to some other wise rather plain areas. I also plain on building bookshelves to fill in any bare areas. The lab equipment and tables will not be glued down to allow for repositioning. I want to keep the lab cluttered to only really allow small and medium bases to move freely. I'm sure at some point a large model will need to be in the lab and having moveable pieces will prevent models being stacked on top of stuff.

The grave spirit in book one is described as having tentacles, and also described as a Medusa-like woman. I'm going to take liberty and say the Gorgion is a Chthulu like beastie. That way I can use these cool buttons I found as decoration on the interior walls. 

In addition to the graveyard the exterior has a roman-inspired facia. I went with this style as it reminds me of university buildings and government offices. I imagine McMorning would like to keep his lab similar to the morgue. 


On the painting table...

Malifaux – I've started another commission for the Ortega family. This time around the client wants them to have black coats and to bring in orange to the color pallet. To compliment the orange and help deviate from the "halloween" look orange an black typically have I've brought in a n earthy green color. I think this helps to give them a nice look. Obviously they models are far from finished but I'm really happy with how they've turned out so far.  Doing black anything is always a challenge to highlight because if you do to much it looks gray, and to little doesn't bring out the definition of the models. Using washes over a dark grey I think I can create a water-color-like effect that will not only bring out the detail but also simplify the highlighting process. 


I've also had a chance to work on McMorning's Lab a bit more. Having interior locations as part of "Rising Powers" is pretty exciting. So far I've framed in the lab and began detailing it out. 

I've chosen to give the working areas a grated flooring to help with any spills or other fluids that might wind up on the floor of the lab. The rest of the floor is going to be decked out in cobblestones.

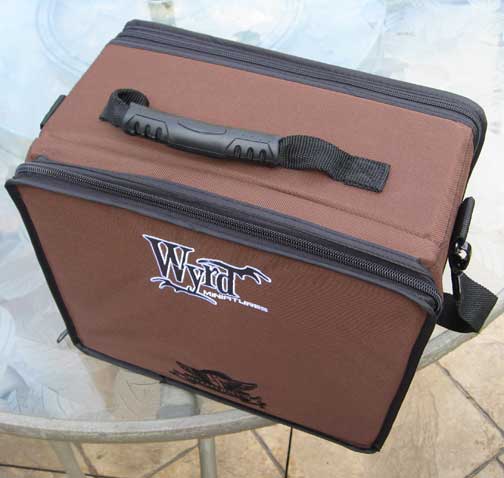
Product Review – Battlefoam Malifaux Bag

I've been meaning to replace my original army transport bag for a while now. The nylon was starting to crack and lifting all the tray out of the deep bag was getting annoying. After shopping around I decided to go the fanboy route and pre-order the Battlefoam Malifaux Bag. From the product shots it looked liked a really nice bag that would hold all my stuff. I've been looking at the bags for a while, but the army green was a bit of a turn-off for me. I received my bag today and thought it'd be nice to give it a full impartial review.

The Basics

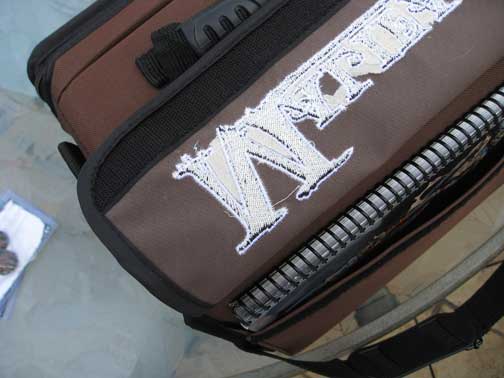
To start, the exterior of the bag is constructed out of canvas, a big plus since it should wear better than vinyl and cracking won't be an issue. The embroidery is top notch, no annoying jump stitches to trim and the density is light enough that the flap bends easily. The case is really solidly constructed with no exterior pouches to snag on door handles or parts of your car (something that happened all the time with my other bag.) It's lined with some type of stiff material that gives it shape an makes it really solid, much like quality luggage. The handles are a nice heavy rubber with a comfortable grip. The strap connects with heavy metal clips that you'd have a hard time breaking. 

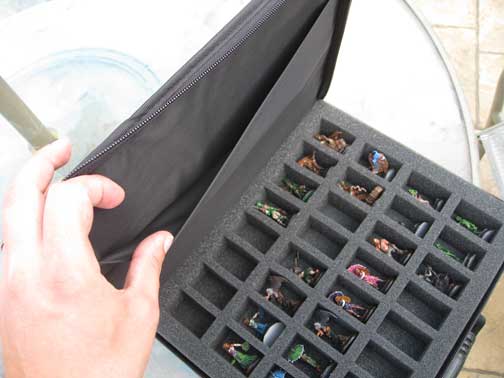
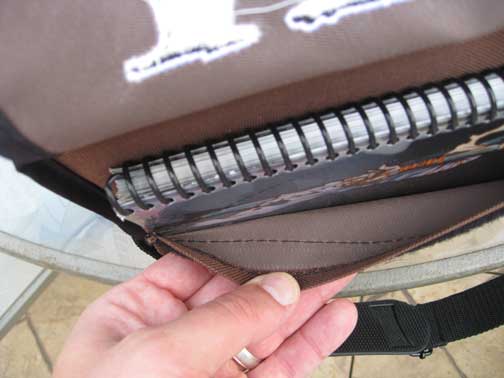
Inside it comes with two sheets of precut foam and one larger block of pluck foam. (Everytime I see Battlefoam selling pluck foam I think back to the YouTube commercials with the owner bashing on how flimsy pluck foam is ... oh the irony.) The foam is a high density and much firmer than my other trays, I'm not sure if this is a good or bad thing, but time will tell. There is a separate compartment that is supposed to house your cards, decks, tokens and markers. The interior of all the compartments is lined with a black vinyl. There's a pouch that should fit a rulebook in here, a similar pouch in the miniature section as well as a canvas pouch on the outside.

The Good

This is a really solid bag. The construction materials are high quality and there has been some obvious thought put into the design and construction. I can fit all the released Ressurectionist models I own, a Lady J crew and a Pandora crew in here with room for more. Of course depending on how many more models will be released in the future I may wind up outgrowing the bag. It seems like it will fit a full faction with multiples of the minor minions fairly easily. However if you own everything that's been released you're going to need multiple bags. Little details like the metal clips on the strap, heavy duty zippers and a durable outer shell make this a bag worth owning. Having pouches to hold decks and spots for markers is a nice touch.

The Bad

Of course every bag has it's down sides and this one is no exception. The pouch that is supposed to fit all your cards won't fit the hard plastic sleeves that I use for my cards. I suppose if you had thin sleeves or just laminated your cards they'd fit. However there's no way that you can fit cards for every model the case holds in this tiny pouch. The pouch that is supposed to hold your tokens and counters is also tiny. I can barely fit two bags of body parts in it. In the same vein there's not a place for a tape measure, granted I like to use a TAC Template but I still need a full size tape to measure range on things.

It's slightly disappointing that the chose to not cover the back of the embroidered flap with material. It cheapens the look. It's be nice if the canvas pouch was doubled up as well, but I imagine this was done to allow it to lie flat.

I hope that they'll release the foam trays separately. The tray with the smaller slots doesn't fit most of the height 2 models, and the ones that do are a really tight fit. The tray designed for "oversized" models holds most of them nicely, but a few like the Death Marshalls and Seamus are an awkward fit. The 2" block looks like it will fit most of the odd sized models, but some might be a tight fit (Mature Nephilim, and Lord Chompy come to mind).

Final Thoughts

I like this bag. It's a good buy for the price point and looks sharp. If you're a big fan of Malifaux it's a great way to show it off. If you're not a fanboy, you can probably find another bag that will suits you just fine. I've got great use out of my Sabol bags and will continue to use them for other games. You can probaly find things that are cheaper than either company, but for ease of use and easy availability they get my vote.

I wish that Battlefoam had put more thought into the game aids section. There's enough room in the bag to make the pouches slightly bigger, and if they had a fold that allowed them to expand you could fit more in it. It's a bummer that I'll have to bring another bag to hold my stat cards, counter and tape measure.

The Qi & Gong...part one

Malifaux – On the edge of the city proper near the border of the Quarantine Zone, lies the Qi & Gong. This Three-kingdoms style establishment caters to all comers. Nestled within the smokey confines you may come across smugglers, murders, thieves or worse. All types come here to lose themselves in the opiate haze that permeates the building or to lose themselves in the embrace of the many soiled doves that call this place home.

I really like the idea of a "chinatown" within Malifaux, it fits with the time period and helps to make sense of things like katana wielding zombies. In book one Victoria meets Zoraida in one of the rooms, and gets a reading. That small chunk of the story caught my attention and inspired me to build a full size tavern. Most gaming terrain consists of small 5"x5" impassible building or ruined sections of the buildings. In reality this isn't really to scale and having a barfight in one of these is more like a fight in a small shack. Of course making something to scale creates all kinds of problems with storage and keeping it playable without getting boring adds to the challenge.

To create the Qi & Gong I started with a 24"x24" piece of MDF. From the description in the text it's a multi-storied pagoda style building. While that make look really cool it isn't exactly playable (having to move floors and whatnot). So I decided to stick with a 2 story building (6" high, 3" per floor). Rather than try to figure a way to remove floors during the game, I stuck with a wide open serving area, with a second floor of several rooms. Keeping the area under the rooms blocked off as a solid chunk created a solid base for the rooms above and helped to limit the area below. Realizing that a wide open area like that would be problematic giving  ranged lists an unfair advantage I added another sectioned off room. This is the "opium den" area it gives a more secluded spot for clients to partake in what ever they fancy.

Detailing a large box like this is always a challenge. It needs to be interesting by can't be cluttered so that it hampers usability. I drew up some tiles, doors and chinese-style gates that I converted to SVG files and cut out of cardstock with a Circuit machine. For the trim I found some craftsticks that had notches cut out of them which looked like they'd fit the bill. The railings were made from doll house parts cut down to fit. 

It's still a work in progress and I'll post more in the future including a tutorial about making beds and tables.

Gamer Gear

I'm pretty sure just about every gamer has a "uniform" that they wear when they're playing games. Mostly this consists of the token black t-shirt with some type of heavy silkscreen. Some gamer's have specific shirts that they wear when playing a certain army/faction or game. Some gamer's go out of their way to "cos-play" their character or just create a special costume. 

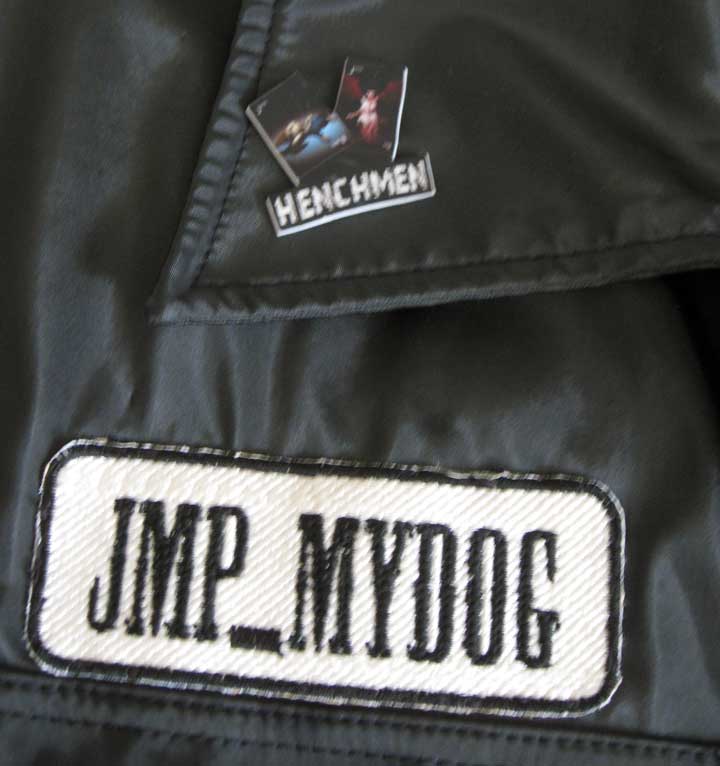
Well I'm not really that different. For our gaming group we wanted to do something different than t-shirts, so after some discussion we decided on motorcycle style patches. My vest has the club name and my store on the back. On the front, is my forum name and club title. 

I also have made a pin for my faction of choice and a pin denoting my status as a Wyrd Henchman. These were made the same was as I made my spell effect tokens. Shrinky-Dink paper is an amazing thing. I purchased the pin backs at the craft store and attached them to the back with a bit of gorilla glue. 

Added to my typical outfit are a hooded Resurectionist sweatshirt that I had custom embroidered (as well as a matching knit hat) for the winter months. During the summer I have multiple Twilight Emporium shirts that I screened myself. 

After attending the Steampunk Expo I decided that I needed a tophat and some goggles. Rather than pay a significant amount for a pair at the con, I did some research and found that the majority of them are nothing more than welder's goggles with some leather modifications. I've picked up the materials to make them myself and will post more photos once I begin the construction process.

Of course no discussion of gaming gear would be complete without a discussion of bags. Transporting your models, cards etc. is one thing that every gamer has to deal with. I own several of the Sabol Army Transports and have been very happy with them. I use the Motor Pool to transport my 40K armies, it seems to be just the right size to fit most everything I need at a given time. Battlefoam makes a nice troop tray that fits 40 standard size models. Getting two of them I was able to increase the capacity of the bag significantly, it's nice that they'll cut custom text into the tray as well. Currently my "original" Army Transport houses my Malifaux models. I've stuck with 2.5" pluck foam that allow all the models to stand up. On the top I had a custom patch embroidered with my faction symbol. I've also made multiple pins that adorn the outside of the case. For Magic the Gathering I used an Ultra-pro case adorned with pins I've found featuring some of my favorite cards. I also was fortunate enough to get a great deal on the 5th Editon 40K Rules that included a "Bolter Round" ammo case. This is just the right size to house my Necromunda gang. 

I'm a huge fan of custom swag and think it adds to the hobby. 

Summoning some daemons

Warhammer 40k – So I've been pretty consumed by Malifaux as of late.

So it's time to take a short break. Prior to August 2009 I was really excited about the 5th Edition Rules for 40K. I've had my Space Marine list pretty close to completion for a while now and eventually will get around to finishing up the tanks and characters I have left. I'm really proud of my Twilight Ravens, chapter. Each marine has there name applied to a scroll on the base (which are all scientific names of birds) and each unit has specific markings and campaign badges. I've kept them very generic so I can use whatever codex suits my needs at the time. For the most part I like to use the White Scars rules or the Raven Guard rules.

When I first designed my chapter they were based around the Index Astrates: Raven Guard article. I had acquired a toolbox full of random marines as partial payment for a commission, and wanted to build a force with them. At the time the Chaos marine codex was running rampant at every event I attended as well as in my local play group, so the bonuses against Chaos were a big deal. I also had a Witch Hunters list that paired well with the Marine ruleset I was using.

Then 4th edition came out and 40K died for my play group and any stores that were running events. So my loyal marines were shelved unfinished. After jumping headfirst into Warmachine and subsequently being turned off by the direction the game was headed. I returned to 40K excited about the possibilities available. Unfortunately I had sold off my Wordbearers, Sisters of Battle, and a good chunk of my Black Legion ... leaving me with just my Emperor's Children and the piecemeal Twilight Ravens. The current Chaos Marine book left me with a bad taste in my mouth, my heavily daemon based biker army wasn't viable any more and all the custom work I did to create an all Slaanesh force didn't seem like a viable option. So my marines got the spotlight and became my list of choice.

As I was cleaning up and organizing my game room I realized that I had enough Slaanesh Daemons to field a force on their own. So I dumped them all into a Simple Green soak and stripped them down to bare metal. And then began repainting them, until August 2009. Then Malifuax came out and it became my game of choice, 40K got shelved again. And my daemons sat partially assembled and painted.

Needing a break to do something different I recently brought my daemons back out to work on them. I began with the Ultraforge Pleasure Daemon. This model was a pleasure to assemble after the nightmare that was the Khorne Daemon Prince I recently put together. The pieces were simple to assemble and there were no huge chunks that needed to be removed. The only problems I found were a large gap in the arm assembly, and the slight "miscast" along the arms that required a bit of sanding and green stuff filler. The model isn't as detailed as the Forgeworld pieces, but it's still very impressive and fits the theme of my force. Once it is finished it will fill the roll of my Bloodthirster of Slaanesh.

Off the painting table ....

Malifaux – My Resurrectionists are getting close to completion.

I've finished up the Crooked Men, and Necropunks. In practice the Crooked Men are really strong models, the versatility they bring to the table is really helpful. The shafted counters force opponents to make hard decisions. Not always effective in doing what you want them to, but that random chance is enough to cause concern for your opponent.

--------------------------------------------------------

Just found out that AMC is making the Walking Dead into a TV series. The comic is pretty good and I can't wait to have a zombie TV show.

Product Review

Frontline makes some nice resin terrain that fits the scale for game of Malifaux. I picked up the Dr. Jekyll's Lab and Frankenstein's lab. Both are pretty nice pieces that consist of tables, bookshelves, and a tank. The price isn't too bad and they are available in the US through the link at the beginning of this post. They look like they'll fit well in the fortress laboratory I'm considering building as my next project.

Speaking of large projects, I've been building the Qi & Gong for my Victorian City terrain set. I'll be posting photos and tips for building large scale buildings in a future post. 

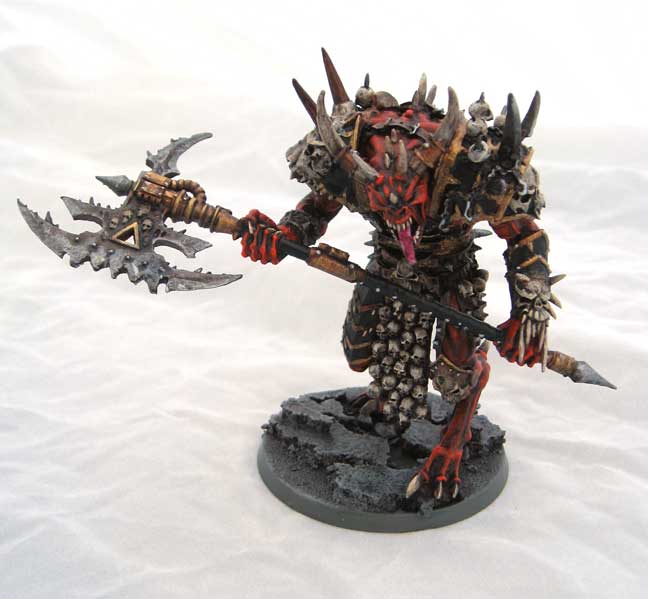
The Blood God is coming....

The Forgeworld Daemon Prince of Khorne and it's herald are now finished, you can see more photos in the gallery section of the site. These were painted as a commission for tabletop quality. Fun to paint since there's just so much detail that it doesn't take much to make them look really great.

The morning after....

I finished up the remaining models for the Ramos Crew.


The Electrical Creation is actually a pretty cool model. I didn't like the tentacles, until I realized that it was in fact a sack that the thing is popping out of. Still not sure that it makes sense for a spirit to be made out of metal, but the coolness factor of the model outweighs that concern. This time I went with a more corpse-like skin tone for the steamborg. 

An evening with Ramos...

On of my regular clients picked up Ramos and a bunch of Arcanist stuff to take advantage of the Free Gemlinette promotion and avoid the "price hike." So, I now had the Ramos box, a spiderswarm, 2 horecat prides, an electrical creation and a bras arachnid to assembly and paint to a tabletop standard. 

I began by putting everything together one evening, then priming them the next day. As the primer dried I picked out a color scheme for the crew. Simple silver and brass for the constructs and a deep blue for Ramos and the 'borg. I decided to make the horecats match the tiger I did for him before.

Setting everything up like an assembly line, I painted all of one color and then moved on to the next. Having cleaned off my painting table prior and putting all the colors I needed within arms reach expedited the process. I've noticed that GW washes dry much faster when the AC is on, something to keep in mind.

I finished up everything but the Steamborg and Electrical Creation in the course of a few hours. Those two need a little extra attention to make the fleash and burlap look good.


Off the painting table...

Malifaux – I've finally gotten around to taking photos of some of my own finished pieces. I'm primarily a Resurrectionist player and prefer to use Seamus. I find him to fit my style best. Nicodem and McMorning both see plenty of table time as each master excels at different strategies. You can see the updated photos in the Gallery link.

I've chosen to stick with a green theme for each of the masters. Even though though this is a skirmish game I like to carry through general color schemes so that the models feel cohesive on the table. With other models I try to keep the skin tones similar, for example the Belles are a bit fresher so they have more color, where the Punk Zombies are rotting and therefore have a greener hue to their flesh.

All of my Resurrectionists models are based on the Dragonforge Designs Cobblestone bases. These are easy to work with and a great deal, you can get 10 30mm bases for $10. He has a nice selection available, my Neverborn are based on the Forgotten Empires set and the Guild are on a combination of the Trench Boards and Broken Wasteland. I'll be posting photos of them as the move back onto my painting table. If you want a consistent look throughout your force I highly recommend these bases. The quality is outstanding and they are really easy to work with.

Victorian city continues ....

I've almost completed construction on the Victorian City commission. My client was very happy with the first three buildings. The next three are a bank, factory, and store. I've tried some different techniques out with these buildings.

The Bank uses some cake columns I found at the craft store. I figure a secure location like that would only have one entrance. I've been working on casting my own lamp posts. I think they have a better weight and feel than some of the other ones I've seen. Getting your mold right is a difficult process and I've tried several versions, none of which are as easy to use. Luckily I found this tutorial from the company that makes the silicone for the molds. This makes the process much easier.

The Warehouse/Factory uses corrugated cardboard for the rolling door.

As with all my buildings I use a Cricuit machine to cut out the letters so that they are dimensional. There's a program that allows you to cut SVG files which means anything you can draw in illustrator can be cut out. The smokestacks are plastic tubes from cheap little cigars. They have a better diameter than drinking straws and have more interesting end pieces. Thinking that this is a building that has fallen into disrepair, I gave the impression of plaster falling away from brick. Whenever I go to downtown Detroit I try to take pictures of the buildings to get ideas for textures. I scored the bricks into the building and covered it with wood filler to get the right look.

And finally there is the General Store. This is pretty standard construction, I added a awning to the front and will paint that up in red and white stripes. Giving a bit of color to the block. It really helped to create a template in Illustrator for the buildings. That way the windows line up and it's easy to swap the walls around. Here are the templates I created.


Tactics: Dr. McMorning

For a long time I didn’t like McMorning. I thought the model was great, and loved the concept; however every time I put him on the table he failed to perform.

So I put him away and played using the other masters and really started to see the synergy that the Resurrectionist list has to take advantage of. 

One day while going through the forums I found a clarification that suddenly made the Zombie Chihuahua much much better. For some reason I thought Get the Stick was just a variation of For You Master, then I realized what I was missing. That little doggie can “fetch” 2 parts per turn as long as it stays within 3” of McMorning. That little fact suddenly made McMorning a summoning machine. 

On paper McMorning looks like the “melee beatstick” for the Resurrectionists. He’s not. If you try to run him up like Justice or Lilith he dies...quickly.

What I’ve found works best with him is to hold back for 2-3 turns. He can let his minions weaken and tie up the opposition, while he cranks out a few Flesh Constructs. Around turn 3 or 4 have him run up (preferably with 6 or more parts) and summon a Construct for protection. Since McMorning is relatively fast for a Resurrectionist master, he can potentially move 15 inches in a turn and summon a flesh golem 6” beyond that. That becomes a pretty solid threat range.

For his crew I like to have waves of models. Usually I like to run three Canine Remains, three Punk Zombies, the Zombie Chihuahua and Sebastian at 30 points. Running the dogs ahead of the zombies will usually force the opponent to deal with the dogs first. They die quickly but it gives you a turn to set up your charges (as well as potential parts for later) with the Zombies.

Belles are fun to run with McMorning as they can pull models into threat range and help you to pick off models one at a time. They synergize well with the Canine Remains, especially if the remains can trigger rabies.

My favorite trick is to have McMorning, Sebastian, and the Zombie Chihuahua sit back and make stuff. I’ll usually cash in 3 stones for three body parts. On the first turn the Chihuahua uses Get the Stick twice. McMorning activates and hits Sebastian twice (cheating in weak damage) and gains 2 more parts. Then cast Monstrous Creation. Sebastian activates and Gathers Parts. Next turn repeat with the Chihuahua and have Sebastian For you Master to give McMorning more parts, cast Monstrous Creation again. Next turn you need to heal Sebastian, before you punch him for more parts. You can do this all game if you want but I like to run McMorning into the action on turn 4, carrying 6 or more parts. So long as the cards go your way you can summon a minimum of 3 constructs, if not more depending on what the body count looks like when McMorning makes his move.

The list can play the aggressive game as well. However you have to be very careful because McMorning has pretty terrible defense, and you want your stones to do damage, otherwise you can “guarantee” a hit.

Rancid Transplant is hardly ever worth casting. Spending cards and/or stones to make something Easy-to-Wound seems like a good idea, except it will usually die to the next thing that hits it. 

I haven’t tried The Hanged or Crooked Men with McMorning but they don’t seem to really have much synergy with McMorning’s playstyle. 

Mortimer is a good choice as well, especially since Exhume can now be cheated, netting you corpses that become two body parts. Sybil is a good choice as well since you can beat on her and she heals herself. 

Movie Review: Jonah Hex

Went to see Jonah Hex on Thursday with my wife. Overall I thought it was a fun movie. I know the critics panned it terribly, and Megan Fox's "acting" took the brunt of the criticism. Thankfully her speaking rolls were pretty limited. Besides, she plays a southern prostitute with a thing for scarred veterans, for that she did a good job. Josh Brolin did a great job, if this does well we might see a revival of Clint Eastwood style westerns. I haven't read any of the Jonah Hex books, but this movie did peak my interest.

It's odd that this fell in DC's Vertigo line, yet this movie was PG-13. It seems like an R-rated version would have been better for the dark character. 

Summer movies tend to be mindless affairs. This is no exception. The plot is the same as Wild Wild West and countless other pulp comics/fiction. Confederate general tries to destroy Washington with a super weapon, foiled by hero, hero is offered position as "national" sheriff. Not really a spoiler since its the predictable nature of this type of film.

The costumes, sets and cinematography were impressive. Visually this movie was inspiring and I might start some new terrain projects based on some of the sets. There was plenty of steampunk influence, crazy inventions, Eli Whitney as America's first arms developer was a nice touch.

The animation sequence in the opening was interesting but the style was to clean and Flash-like. It didn't fit with the style of the rest of the film. It was a good (cheap) way to tell the back story but should have been done in a rougher style animation to fit with the gritty feel of the rest of the film.

I'd recommend this as a matinee or twilight showing to watch. It's so short paying full price for a ticket seems like a bit of a rip-off. 

Badges, buttons or something

So I've been working on sculpting some badges for the different factions. The plan is to use them as prize support for events. Once I finish the original I'll make mold of them so I can cast them out of resin and affix some type of pin or magnetic clasp to them. I'm going to make them look like aged brass using an antiquing rub.

The basic shapes were cut out of Sculpty and baked until hard. I'm using Milliput to sculpt the raised portions of the designs. So far the Neverborn and Ressurectionist ones have the basic shapes finished. Now it's just a matter of smoothing them out and cleaning up the details.