Gaining Ground – Malifaux Event Reports

Malifaux – Recently I was able to attend two Malifaux tournaments both of which were fairly different as they used two of the scoring systems outlined in the Gaining Ground document. The nice thing about both events was I wasn't running them so I was able to look at the system from the viewpoint of a participant.

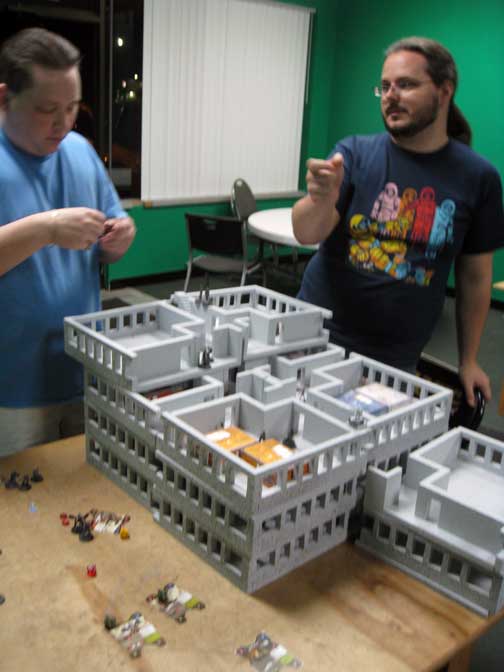
The first event was in Flint, MI at Gamer's Sanctuary. This is a smaller store that has much of it's footprint taken up by gaming tables. The terrain was mostly GW kits with some nice scratch built items as well. Unfortunately I forgot my camera and didn't get any photos of the tables. A few of the table had some weird bowing going on that was a little distracting but didn't significantly hamper gameplay. 

The event had 10 participants and used the accumulation format (Tournament points than VP's for tie-breaker) Each table had a fixed terrain element and each round there was a shared strategy for all players. Many of the players were relatively new to the game but there were very few questions or rules disputes that arose (I think the Rules Manual may just be working ..). The cap on VP's at 8 is a good thing because it limited players from wracking up extra points with Jack Daw. I came in third overall which was a bit of a surprise for me.

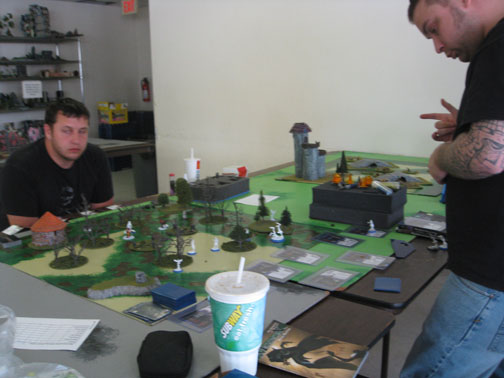
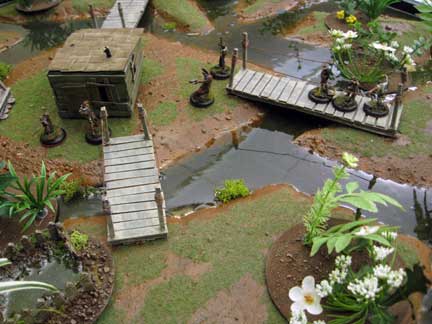
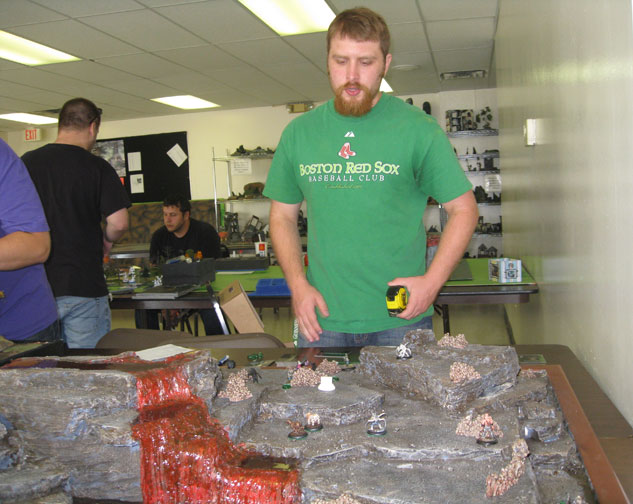
The second event was the following weekend at Pandemonium in Garden City, MI. This event had nine participants due to scheduling conflicts (only 2 of the players from their league made it to the event), so I was able to see how the bye system worked in practice. For this event I brought some of my tables but the event organizer chose not to use any of the special features or terrain elements so most of the tables were the same set-up with some sparse trees and a few buildings. 

Each round a shared strategy was flipped for and used the differential format. I think this format is a better gage of skill level then accumulation but I'm not sure about the bye system. Basically you average the player's overall score to determine the points for the bye. This leads to some weird situations but I think its fairer than giving a flat score for the bye. 

Overall I found it to be a fun event. However there were a few improvements that should have be obvious in my opinion. For the first round of an event you shouldn't pair people who came to the event together against each other, especially in small events like this where it's pretty easy to avoid. The other takeaway is special events/terrain are pretty important to creating an exciting game. In a fixed format if you don't have special terrain elements the random events should be used and specific to each table otherwise every table is essentially the same.

August 15, 2011 will be the start of a Mali Mini-League at RIW Hobbies in Livonia. Sign-ups will begin August 8. The event will be run like a tournament each week you'll be paired with an opponent and play a 40 Stone Scrap. The league only runs 3 weeks and takes place on Tuesdays at 7:00pm sharp. Pairings will be determined at 7:00 pm based on attendance. Cost is $5 which will go towards prizes. 


Summer Movies

So far this summer I've been to see a new "Blockbuster" every month. Some have been great others no so much. To the most out of the experience I prefer to go the Saturday morning/afternoon the day after the film opens. Not only does this save some cash but there seem to be less people so the experience is less likely to be ruined by some d-bag high school kids.

Also unless I really like a movie never pay for 3D most of the time it does nothing to add to the film and is just a means to squeeze a couple more bucks into the box office gross.

Pirates of the Caribbean: On Stranger Tides – Good movie, loosely follows the book of the same name. I'm glad they moved in a new direction replacing most of the supporting cast it allows for the film to feel fresh even though many of the same ploys are used throughout. "Oh is Jack gonna be a "good guy" this time or a shifty pirate?" You already know the answer but the franchise remains fun.

Transformers: Dark of the Moon – Way better than the second film which was full of to many explosions and junior high humor. This film actually does a decent job setting up it's premise and remains action packed. Of course it is a Micheal Bay film so all the bullshit people hate about him remains but, this is a fun summer movie about giant robots that turn into cars. Shockwave was really cool in this one.

Captain America: The First Avenger – Best movie I've seen all summer, honestly there wasn't a single thing that I had issue with. Even the hoaky patriotism tugged at my heart strings. I'm not going to say anything more than you need to see this movie.

X-Men: First Class – Fun period piece proves you don't have to be true to continuity to make a good comic book movie. This is one of my favorites, sure most of the powers suck but this is well done movie. Even if it does feel a bit rushed in some parts.

Crap I'm waiting for DVD:

Green Lantern – Sorry never was a huge fan and after the panning it got following it's opening I decided to wait for Netflix.

Harry Potter and the Crappy Snake Faced Wizard – Was a fan of the books lost interest in the movies after the third one, and given it had the biggest drop in box office history I'm sure this is one only diehards will love.

Thor – Again not a huge fan of the God of Thunder, excited for the Avengers sure, but Thor is just kinda lame in my opinion. I've heard good things about the film but can wait 'til the fall for the DVD.

Coming Soon
Cowboys and Aliens – Looking forward to this even though it may be a huge disappointment (Crystal Skull anybody?).

Smurfs – Scotty Smurf really? WTF.


It's getting cold in here.

Malifaux – Over the weekend I received another commission for a Rasputina crew (Oddly enough this is the first 'tina set I've painted). My client had no preference on the color scheme so I decided to go the traditional white and blue route. 

With the painted Ice Pillars I make, I've perfected my preferred method of painting ice. I use a bright baby blue as a base and shade it with a dark blue wash. From there I drybrush the baby blue, followed by a dove gray and finally white. The same method works well on the Ice Golem and Gamin, however it does require going in and painting highlights and smoothing out the shading. I used a similar method to basecoat Rasputina, and them worked out the details to bring her up to the appropriate painting standard.

I decided to used the Clear Ice Bases to base the crew. Rather than attaching the models prior to painting I prepared them on a separate base and attached them after they were finished. Clear resin can be tricky as tiny imperfections in the mold give it a slightly cloudy appearance. I've found coating the base with a gloss varnish clears up the cloudiness and gives it a wet look the feels like ice. After that's done I paint the edge of the base with a gloss black which seems to adhere better to the clear resin than a flat finish. 

After pinning and glueing the models into place, it's time to add the snow effect. I mix one part snow flock, one part tacky glue and one part white paint to create a paste. Carefully apply it to the base where you want snow. I then bury the whole base in snow flock and let it dry over night. Once it's dry I gently brush off the snow flock and seal the model with a matte sealant. If the ice loses it's sheen simply reapply the gloss varnish where needed.

Jersey Sure

Malifaux – So I finally finished up the Neverborn Hockey Jersey I was working on. Figuring out the front logo was a bit more difficult than I anticipated as just embroidering it to the front of the jersey wouldn't give the look I wanted. The jersey looks really great and I'm pretty happy with the results.

As a follow up to this I just wanted to direct people to another post which detailed the process of making the jeresey. This was a custom job and I have no intention of mass producing these, however I'm always on the look out for new and interesting projects so if you're looking for something special please just use the email me link to contact me directly to discuss the project. 

Some of the other projects I've done are motorcycle style patches for a gaming club, custom dice bags, award patches, jerseys and other random things.

Victorian City continues .... Part 2

I've finished commissioned board I've been working on.

The final three buildings have a gritty old town feel to them. This was and interesting project to work on because my client had a very specific budget and a need for general purpose terrain that would fit all the encounter locations. So I needed to find a way to make nice looking terrain with the time and materials I could allot to the project.

Overall I think they turned out well, using a template helped to save time as did the lack of doors and window frames. The client has been really happy with the building he's received so far and I think these will receive the same response.

In other news, I bought some "Brown Plastic Furniture" from thequatersource.com. My first impression of the kits was that they are really tiny looking. However, after placing them on a "normal" size base it becomes obvious that these are pretty close to the correct scale. I purchased the bedroom, bathroom, den and kitchen sets. On the site these are the cheapest things they sell. The quality is what you would expect from cheap chinese plastic. It's a hard plastic rather than the flexible rubber type so repainting them shouldn't be an issue. I'll probably use these in my western style buildings, since the scale is pretty close. 

For "overscale" buildings I think I'll need to stick with scratch-building my own stuff. Look for articles on building beds and tables in the future.

In the 1800's products like windows and furniture was made to a smaller scale than what we have today. I'm hoping to take my daughter to Greenfield Village this weekend, and get some inspiration for some new projects. In particular the working of the machine shops should give me some ideas for some Union buildings.

..............................................................................................................................................................

In non-miniature news, BP may have started a chain of events that will bring about the end times if you believe this report. I don't know how much credit I give a site advertising "cheap" ipads. Regardless the whole thing is a terrible mess. Benzene is not to be messed with, as a designer I know many guys who've developed prostate cancer because of the widespread use of acetone and benzene as cleaners and adhesive removers.

And then there's this.


Hell Yeah!

Helldorado – The english rulebook is finally available for pre-order. Looking forward to picking this up as the quick start rules seem geared more towards someone who has played the game before. I really like the setting and the models and can't wait to see what the full ruleset is like.

I've made a bit of progress with my skull piles and bone walls. Simply priming them brown and a quick two color drybrush got them to an acceptable level. I think I need to wash them and paint some highlights on to bring it up to a standard to match the rest of the board however.

What is this?

Malifaux – Looks like Wyrd has started releasing wallpapers of some different versions of the Masters. I'm really a fan of the two versions of Seamus. The "hulked" out version reminds me of Hyde from the The League of Extraordinary Gentlemen. Wonder what's up with the headless Justice ... could she really be dead? And is it just me or does that Belle in the background look vaguely like Pandora or Perdita?

Off the painting table ....

Malifaux – Just finished up another Sonnia Crew. This one had an interesting red and purple color scheme which is a bit different than what I typically get requests for. I think they turned out pretty cool. The flame was interesting to paint as my client hates yellow so I had to vary my typical flame technique to skew more to an orange shade.


On the painting table ...

MERCS – So I didn't find out about MERCS until well after the game was released. Which is a bummer because the limited edition model that was released with the pre-orders is really cool. So feeling left out I decided to make my own. I started with Kabuki miniatures Bug Hunter and added some more MERCS flavor by cutting up a CCC leader and demo.

Replacing her Alien style gun with the gun from the CCC Demo was fairly easy. I than removed the head and torso from the CCC leader to add to the base. So far I'm pretty happy with the overall effect. 

To hell with it ...

Helldorado – The hell board is just about complete. I finished the waterfalls and did my pours of water effects. Now all that's left is to go in and add some small details. Painting the skull piles, adding ripples to the water and touching up some spots. I'm really happy with how this board has turned out especially since I didn't really have a plan when I started. 

Working in the Stockyard

MERCS – I've been working on building a dedicated MERCS table. Currently I'm feverishly working on building a massive amount of ISO shipping containers. My goal is to have at least ten of these built and painted for games of MERCS. 

What I like about these is the versatility they provide in setting up a table. They stack easily and can add a level of elevation that is consistent and simple. With MERCS using cards to measure it becomes tricky to use more complicated terrain as you can't get the card inside of buildings or around corners etc. 

To go with these I've picked up a Zuzzy mat. These are really great if you don't have space to store a full size table. The mats are nicely detailed and fairly simple to paint. 

Magnets ... how the f@!# do they work?

Malifaux – Recently I began work on a new commission. The customer wanted modular magnetic bases, that could swap models from 40mm bases to 50mm and a set to swap 30mm models to 40mm. The idea being only having to assemble and paint one set of coryphee and two sets of spiders. The desire is for an industrial feel appropriate for the setting.

To begin I sorted through some potential components that would serve the purpose. I settled on industrial grating with field stone. The general feel is similar to some other sets of gothic/technology bases I've seen. After measuring and being sure the models could attach to a removable element of the base, I began construction. 

For the Coryphee I created a platform for the crouching one to stand on and a half globe for the pirouetting one to attache to. The half globe fits into a vent fan nicely. One of my goals for this project was to create bases that could be fully painted without the elements attached and still look good. 

The spiders were going to be an issue. I had to find and element that was sturdy enough to mount them to without them ripping off the base. After looking through my bits I remembered the Hirst Arts pipes. These are chunky enough to fit a magnet and sturdy enough to give plenty of mounting points. 

After completing the base work I began experimenting with magnets. I didn't want to just sink the magnets into the bases, as from past experience they do come lose over time. So I made a quick mold of the base and half filled it with resin. Than I put the magnet in and filled the mold. After a few tries I found the correct depth needed for the magnet to maintain attraction. Next I made a quick mold of the elements and repeated the process. TIP: Mark your magnets with a north and south side before you begin. I didn't do this with my first test and the pieces repelled instead of attracting. While my wife found this hilarious, it's a pain to try and figure out after the fact.


World Steam Expo

Memorial Day weekend I had the pleasure of running Malifaux demos both Saturday and Sunday. The event was lots of fun with plenty to see and do. There were several bands that I wasn't familiar with prior to the con, but they seemed pretty good for niche steampunk themed music. The costumes were pretty amazing and I'm sorry to say I forgot my camera when I was walking around the con so I don't have more pictures to share of the rest of the areas.

The vendor room was packed with interesting things. Lots of costumes and accessories, (gears, goggles, fancy hats and what not) I broke down and bought a top hat. However I refuse to pay for "welder's goggles" that have been modified. I'm going to make a pair of my own since the materials are incredibly cheap and I want mine to be Malifaux-themed.

Demos went amazingly well, I started 2 hours early on Saturday because the table was ready. As soon as I set up my demo tables and other gear, numerous people flocked to the tables to ask questions and learn more. Around 5 when the demos were scheduled to start we had a sudden influx of people, with numerous quick demos of the mechanics and an explanation of the game. Well over half of the people that received the "quick demo" came back later to either participate or watch a full game.

Sunday we went none stop from the time the room opened until it closed at 11:00pm. Luckily I had two guys there to help out. Both Trevor and Alan were super energetic and played tons of full demo games. Boiling the game down to a simple game of war with a twist was the easiest way I found to explain the mechanics to non-gamers (which we a had a ton of). It's an easy sell for people who have played Warhammer, Warmachine or another miniatures game in the past. Most of them loved the easy buy-in for a skirmish style game and thought the rules were a breath of fresh air.

Special thanks is in order for both RIW and Pandemonium (game stores in the area). Both stores provided coupons and information for their upcoming leagues. I'm hoping to see lots of new faces at both locations.

In other news, Pandemonium is starting their "Faction Wars" league Monday June 14th. Check the Wyrd forums for more info. And RIW has their Tuesday Tussels every Tuesday night (Malifaux has significantly out numbered the Warmachine players every week...No hate though). If you live in the Metro Detroit Area you should definately try to make it out to either location.

Sweat shop

I'm not sure how those kids in the Nike factory do it. Over the weekend I learned how to use an embroidery machine. My mom is as obsessed with craft stuff as I am with games, so after my sister and I moved out our rooms were converted into something of a sweat shop. Being an old farmhouse there's no AC so the rooms upstairs tend to get a bit warm. (Ok maybe sweltering is more appropriate).

A friend of mine is getting married at the end of the month so I wanted to make a unique gift rather than just give a card with a check. We've been in the same fantasy football league since 2003, so I though I'd make a his and hers matching jersey with their wedding date as the numbers. Seems easy enough, right?

Well my mom decided that instead of her doing the embroidery it would be "beneficial" for me to learn to use the machine. Overall it's a fairly easy process, there's a computer program that you use to convert the art files to embroidery files and then the machine stitches them. Of course it's not really that simple as you need to hoop and measure and watch the machine so it doesn't snag something etc. That said I became intimately familiar with a seam ripper.

The applique process is also pretty time consuming. You first stitch a guide than put the material on and it stitches it down. Next you have to  take tiny scissors and trim the material down to the stitches. You then put it back on the machine and it does the satin stich to finish it off. Once that all done there are a ton of lose threads that need to be trimmed.

The jerseys turned out great and I'm hoping they'll really like them. I mean who wouldn't like matching team jerseys?

In addition to that project I also worked on a custom hockey jersey for Weird Sketch from Wyrd Miniatures. We met at Adepticon and he really liked my "Seamus" jersey and asked me to create a "Teddy" version for him. The jersey looks great as I found a company that sells blank NHL jerseys that are the same as what they wear on the ice. The jersey is almost complete I just need to finish the logo on the front.

Review – Call of Cthulhu Card Game

Recently I had a chance to sit down and give the Call of Cthulhu Card Game a test drive (well not really a test drive since I own it, just got around to reading the rules and playing it). This is a Fantasy Flight game so of course there's some cool cardboard bits and some amazing plastic statues. The core game comes with everything you need to play and try out the various combinations of the seven factions.

Opening the box we find:

155 Customizable Deck Cards (split between each of the seven factions)

10 Story Cards

24 double sided Story markers (One side for wounds and the other side for success)

6 Plastic Cthulhu Domain Markers

1 Game Board

1 Rulebook

The rulebook seems to be a bit daunting at first but once you get through the 12 pages of rules it becomes easier to just explain how things work to another play. Each player choses two of the factions to build a deck, some combinations work better than others as a player can't have evil and heroic characters in play at the same time. I really liked pairing cthulhu with the syndicate, but any combination can work well. You start the game with 8 cards and play three of them as resources, each turn you can then play another resource. The system is similar to mana in magic, but rather than counting on drawing a specific card you can play any card as a resource. This leads to some hard decisions, as once a card is played as a resource you can't use it for anything else. After playing your resource you drain it by placing the nifty statue on the cards. The odd thing here is regardless of how many cards are under the domain you can only drain it once. For example I want to play a green card that costs 2, but my only green resource is on the domain in which I have 5 resources (cards), if I drain it I don't get to do anything with those left over resources. I like this as it forces you to plan ahead as well as the fact that some cards give an additional effect if you overpay for them.

After you've played your characters and whatnot you move into the story portion of the game. In order to win you must collect three story cards. During a players turn they can dedicate characters to a story and your opponent than can respond by doing the same. Each story goes through several phases and a player wins the phase by having more cards with the appropriate symbol on it for a phase. If you get to the final phase without your characters going crazy or dying you gain a token for the story. Once you have 5 tokens on a story you win it and have the option of triggering the event on the story card. Your opponent than gets their turn and does the same the response mechanic is interesting as it's hard to judge what you opponent will do because if they don't contest you, you'll gain two tokens, but if you totally dedicate yourself they can do the same.

I really like the game, my only real gripe is that it only works for two players, trying to modify it for multiplayer games would be a nightmare, so the amount of play it will see is fairly limited. The game does play fast enough to act as a filler between larger games so that's a bonus. The fact that it's a living card game is also cool as you know exactly what you get when you buy the game and/or expansion packs. The downside is even though it is a "living" card game some of the earlier release are very difficult to find and there isn't a concrete date set for reprints.

After doing some research it appears that there is a "official" format for events and deck building which limits you to three of any card. The sets only come with one of any card so to play competitively you'd need to buy three of any core set or expansion. That said I've never seen the game played competitively anywhere and don't find myself drawn to that aspect.

To some it up, this is a good game to bust out with a friend and have some fun. It's fairly quick to learn, yet has a depth of tactics to make it a challenging game. The components are great, the art has a pulp feel and it fits into the mythos without taking several hours to set up and play.


On the painting table ...

Malifaux – Ah summer, the joys of yard work and weekend events. Which means less time for hobby stuff. So while I have several projects to share/complete it may be a bit longer than usual between posts but never fear, there's stuff worth looking at.

I just started painting a Sonnia crew to go along with the Ortegas that I posted last month for a client. He requested a red an purple scheme for the models so they stand out on the table. So far I've got them assembled, based and the colors roughly blocked in. They're still in need of some serious shading and highlighting, but the basic color is there.

Just plain silly...

Malifaux – This week I decided to break out my Kirai crew, rather than run my standard list I decided to try something silly. I took part in a three player game on my "Hell" table facing both a 35-stone Sonnia and a 35-stone Vonschill list. We deployed in 8"x6" rectangles equally spaced in a triangle.

Here's the list I ran:

Kirai (6 Stone Pool)
Killjoy
Spirit of Lost Love
5 Seishin
Necropunk
Nurse

My idea was to turn Killjoy into a spirit and heal him up with the nurse, than do the same to the nurse and have that nightmare running around the table. I drew the cards to pull it off in my opening hand, however I got overzealous with trying to scare Von Schill back down the water fall, with the necropunk that was in his face turn one. Rather than run away from the thing like I anticipated my opponent doing, he stood his ground and killed it. With Slow to Die I summoned Killjoy, and attempted to run through his crew. Some bad flips on my part limited the destruction and the Nurse and SoLL were to far away to save the big guy.

On the other side of the table I sent Kirai and the Seishin to deal with Sonnia. An amazing turn one saw a Shikome and Ikiryo summoned right in the middle of his crew. The Shikome forced Sonnia to burn through all her stones preventing damage and then the last to not run away when she activated the next turn.  The Shikome died in the following turn, and Sonnia put up Inferno. A healed up Kirai burned through her final Seishin to summon a Shikome which proceeded to kill Sonnia and her explosion wiped out her crew.

The list has some potential to be pretty ridiculous, but I think I burned through my spirits far to quickly and didn't get Kirai anywhere near the action to gain more Seishin. We called the game turn four as it was getting late and I only had the Lost Love, Nurse and Kirai with 1 wound left, on the opposite side of the table from Vonschill, 2 Librarians, and some wounded Friekorps. I think I could have potentially come back given the right draw, but I didn't see a single crow in that last turn and was unable to pull off any of the spells I needed.

Apartment 13 ...

Earlier this week, I had a chance to play a special scenario of MERCS using some home brew rules. The game was really fun and we had a chance to try out maverickman's foam apartment building. 

The terrain piece covers a 2'x2' area and each floor consists of four separate tiles. For our game we started on the roof and had to fight our way out of the building. 

We used the zombie stats that I posted up earlier this month and each chose a five man team. The apartment building was populated with about 40 zombies. Each player randomly chose one member of their team to start. Each round a new MERC would appear at one of the entrance points. The player with the fewest MERCs on the table randomly chooses a new team member to join the fight. In the event of a tie for fewest MERCs, we rolled off the determine who got a new team member. 

The zombies would move one card length towards the source of noise anytime a shot was fired (silent weapons don't trigger a move ie flamer). After all the MERCs activate the zombies move toward any MERC in LOS, attacking if they get within a base. We also determined the zombies moved at the same time, otherwise overwatch wipes them out to quickly. 

The game was a ton of fun and I look forward to trying something similar again. During the first turn all the MERCS were wiped out and became zombies. The next turn our team members were better equipped to handle the horde, but still had a tough time clearing the floor.

Off the painting table ...

Malifaux – Just finished up another Ortega crew for a client. This was my first time painting the Grandma Ortega model and I'm pretty happy with the results. You can see the full crew in the gallery.

Get to the Chopper

To go along with the MERCS/Zombies expansion I've been tinkering with, I decided that there should probably be some scenarios. As much fun as it is tromping a horde of zombies across the board, eventually it's going to get old. So to keep it fresh and fun I've developed some scenarios to accompany the rules.

The first set of scenarios is geared towards having one player control the zombies per the Zombie Master rules. These could be linked together as a mini campaign or just played as one of games.

Scenario 1: Patient Zero

A disenfranchised group of scientists has created a virus which is geared to bringing the Megacons to their knees. In order to develop a vaccination the original carrier must be captured.

Set-up: The table should be set up with several one and two story structures as well as some barrels, shipping containers or other industrial terrain. Each MERCS player sets up on a board edge. The zombie player sets up anywhere 2 card lengths from the board edge.

Mission Goal: After set-up the zombie player notes one zombie to be "Patient Zero." The MERCS player must capture "Patient Zero" by reducing it to 0 Blood while in melee. The zombie player wins if Patient Zero avoids capture or all the MERCS are killed.

Game Length: The game lasts for 6 Turns.


Scenario 2: Secure the Lab

Intel has revealed the location of the lab in which the virus was created. The lab must be secured to further research and development.

Set-up: The table should be set up with several one and two story structures as well as some barrels, shipping containers or other industrial terrain. There should be a structure in the center of the table. Each MERCS player sets up on a board edge. The zombie player sets up within 2 card lengths of the central structure.

Mission Goal: The MERCS must capture and secure the lab. At the end of the game if the MERCS player controls the lab (not zombies within the structure) they win. The zombie player wins if there are any zombies still in the lab at the end of turn 6

Game Length: The game lasts for 6 Turns.


Scenario 2: EVAC

After securing the needed information, it's time to get out of dodge. 

Set-up: The table should be set up with several one and two story structures as well as some barrels, shipping containers or other industrial terrain. There should be a structure in the center of the table. Each MERCS player sets up within 1 card length of the central structure. The zombie player sets up anywhere on the board at least 1 card length away from the central structure.

Special: Zombies killed respawn on one of the board edges adjacent to the EVAC site.

Mission Goal: The MERCS must get to the chopper. Nominate a 1 card x 1 card section on the board edge or place an appropriate vehicle on the board edge. The MERC player must get his team to the EVAC site or be left to the horde.

Game Length: The game lasts for 6 Turns.