Airbrush Action - Learning on the Fly

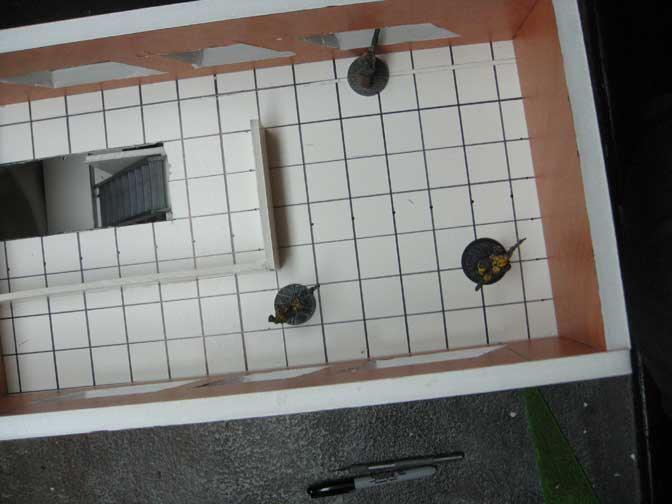
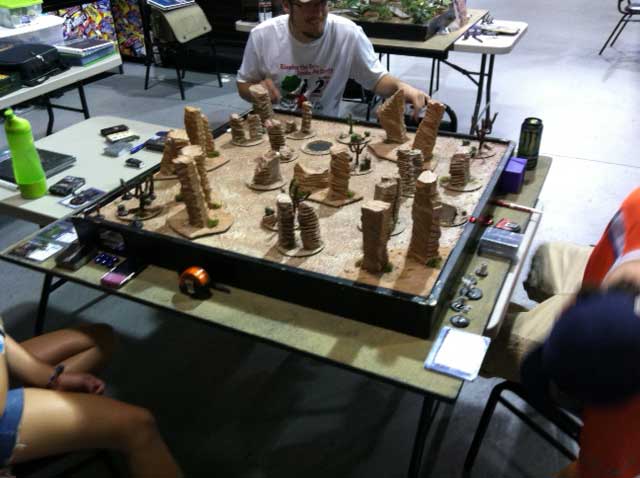
Terrain Making – Last Christmas I received an airbrush kit from my in-laws, nothing super fancy but just a simple starter kit as I've been meaning to try airbrushing terrain. Being as most terrain elements are fairly large painting with a regular brush can take some time and effort to smooth thing out. Up until now the kit has sat in my basement next to the "pressure pot" (that I also received as a gift) that I need to pick up the pipe fittings to convert it to a proper "casting pot."

I postponed busting out the airbrush until now because airbrushing has a huge amount of set-up and takedown work. First I needed to clear out the garage to avoid potentially over spraying on stuff I didn't want to be painted or have a chalky misting of overspray on. 

Next up was learning how to take apart and reassemble the brush. When I was a kid my mom bought me a cheap plastic airbrush that didn't last long as the tips were plastic and didn't have instructions on how to clean/take them apart. After slowly destroying that airbrush from lack of care I lost interest in it and moved on to traditional brushes. As an adult with an appreciation for "having nice things" I spent a long time watching videos and reading articles about how to take car of the brush. All of them insisted on taking it apart and reassembling it clean so you don't mess it up.

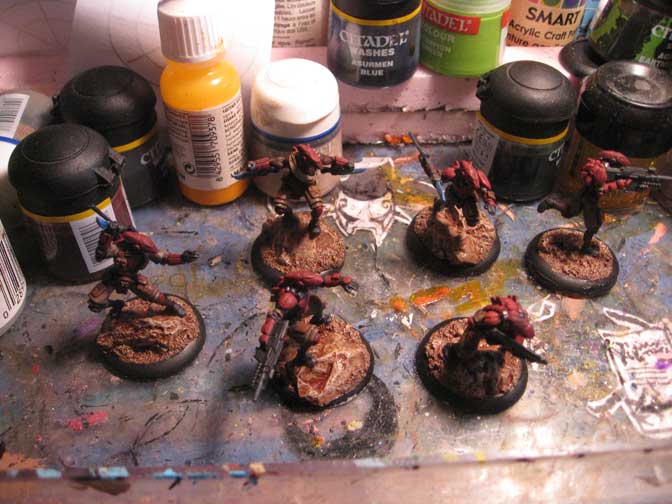
Armed with a few drop cloths and the near future terrain I prepared my spray room and set everything up. In order to feed paint through and airbrush you have to thin it down. I chose rubbing alchohol as it dries fast and doesn't mess with the colors to badly. (Note: old thick paint will not thin down no matter how much you thin it. The chunks will clog the nozzle and force you to take everything apart and clean before you can spray again.)

So after cleaning the chunks out of my nozzle and a trip to the store to buy fresh paint and empty flip top bottles, I was ready to paint. I used the house brand of Michaels craft paint which is pretty thin to start with. Mixing it 50/50 with rubbing alchohol yeild me with a thin paint that sprayed without splattering. 

Deluxe Apartment in the Sky ... Near Future Progress

Terrain – I'm trying to spread my time on this project so I can keep the various structures in the same state of completion. With previous projects I've been gung ho and plowed through until completion, which resulted in some less the optimal terrain pieces for actual game play. (Notably the Qi & Gong and Ressurectionist Lab, both have some spots that are hard to navigate during the game notably because of fat finger syndrome)

For this board I'm trying to get each piece to a semi finished state to play some test games before I move into painting. Because something that looks cool and fits the models doesn't necessarily mean it will be a fun piece of terrain to play games on. 

My major concerns with the apartment building lie with models moving around inside. While it was easy enough to build the floors to be stackable and removable, I'm not sure how much scatter terrain is needed inside the building. Sure it will look cool to have it fully furnished, but will it hinder gameplay?

One of the issues I have with all the laser cut MDF buildings that have popped up in the market as of late is the last of interior details. If this is an apartment complex, how do you get to the second floor? Catwalks on the exterior of the building are pretty inefficient and unlikely, unless the buildings are scavenged together from junk. Sure it makes for decent cover and what not, but then so does just building a bunch of random shapes like a paintball field. Not exactly realistic (in a game with alien soldiers wielding chainsaws and laser guns realism is key ... right?) which for some reason bugs the hell out of me.

To attempt to solve this I build a stairwell within the apartment building. It took a bit of trial and error but eventually I found a location that would be easy to move standard human size models up and down as well as be able to replicate the firefights that happen in said stairwells all the time in movies.

We Be Clubbin' ... Near Future Board Progress

Terrain – I spent some time working on the club terrain piece for my near future board. After constructing the walls I realized this was going to be a rather bland structure since it has no windows and only one entry point. The interior is fairly interesting with several height variations leading to the private rooms and stage as well as the main entry check point/bar.

To add some additional interest to the building exterior I've cut some strips of lightweight cardstock into "futuristic shapes" (yes that means variations on hexagons...) While I was cutting strips Empire Strikes Back was on Spike so I gleaned a little inspiration from the set pieces in the film. Most of the futuristic feel of the set comes from the various panel shapes in the background. I also have been paying more attention to newer commercial buildings and noticed most of them use something called efface for the exterior. Essentially what that means is the exterior walls are covered with a foam product skinned with concrete, this allows for interesting shapes at a low cost.

Taking these two points of reference I've added quite a bit of exterior detail that will bring out interest areas without resorting to the typical rivets everywhere look of some futuristic terrain.

I also created the removable roof. Initially it fit a little to snug, after trimming the paper backing off the foamcore on the interior side it is now easier to remove and shouldn't cause to many problems lifting off during gameplay to place models inside.

For the large sign on the exterior I opt to go with a silhouette and a large billboard. I'm still contemplating how I want to do the name of the club. Most likely I'm going to cut out the letters and paint them like neon but I'm still on the fence. For the actual name I'm leaning towards "The Slippery Kitty Lounge" this seems to be a solid name that will fit in numerous settings. 

The roof needed quite a bit of detailing. Because the structure takes up a significant portion of the 3'x3' board, I have a feeling the rooftop is going to be a popular perch. Because of this I added some HVAC units and other structures to the roof to provide some cover. Ideally I don't want the roof to be just a sniper's nest but an area that could be contested by several models without becoming a no mans land if there is a model at a higher vantage point. The HVAC units were made from some Platformer parts I had laying around as well as some other bitz.

I still have some other details that need to be figured out before I can move onto painting this building but at this point I think it's ready for a test game to be sure it works as intended.

In the year 2000 ... Building a Near Future Board

Terrain – I've begun the groundwork for my near future board. After doing a few sketches and looking at the large amount of laser cut terrain available in the market today I decided to pull some inspiration from these designs. While I really like the look of the laser cut mdf I can't justify the cost when I can build eactly what i want myself. Sure it might be easier to just buy and glue together a kit (probably will go that route in the future...) but I'd like to build everything from scratch for this board.

After laying out some paper shapes on my Zuzzy mat I got a rough idea of what type of layout I wanted to create. My thought is to create a slum/industrial area and I drove around Detroit for some inspiration. In many seedier neighborhoods you have truck depots/shipping yards that but up against residential areas and also feature some of the less desirable businesses. For my purposes this is going to be the ideal battleground. The structures I have planned are a three-story apartment building, liquor store, gentleman's club and a fenced in shipping yard; combined with the variety of 1:43 scale cars I've found I'll be able to detail out the neighborhood easily.

The first step was determining a size for my buildings as there are several different systems I plan on using this board for it was important to make sure the scale made sense for everything. In MERCS the movement cards are about 3.5" long, so I used that as my basis for the height of a standard wall, this way it's easy to determine how many MP it takes for a model to ascend a level. Most other systems have 4"-6" as a standard move so this size will work with them as well.

I happen to have a bunch of 1/2" gator board that I saved from a dumpster (technically) which I decided to used as the basis for my walls. The nice thing about gator board is it has a styrene skin which holds up better than paper. This board is very dense and provides a sturdy foundation for the walls, especially when cut down to small sections like these buildings. It is however difficult to cut as the plastic skin is so durable it will take a few passes with the blade before you get to the foam.

After messing around with a few designs I came up with a look I like for the apartment building and have begun cutting out the windows and cutting cardstock to detail the exterior of the building. I'm going to give the impression of concrete formed material with some geometric patterns. I think this will look futuristic enough without going over the top.

I also cut out the walls for the club. I went with an "L" shape that can break up the table in some interesting ways. My plan is to fully detail out the interiors of these buildings and add removable roofs so you can easily enter and exit them.

Next steps are to continue detailing the building exteriors and devise a method for stacking them that won't be to difficult to remove during game play. 

Parking Lot Pimping - Near Future Gaming

I'm beginning to re-look at a near future terrain project I've had sitting on the back burner. I've been kicking around the idea of running a Judge Dredd game as well as busting out MERCS again. Both of these games take place in the near future and as such need a different style of terrain than my ruined city scape from 40K and my wild west/victorian themed terrain from Malifaux. 

The problem with near future is getting it to feel right. We're obviously not going to have flying cars all over the place anytime soon. Maybe some type of hovercraft or VTOL style transports for the military and very rich but the common man is going to be stuck on the ground for the most part. I like the take on vehicles from the Dredd 3D movie and also in Looper. In particular in Looper with many cars having solar panels or other modifications to older model cars to make them use an alternative fuel. It's subtle but you can see it if you look close. In Dredd they look very similar to what we drive around today.

Keeping that in mind I've been looking for a good solution for cars in the 28-30mm scale. I've found the 1:43 scale is pretty close for most miniature lines in those scales. Some look chunkier than others but overall it's a passible solution. 

Having settled on a scale that should work I set off to find some cars that would work without breaking the bank. First stop was Toys R Us, having been in the car aisle more often as my son has decided cars are his favorite toy, I remember seeing something that might work. Toys R Us carries a store brand called Fast Lane which is fairly inexpensive and of decent quality. (This is the same brand that makes the Western Train I use for Malifaux) I was able to find some three-packs of 1:43 scale cars, mostly of the sports car variety, but higher up on the shelf I saw some semi-trucks in the same scale. One of which had a bunch of wooden pallets which will be useful for scatter terrain at a loading dock. They also had some helicopters that might be cool, but I passed on them at the moment.

The next stop was Dollar General. Here I was able to find some 1:43 scale Bburago cars. These are also really close and they have a few different styles on the cheap (under $3). The store by me was fairly limited in selection but I was able to find a few different body styles. 

Once I got them home and unpackaged everything, (stupid twist ties and zip strips) I set them up with a variety of miniatures from different lines. Pictured are a Zombie Stripper from Reaper, a Zombie from Studio Miniatures, a Judge Dredd model from Mongoose, a CCC MERCS model, and two Necromunda Gangers from GW. As you can see from the photos they're a really good fit. I imagine I'm going to need to repaint them all to match the look and feel of the models but until I get around to that they look nice on the tabletop.

Chop Shop – Repainting 1:43 scale cars

I decided to begin work on my Near Future board. Well, not really the board itself but rather some of the scatter terrain. With all the cars I have laying around now it makes sense to begin the repaints so they match up with my style of painting. While I suppose I could just dip them in stain and call it a day ... that's not really my style.

Step one is to mask off all the windows and headlamps. I like how the clear material looks and don't want to loose that with the repaint. So I dug up some blue painters tape and began the tedious process of masking and trimming each window. It's not a difficult process however it takes time and patience to do it right and not scratch up the plastic with my blade.

After trimming them up I sprayed each car with Duplicolor Dark Gray primer. I really like this stuff it drys fast and smooth giving me a nice surface to paint. 

I've decided to recreate some of the cars I've pimped out in Saints Row 3. I really like the purple and silver scheme of the protagonists in that game and think it will add some much needed color to what could be a rather bland board. (most urbanscapes have this boring gray tone which I want to try and avoid this time around). 

I'm also working with some Laser Decal paper to try and figure our how to tint the windows out. I'll probably add some of the decals to the windows as well to call out and personalize the cars similar to what you see in urban neighborhoods.

MERCs-like Halloween

MERCS? – Our annual Halloween zombie fest happened again this year. Ben took the iniative to create a Left 4 Dead variation using the Zombie rules I came up with a while back and generic survivors. Basically the table was set up as a 3'x6' board covered with terrain. The survivors have to run across the board to grab and objective and then run back to trigger the escape button. Easy right?

To start the survivors have no weapons. Throughout the board are random tokens that allow you to either heal or draw an item card. This is how your character levels up during the game. Essentially going from a sneak-theif to a bad ass zombie killer. The rules set is based on MERCS with movement cards and firing numbers. It worked really well and fit the bill for what we were trying to do.

Zombies are loosely controlled by a GM spawing a random number each turn and moving toward what ever they can see. If the survivors fire a gun or kill something it generates noise which overrides the LOS movement.

Once the survivors reach a set point on the board an event triggers which essentially changed the rules of the game. The instance we had was a flash flood. Which reduced movement and increased firing numbers.

The surviors died several times while moving across the board and had to be respawned by a teamate to continue the game. We made it to the objective and then had to call the game because the store was closing.

Overall it was really fun, in our post game parking lot discussion we had some tweaks we would make to the game to make it move a little faster and smoother.

• Reduce the size of the map – 6' is really far to cross when your model moves and average of 6" per turn. I think with a 4' map we'd be golden and have a shot.

• Give survivors a basic weapon – Having to run a grab items was fun, but it seriously slowed down the first part of the game and forced the survivors to make some "bad" moves.

•  Allow models to "fire and move" or "melee and move"– some spots where we had to choose to kill a zombie or run made it impossible to get away. Thematic for sure but it's more fun for players to be able to smash skulls then to run and hide.

Paid in Full: Commissions - How much is your time worth?

Random – Lately the number of inquires I've recieved about commission work has dramatically increased. Many of these questions have been about how to determine a price when doing commission work. So in an effort to answer these questions for the larger population, here's the basic principles I use when putting together a quote.

1. How much is your time worth? When considering doing "craft" projects that you intend to sell to others the first thing you need to consider is how much is your time worth. For the most part you're not going to make $16-$30 an hour painting models or building terrain. Even when painting to a Golden Daemon or Crystal Brush winning level the amount of time you put in usually won't equate to "real job" money. Most gamer's won't pay more to have a model painted then it cost them to purchase so keep that in mind when putting together a price. Also remember if you have a wife and kids or girlfriend your hobby time is probably limited. When I started this site I was between jobs and had much more time to build and paint stuff. Now my time is limited so it's important I enjoy every project I take on and be as efficient as possible so I'm not working for pennies an hour during my free time.

2. What are your material costs and how do you recoup them? Paint, primer, glue, sand all cost money. Good paint brushes and glue cost more. While it can take a while to burn through a pot of paint, you have to consider the costs when figuring your price. One thing I've instituted is buying new pots for army scale projects and billing them as a line item. Once you're done with the project your can give the remainder to your client in case they need touch up or add models they don't need or want you to paint.

Terrain Projects can get tricky as sometimes you use found materials and other times you need to buy foam and other raw materials. Most of the time you're going to buy in bulk and have a bunch of stuff you need to store. If you have limited room you might need to invest in space to store that stuff. Right now I'm not quite at that point but it's getting close.

3. What are your customers expectations? This is a big one. Some customers just want a three color minimum. While other might ask for table top quality expecting to be able to enter them in a juried contest. Managing those expectations and delivering as promised is huge. I've heard many horror stories from painters about unreasonable clients that make requests well beyond what the initial request was and then want to pay less because the quality is what was expected. On the flip side I've also heard numerous stories of painters that send over a quick shot of the base coated model only to have the client "love it and want to know how quick it will ship." That second one is rare but important to remember as some clients dont' want you best work. They just want some color on the models. Knowing this you can save yourself a ton of time.

4. How are you going to get it to the client? Nobody considers shipping costs. One more then one occasion I've  had to deal with customers complaining about shipping, "DUDE the flat rate box is only $5, why does it cost $20 to ship to me in Antarctica? You're trying to RIP ME OFF!" You also see this all over several companies forums. The reality is shipping is expensive, foam and packing materials are expensive. Tracking and insuring packages is expensive. And even it you do everything right the post office, UPS or Fed Ex will inevitably screw up on a one-of-a-kind rare product. It happens, sending boxes across the country or world has risks. Most of the time it's not an issue but when it is will be the one time you didn't insure or track a package. C.Y.A. 

While the post office and FedEx provide free boxes the packing material is not free. Even cheap foam is a $1-$5 a yard minimum. If you're shipping painted models wrap them in foam and pack them well. Otherwise it's likely to be damaged during shipping. For an order of several models you can quickly burn through a large amount of foam and tape. So figure in the cost of shipping and add a few dollars to cover packing materials otherwise it will eat into your already tight bottom line.

5. Don't get burned. When painting models this isn't as big a deal as if you don't get paid keep the model and resell it. So long as it's nothing to obscure you should be able to get at least 40-50% of the retail cost, more if you're willing to wait. But terrain projects are another beast entirely. Custom terrain is hard to sell once its built. Particularly if it's custom to specific client. After getting burned a few times I put forth a 50% nonrefundable deposit. That way if I have to go buy a bunch of supplies for a project I'm not going to be out of pocket if the client changes their mind or "is broke this month bro."

6. Be transparent. Have examples of your work and the various levels of quality and pricing tiers available. Put them out there for the work to see. Eventually people will start to connect with your work and ask about pricing. For example for a table top quality miniature from a skirmish game I typical charge by model size: 30mm - $8-$12; 40mm - $10-$15; 50mm - $15-$30. This gives a good starting point. But for an army level game it's unlikely you'll get that much per model. At this point most people want a "lower table top quality" which falls more in line with the 25mm- $2-$3, and goes up from there.

For terrain projects it helps to come up with some designs you can quickly replicate and make a bunch of them at once. Assembly lines are good for managing time and if you make something that can be used for several systems you diversify your client base. For example the swamps I sell in the online store I typically make 6-10 of them at a time. Since they use water effects it's better to mix a larger pot of it and pour all at once than to make small pot and have a bunch of waste. Having an existing stock also lets you focus on other projects and have a reference point for custom orders.

Being consistent helps you to manage your time and be able to quickly quote a price to a potential customer. I hope this answers any questions for aspiring painters and potential clients.


Brown Black really? – Step by Step Library Board (Part Four)

Relic Knights – Continuing my progress on this library board I've gotten some of my bookshelves assembled and smoothed out. Gluing them together I ran into some issues with gaps and shelves that are slightly different heights. I used some Dap spackle to fill these in.

After sanding them smooth, it time to paint. I found a dark brown satin finish spray paint to do the base coat. I have this crazy idea that the book shelves should be the same color as the Ikea book shelves I have in my game room. The problem I have is: What color is black brown exactly? It's not really a color at all at first glimpse it seems like I could take in in and have it color matched at Home Depot, unfortunately the effect seems to be from layering two colors so you get hints of brown when the light shines on it.

My solution was to spray them with a dark satin brown and then apply dark walnut acyclic wood stain. This did my basic shading for me and brought the color closer to what I was looking for. I'll tweak it more as I move into the detail painting of the shelves.

With the sections I've base coated so far I have a pretty decent area of the board covered and once I add in some statuary I think it will start to look more like what I've envisioned in my head.

Shelved - Step by Step Library Board (Part Three)

Relic Knights – With the basic board done it's time to populate it with terrain elements. I sat down and did some sketching to plan out what it is this board will need to feel like a library/school. Usually I don't really sketch anything when I'm building terrain as I like to play it by ear and build what I see looking at the parts I have to work with.

While that system has worked well for me in the past it also have some drawbacks, namely not having a solid plan means some projects just go on forever. I've also run into the problem of playing it by ear and having a piece that looks great but is impossible to store. 

After doing some thinking I decided that I will need several elements to make this board look and feel like a library. I also came up with some optional elements to make it feel more like a school, anytime a board can pull double duty with minor tweaks you should include that in your planning.

BOOKSHELVES – I decided the primary terrain element for this board is going to be various bookshelves. To make the best use of my time I decided on several configurations that could be easily repositioned to create a new layout and were small enough to be easily stored. I settled on a single-stack L shape, a double-stack L shape, a single stack S shape and a few straight sections.

STAIRS - I'm still looking for some inspiration on these. My first thought was to use wooden balls and build the stairs going around them. I think that could look mystical and cool, but I'm afraid they won't have enough height. I've been looking at using a tube and ringing the steps around that to give some more height and provide someplace for snipers to nest. 

STATUES - I need to find some cheap Egyptian style statues. I see this more as a library/museum of mystical power and history so incorporating some statues and other relic type items will give more scatter terrain and add a bit more character to the table. While the bookshelves I found are really cool a table of nothing but bookshelf is going to feel like a simple dungeon.

ARCHES - To help give the feel of being in a massive structure I'm considering building some arches. These will provide some more interest areas as well as some minor cover for long hallways. I'm not 100% sold on the idea yet but will  probably at least build one to see how it looks.

Here's the optional stuff. To try and get more life out of this board I'm considering adding some school elements.

DORMITORY - Essentially the idea would be to create some rooms (or walls) that can divide up sections of the board into rooms (essentially buildings on something this big). I have some beds that will make a good dorm room, they're just over 1" high so it will be a bunch of light cover in a small area that could be interesting.

LOCKER ROOM - I'm not sure about this one. On one hand I think it could be fun to build on the other I don't know how functional it will be in game terms. I'm going to revisit my sketches before I try to build anything.

BOILER ROOM - This will be easy a room full of pipes and techy looking things. Gives me the chance to pull in some additional sci-fi elements and add some grime to the table. I'm not sure it's necessary yet but as an option I like it.

STAGE - Most schools have stages for presentations and talent shows. If I build one this could potentially serve double duty as the Star Theater for Malifaux. Not sold on it yet but we'll see.

On the Painting Table ... Nuclear Winter

MERCS – In and effort to complete my collection I've started painting a Kezi-Waza force. I really like the look of the models and can't wait to get them on the table. After opening the box I was disappointed to see I was missing some parts. The leader's missle wasn't in the box. I've contacted Brian at mercsminis and he assured me they'd get the part right out to me. While I patiently wait for that to arrive I got to work assembling the rest of the team. 

First thing I noticed is these are particularly fiddly to put together the arms didn't seem to match up as nicely as the other MERCS models I've assembled. After a bit of pinning they fit together pretty much as pictured on the box. There is a nasty gap with the cloaked sniper head that I need to fill with greenstuff and the Heavy Hybrid wouldn't hold his gun with both hands no matter how I tried to position the arms. Eventually I got it to stick with only a slightly noticable gap behind the arm. I mounted these to my urban base set and am happy with how they look. 

After priming them with a dark grey primer I went to work painting the armor plates. I opted for the "official" orange scheme to match the dice that came in the box. The fabric is a nice khaki brown. 

On the painting table ... MERCs

MERCS – Several guys in my group have picked up MERCS starter boxes and have asked me to paint them up for them. The first one to come across my table is the USCR which I ironically just finished painting my own. Luckily my client didn't want the white color scheme and wanted something primarily red and black. Taking this cue I decided to base them on the old Soviet Flag. Red armor, with yellow marking and black/grey cloth with a deep brown leather for the pouches.

For the bases I chose to use my "Imported from Detroit" asphalt bases I think they work better with the support details that the models are standing on then my ice bases. Learning from painting my own it became obvious that the models have too large of a footprint to mount to jagged edges without some significant tweaking and gap filling. 

To paint these up I blocked in the red areas with a deep crimson, the areas that will be black with a dark grey and the pouches with a chocolate brown. I've found the easiest way to paint black cloth is to paint it a dark grey and wash with one or two coats of black. This adds the natural looking shading and is easier than trying to paint the highlights directly. Of course after the wash I go back in and pick out the highlights anyway but it's easier to see them after the wash as well as making the blending feel natural.

The red armor plates were painted the same way as I did with my sefadu, after the crimson base coat I used and earth shade and baal red to deepen the tone and then went back in with the base to pick out the edges. Once that dried I used the fluorescent any color red highlight I have to make the highlights pop. Next I'll add some simple yellow striping to denote the squad members.


On the painting table ... USCR

MERCS – The next Megacon I've decided to tackle is the USCR. From what I've seen of them on the table I'm not sure they fit my playstyle but with a small scale game like this it's helpful to have extra factions around. Most people I've played a few games with either really like the system or hate it. A good chunk of them don't want to invest in yet another mini game so having somthing for them to borrow means more nights that my group will play MERCS or at least consider it for the rotation.

Assembling these models was fairly simple as most of them are one solid piece. The mold line fall in an odd place on the "kicking guy" and were tricky to scrape/file off. Otherwise I didn't have any major issues with the models. As I plan on mounting them to clear bases I lightly glued them to the slotta bases they came with for priming and painting.

I like the look of the studio models so I decided to mimic that paint scheme. The cloth portions of the models were based with khaki, the pouches all with a bright brown and the armor with a light grey. After a quick wash of black on the grey areas I had a better idea of where the highlights would need to go. While the wash dried I worked on mixing up a white color using a light grey base, titanium white, some blending medium and water. This works well when I want to paint in layers as I can slowly build up to the final color with minimal additional shading.

After getting the majority of the paint work done I clipped the models off the tabs and pinned them onto my Rock Bases. This set was cast using clear resin like the Ice Pillars I've done in the past. Mixing some snow flock, white paint, tacky glue and a little water I created a paste that looks like snow. After applying it to the base I covered it with loose snowflock and let it dry overnight. After dusting it off you have a pretty convincing looking snow cover.

I'm trying to track down some star transfers to finish these off as I really don't like freehand symbol painting if I can avoid it.

One step closer ... MERCs

MERCS – I finished up the sefadu Megacon the other day. I'm pretty happy with how they turned out. The tribal markings on the helms were tricky but I think keeping a simple pattern makes them less busy. To do the yellow I thinned out some Tau Sept Ochre and lightly outlined the pattern. Once I was happy with that I added a second coat of the Ochre to thicken the lines. I then went in with a bright yellow and added some hightlights to make them pop a bit more.

I added some tall grass stalks to the bases. I think it feels close to the photos I've seen of Africa or at least is a good facsimile. As with all my models I added some felt to the base to help keep them from tipping over on an uneven surface and sealed them with a matte clear coat.

Next up is the USCR on crystal clear Ice Bases. Eventually I'd like to own all the Megacons. MERCS probably won't ever be my main game but the small model count and fast paced game length makes for a great once in a while game. I find it really enjoyable to paint a single six man squad. It's not enough to get burnt out on, but just enough to tie together with a single paint scheme.

If you'd like to learn more about MERCS the quickstart rules are online here.

It's Growing ... Gamer's Gauntlet Demo Nights

Malifaux – The turn-out for demo nights seems to be growing steadily. Which is pretty inpressive since the store still doesn't stock the game. (Soon I hope, let them know you'd like Malifaux and MERCS stock by emailing them here). I had about seven players on Tuesday with several people interested in demos. 

This week I brought out the desert board for a change and it seemed to catch the attention of most of the people who came into the store. With an odd number of players I had a group that played a three-way encounter. Collette vs. Zoraida vs. Perdita. They played shared treasure hunt and Zoraida came away with the win (8 points), Collette was a clse second with 4 points.

Some of the guys that tried out MERCS a few weeks ago came back with full crews, the battle maps and token sets this week as well. I'm glad to see that game is catching on as well as it's my favorite way to round out a night of gaming. Although watching them play on a 2D mat was a little odd looking it seemed to work out fine and made it much easier to transport then my boxes of terrain and tables.

Setting up your own demo night:

• Talk to the store owner and see what night they have space available. 

• Explain the system you want to demo, if the store doesn't stock it currently ask if they do special orders. Also ask if they'll start stocking the game if you can generate interest. 

• Prepare a demo table, if the store doesn't have terrain available or the terrain they have isn't appropriate or impressive. 

• Have several crews/models painted up for use

• Bring enough supplies (measuring devices, stones, cards, dice, markers, tokens) for several people

• Have other experienced players on hand to assist with longer demos

• Talk to every person that comes by looking, be friendly and ask general questions to gauge their interest. essentially you become a salesman for the game, your commission is a good community.

• When someone expresses an interest in learning more, do a quick demo of mechanics, then offer a longer demo if they want to learn more. (if you have a crowd it's helpful to pass them off to an experienced player for a "full" game.

• Promote the night, posters/flyers posted in the store, post on forums, join web groups and post there. If you don't get the word out people won't know to come in. 

• Stick with it, the first few nights you might have a weak turnout, but stick with it and eventually more players will show up.

Jungle Fever (A MERCS Three-Way)

MERCS - After my regular Malifaux Demo night, a few of the guys stuck around to play some MERCS. Since I already had a swamp board set up we decided to play a three-way game in the swamps.

Prior to the game starting we set-up some ground rules so the game didn't devolve into shooting from your deployment zone.

• No shooting from your deployment zone turn one

• Plants are infinitely high tubes originating from the base

• Set-up is as close to an equilateral triangle as possible

• Last man standing wins

I chose to play my KemVar, leaving the sniper on the bench. My opponents played Keizai Waza and sefadu. For the deployment I set-up two groups of two MERCS and the Heavy holding my deployment zone, in what I thought was the perfect spot to cover the board. (having forgotten the ground rules we set-up during deployment, it wasn't as sweet as I thought).

he game played hard and fast with the Waza player spreading out over the board, and sefadu coming at both opponents with a two pronged attack. I was able to neutralize the Waza sniper with my demo. Once my Heavy was set and overwatching things got interesting. I unloaded with him and killed (2) sefadu, (1) Waza and my assassin because of his sweet position. This also triggered two overwatches from the sefadu and Waza players which finished off the carnage my Heavy started.

The sefadu Demo took out my Leader and Monkey Wrench with several salvos of Fire grenades. After another crazy Overwatch trigger fest the sefadu player was eliminated and I just had my Heavy and Demo left. The cagey Waza player creeped up taking advantage of the tree cover (which I forgot blocked LOS completely) and was able to pick me off for the win.

The more I play this game the more I love it. I can't really see it as a competitive game, but as something to play just to relax and have fun it's really worth the low cost of entry. We were discussing this after the game and realized that for the amount that I paid (several price increases ago, remember when Rhinos were less than $30) for the transports in my Space Marine company, you can have all the factions, battlefoam bag, terrain mats, GF9 Tokens and rule book for this game. Think about that for a minute. 


On the Painting Table ... Sefadu

MERCS – Having found a great deal on the Sefadu starter box, I've added another faction to my MERCS collection. Sefadu are the African faction that specialize in diamonds and have ties to the CCC. I haven't got them on the table yet but from the cards and what I've seen online they specialize in moving fast and getting into melee combat. 

After washing the parts I cleaned the mold lines and flash. I was a little disappointed to find that my set had some flaws in the sculpts. This was noticeable on the loin cloths for two of the models. It was easy enough to scrape off the "fuzzy metal" and smooth out the cloth. Assembly wasn't to difficult although the heads have a fairly small attachment point so getting them to stay in position was a little tricky. (I'm not sure if my trick of holding the model close to a 100 watt light bulb actually does anything, but it seems to help when I have issues with glue setting ... or at least my brain tells me it does).

I used my rock bases to mount the models to. I'm finding this design works for lots of different terrain depending on how you paint it. (the clear version is awesome for ice bases, email me for more info). I did need to put a few extra notches to accommodate the sculpts. 

I decided to follow the basic "official" color scheme rather that go with my gut and paint them like the MAXX, as I have several "purple" armies I didn't want to add another. I painted the cloth of their shorts with a Khaki color from the GW foundation range, their new color range doesn't match up exactly so I'm glad I have several pots of this lying around. Next I went in and painted the armour plates with a crimson color. I'm not sure exactly if their skin is meant to be showing or if they are wearing a body-stocking, so I went with painting them in a dark flesh tone. The remainder of the models were painted a dark grey with some metallic highlights.

At this point the base colors are done. A few quick washes will add enough shading to have them ready for the tabletop. Since I'm not in a rush to play MERCS at the moment I'll take the time to go in a detail these minis out to completion. This will include adding the yellow "tribal" markings to each model in a bright yellow color.

On the painting table ... CCC

MERCS – Having completed my Kemvar models, the next step in my plan for 2012 is to finish off the CCC Yellow Jackets for MERCS. For this one I picked up a Kabuki Bug Hunter as I really don't like the Demo Model. I detailed the conversion previously. (WOW it's really been a year ... that's just crazy)

Again this project is fairly simple. I put down all the base colors and shades when I was getting these ready to use on the table. While they look pretty good as is some detail work with get them to the point where I'll be satisfied enough to seal them and call the project done.

Since I'm changing factions I cleared off my painting table and repopulate it with the color I'd chosen for the Yellowjackets. I'm hoping to have these finished by the weekend.

On the painting table ... Kemvar

MERCS – After prepping my station, I sat down and evaluated the Kemvar minis I have to finish. This projects is pretty simple because most of the base colors and shading have already been laid out when I was supper geeked about this game last year. Of course I just got them into table top condition so I could use them. 

Now that I'm not carting around the models back and forth to the game store I want to get them into a final state. During the transport they experienced some minor wear since I don't seal unfinished models. 

Step one is to touch up any bare areas with some brush on primer. Even with minor repairs if you don't put down primer the paint doesn't adhere properly and you'll be fixing the same problem down the road. Years of experience have taught me to do it right the first time.

Luckily there wasn't much repair work needed for these so I could jump right into doing the final details and highlights. 

After the paint dried on the final details I finished the bases. For these models I used my 30mm Rock Bases after adding some flock and vegetation I feel like these are a good representation of the jungles in Brazil. For MERCS I decided to based each faction based on their location on the Globe. Usually I like to keep my bases consistent throughout a line (ie skull bases for all Helldorado, desert bases for 40K to match my primary table etc) but for this game I think unique bases for each Megacon makes more sense.

On the painting table ...

MERCS - This year for Halloween, my Tuesday night gaming group is planning on running a MERCS game using the zombie rules I came up with earlier this year.  As I got distracted with some other projects I never got around to finishing up the Studio Minatures zombie horde.

I think part of the reason I lost interest in painting these models is the shear number I had to finish up. When you have 40 or 50 zombies sitting on your table the first instinct it to assembly line them to get the job done. Of course this means your burn out fast and don't lavish the attention these models deserve. 

So I've decided to break the horde down into more manageable chunks. The first batch I'm working on wrapping up are the Zombie Strippers from Reaper's Chronoscope Range. These sculpts are pretty fun even though they tend to be a little clunky, I think it adds to the undead nature. 

I started with a base of Foundation Flesh followed up with a purple wash. This gives that bruised base color that I like for fresher zombies. Once that dried I used Elf Flesh as the first highlight followed with an Ogryun Flesh wash. To give them a variety in their state of decay some will have a greyish highlight applied while others with have a pale flesh tone. I'm trying to avoid the green pallor because these are fresh zombies and not from the grave. 

Before applying the final highlights I've taken red ink and applied it to all the wounds, around the eyes, mouth and hands of each model. The ink gives a slight sheen which is more representative of blood. 

To be able to tell the difference between the different types of zombies (walkers, wailers, etc.) I'm using a different color to indicate the flank and front arcs of the models. This makes game play easier and clarifies what the various zombies could be.