Demo Board – Phase II

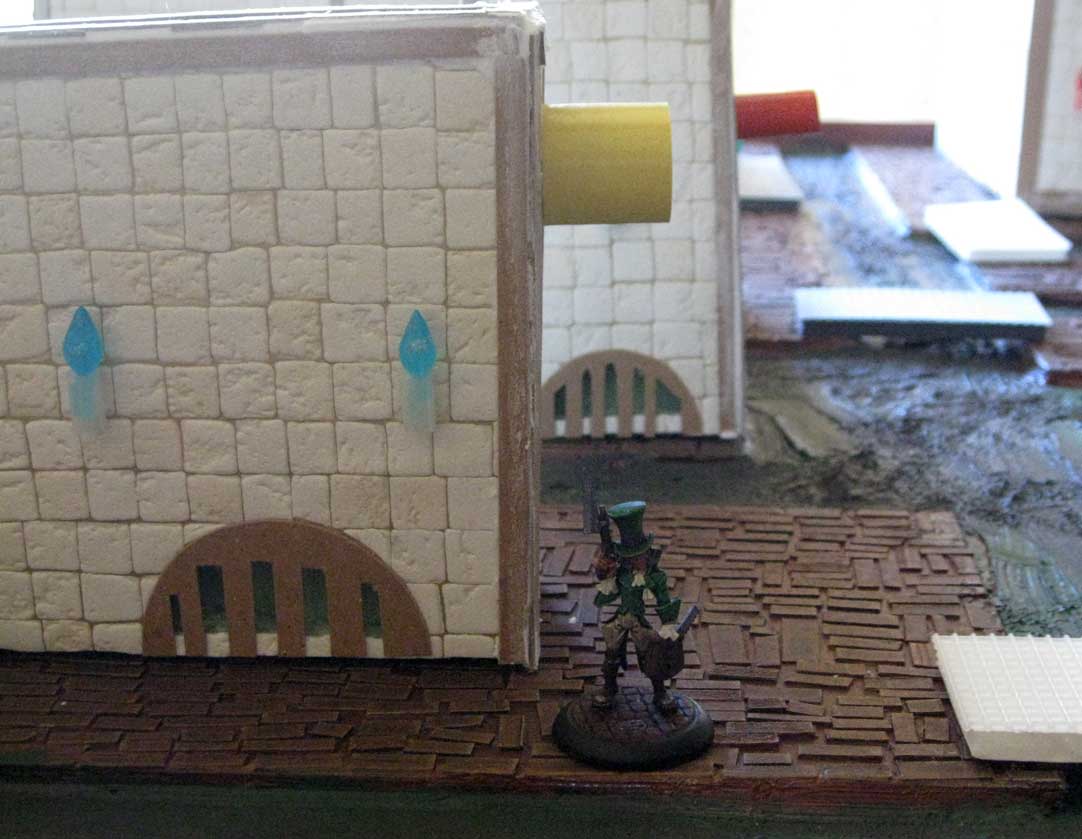
I've made some progress with the sewer side of my demo board. The water effects are done and the walls have been painted with the base colors. I need to do some weathering and ink washes to the walls and pipes to make them appear like a grimy ancient undercity. I haven't decided if I want to just paint the torches as flames or if I should try to do a lighting effect on the wall as well. Right now it's playable but I really want to make sure it's impressive. A great table filled with cool terrain and painted models is the best way to draw interest to the demo. More pics are posted in the gallery.


Painting Service

Malifaux – I've been working on a commission recently and thought I should post some WIP shots. The client provided the Dark Age lava bases and wanted his brood to be an off skin color. Given the basing I decided to go with a red. He has three sets of Terror Tots and I painted the hair different so it would be easy to keep track of damage. I'm going for a very vampiric look with Lilith as I think it ties her in with the tots as well as her abilities.

I also want let my reader's know about my painting service. For tabletop quality simple schemes I can paint your models for $8-$12 each depending on the complexity of the model and/or scheme. For display pieces or more complicated schemes the cost would be higher.

Happy Holidays

The holidays are upon us once again. I've been pretty busy trying to get some christmas presents done. This Christmas Sophie is one of my favorite Reaper models. 

I've also had quite a few new commissions. First up is the Witch Hunters Crew, I really like all the guild models so these were fun to paint. I kept everything in a simple brown scheme, Samuel really feels like a Daniel Boone/Davey Crocket character. From the few tournaments I've been to he seems to be an auto-include for most guild players. The Witchling Stalkers and Sonnia Criid are also really great models and don't need much work to make that look really great.

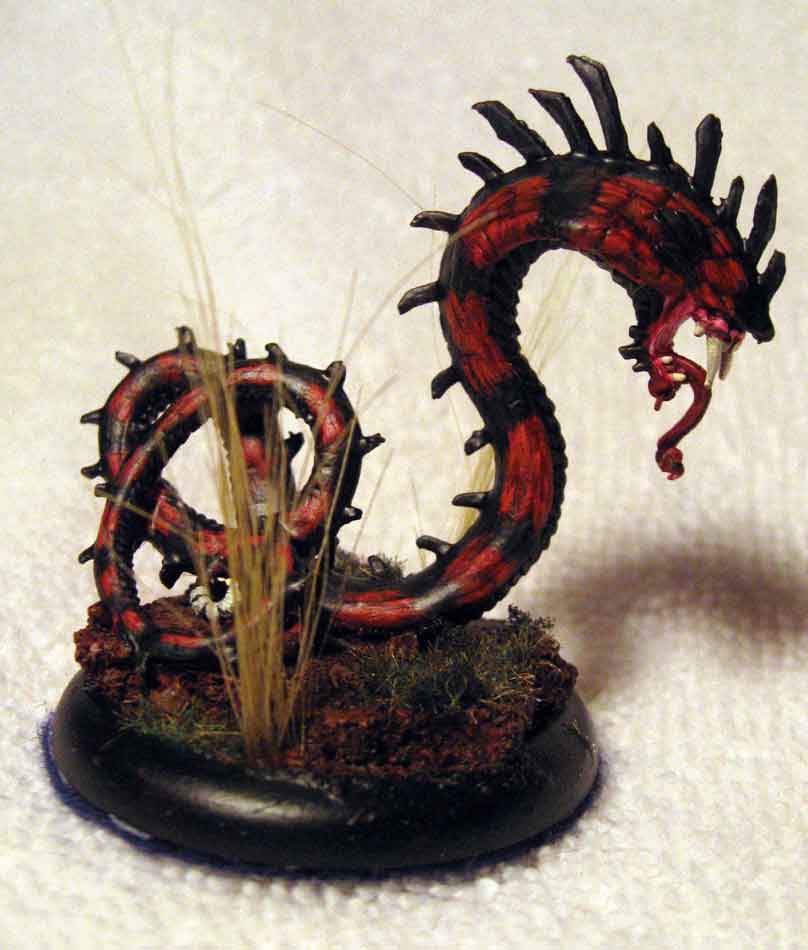
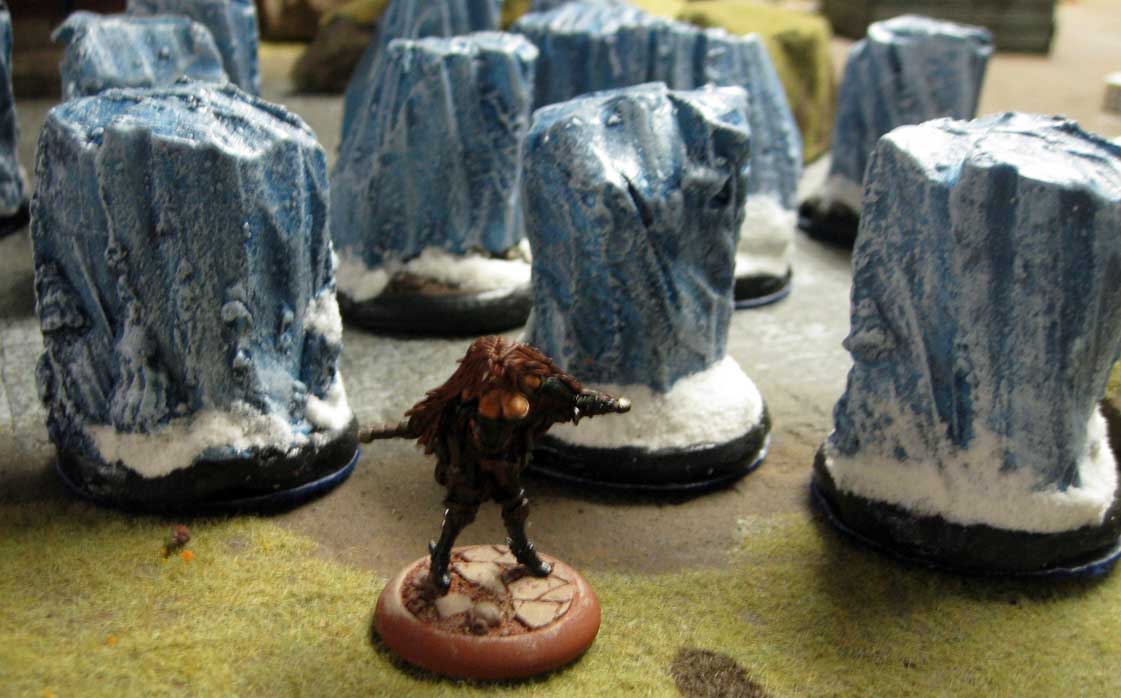
In addition to the guild models I just finished a few models for the Arcanists. The Ice Golem is such a pleasure to paint, washes and light dry-brushing bring out the detail. I stuck with the same color scheme as the Ice Pillars. The sabertooth was painted similar to the studio scheme. The Rattler started off using the same colors as a coral snake but the spines made it too busy. The black and red stripes give it the feel requested without detracting from the sculpt. You can see more photos in the gallery section.

Demo Board

Malifaux – I've been working on a 3' x 3' Malifaux board. I started with a 2" thick block of foam and pegged a 1"x4" board around the edges. This makes a durable yet lightweight table top that will fit on a standard size card table. Rather than just having one playing surface I made the board double sided. With the variety of locations you can wind up playing in Malifaux it makes sense to maximize space where ever you can.

One side of the board is a rocky dirt texture, this will work for most encounters by switching out the terrain used. The other side is a sewer. I think it could pass as the Quarantine Zone, Industrial Zone and the Downtown area depending on the terrain used.

The tricky part of doing any board with water effect is figuring out how to make it modular. I decided on making the brick platforms fixed with water running between them. For the walls I used 2" foam and cut multiple lengths all 5" high. This way the walls and bridges can be moved around so games don't get repetitive. 

The brick platforms were made by covering foam core with individually cut bricks. The process is tedious and time consuming but the effect is well worth the effort.

The water was created using caulk to create a texture. Once it's painted it will be covered with Envirotex water. The wall were covered with a brick texture wallpaper (which I can't find at the store anymore, if you know where I can get some email me). I cut the grates out of cardstock and create pipes with straws and a variety of cardboard tubes. The torches were made from a plastic tube and a christmas decoration. The bridges are foamcore cover with plastic mesh.

It's coming along nicely, next up is painting the walls. I'm also working on a commission of Lilith and 9 terror tots, seems like it could be  pretty nasty list to face.  


Extreme Lighting

Malifaux – Just about finished with a commissioned Ramos. The client want a paint scheme similar to the old photo of Ramos from the Wyrd site (when he came on a bigger base with a spider).

I'm pretty happy with how it turned out. On his back is the  symbol for warrior. The base was built to match the Dark Age inserts he will be using for the rest of the crew.

I've finished the Lilith's Brood box set. I used a color scheme similar to one that I've been working on for my Slaanesh Chaos Daemon army for 40K. You can see all the pictures in the gallery.

The mountain mining town terrain I've been working on is coming along nicely. I have several variations of tree stands that work fine as forest templates or as WYSIWYG terrain. Campsites and rocky outcrops round out the set so far. I feel that it needs an actual mine. 

We used the set for our Sunday night game. For a three player 25 Soul Stone Scrap on a 3x3 table it worked nicely. Having two campsites on the table resulted in some really nice control hands (and a quickly depleted deck).

Mining in the Mountains

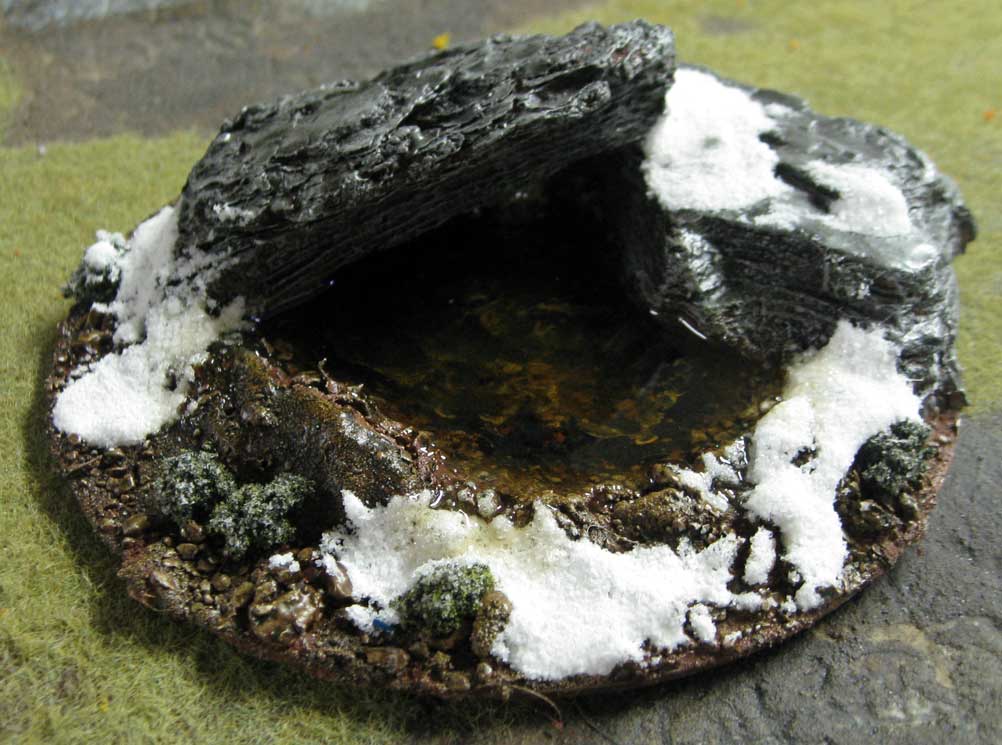
I've been busy working on the next terrain set. Moving out of the swamp and into the mountains, I've completed the Miners & Steamfitters Local 400, and some hot springs. I'm still working on the mountainous outcrops, mine and tree stands. 

The Rasputina player in our group is very happy with the Ice Pillars I made for him. I also did an icy variation of the corpse and scrap counters. 

I'm really excited at how well Malifaux seems to be doing in Metro Detroit area. I heard there may be a tournament in November, so I'll need to finish up my own crew.   

Customer Review

I'd like to thank my customers and share some of their positive feedback:

"The t shirt was cool and unexpected. Thanx for that! I'll wear it tomorrow to our Malifaux game day.

The terrain was very nice. Like I said before paying someone to do water effects for me is more than acceptable and I felt the prices quite reasonable for "custom" work. The shacks are very nicely put together, I love that the top comes up. The swamp bases are very nicely constructed. The only thing I think I'm going to do to them is dullcoat around where the water isn't to kill a bit of the shine. They all felt like they should be together on a board. The pig pen was great, I have no idea how you did the fence, it looked time intensive. 

All in all I am very happy with the elements and will certainly recommend you to anyone looking for some terrain. I'll post something on the forums in a day or two also!"

Regards,
Ryan


Gremlin Village

Malifaux – So I've been hard at work on a Gremlin Village for a commission. The shacks have turned out really nice, and I'm working on some animal pens. I also built an outhouse to go with the shacks. 

The shacks are built with a foamcore shell and covered with craft sticks. I used some salvaged vinyl siding scraps to make the doors and window frames. I really like how the window frames turned out, they give the impression of a throw together mess. 

I'm also working on some ice pillars.

I carved the pillars out of high-density foam and then made a mold using this compound I found at the craft store. The pillars were then cast out of polystone, I prefer to use this as it won't shatter like plaster of paris and is slightly lighter weight. The combination of a cheap mold making compound and the undercuts on the pillars destroyed the mold after 6 casts. I'll have to devise a better way to make the mold for the next set. 

I've been getting several requests custom shrinky dink tokens. If you are interested in getting custom tokens made please email me with a list of what tokens you need. The cost is $0.45 per token with standard first class shipping coming in at $2.00 - $3.00 depending on weight. The corpse, scrap and blood tokens are available in packs of 5 for $5.50. I also have ice pillars available a pack of 2 is $8. Once I have your list I'll request payment through paypal and have then in the mail in 2-3 days. 

I've also received several requests for custom terrain. The same process applies email me with what you want and I'll send back a quote. Once payment clears I'll build it and mail it priority within 1-2 weeks depending on the complexity of the project.

I hope to have a storefront up on this site soon. If there's anything you need in the meantime please email me.


MALIFAUX – In Stock

Malifaux – I now have Malifaux in stock. I'm putting together some starter kits, which are available here. The kit will include the crew box, 3"x5" top loaders, some soulstones and effect tokens (maybe corpse, scrap and or blood counters as well). There are several sets available now and I'll be posting more ASAP. I'm going to offer them at the MSRP, I think the extras are better than a 10% discount which seems to be standard for online retailers. If you need something that isn't listed please contact me through the link on this page.

The gallery has been updated with some new WIP shots of the small hotel. Once I get the weathering done on the outside, I need to figure out if I should make furniture or just breakdown and pick up some resin pieces.

Shrinky Dinks

Game Aids – I first experimented  with Shrinky Dinks while playing Warmachine/Hordes. It is so important to keep track of spell effects that some type of counter has to be used. We started off with colored beads and/or noting it on the card but over the course of the game they became difficult to remember. This resulted in lots of bad plays and "Woah, I didn't know that – instead I'm going to..." Around the same time Gale Force Nine made tokens for the game, for many players this was a Godsend. I on the other hand didn't care for them, sure they were easy to get and had most everything you needed; but they were also tiny, hard to pick up and expensive.

As luck would have it I came across Ink-Jet Shrinky Dink paper at a craft store. With my 40% coupon I bought them and figured it wouldn't hurt, I also found self-stick felt that same day. It took some experimentation but I eventually found that if you make something about 2"x2" it shrinks to the correct size. Also when you chose colors make sure to go lighter than you want them to be. They get significantly darker once they shrink.

My first tokens were for my Cryx force and I made them cog shaped and circular. (Bad idea...circles don't shrink correctly and you get ovals). After Hordes came out I made them for my Circle Orboros and Everblight forces. I've been really happy with them, they're easy to pick-up, large enough to be able to read and relatively inexpensive to make.

After our first few games of Malifaux I came to the realization that spell effect counters were needed. So I sat down and read through the book making note of any spells that stuck around. I decided on a simple hexagon shape, Bleeding Cowboy as the font and scanned in the faction symbols.

Once they're printed out you bake at 300 degrees for 5 minutes or so and you're done. Seal them with a gloss spray and you're ready to game. I prefer to apply self-stick felt to the back of them. This not only makes them look more finished but also makes it easier to pick them up.


Counters and tokens, oh my

Malifaux – I finished up my corpse, blood and scrap counter today. I'm really happy with how they turned out. I used envirotex and an ink mixture to create a realistic blood effect. 

The scrap counter were made by cutting up wire nuts. I saw this somewhere online and thought, "Sweet! easy cogs." Little did I know, they are a pain to cut and the amount of force you need to slice them results in little plastic pieces flying everywhere. The wire nuts do have a nifty piece of wire that I used as a spring. 

I made the blood tokens so the Lilith player in our group wouldn't be left out. I made the bases out of cork and sand, then applied the stay-fresh blood used on the corpse tokens. 

I'm really happy with the results, but I made way more than I need so I've listed them in my ebay store. Also I posted picks of some faction specific Soul Stones in the Malifaux Gallery.

Malifaux – I finished a "hanging tree" and a scrap heap for my terrain set.  I'm working on corpse, scrap and blood counters, those should be up in the next few days. 

The commission that had the Ramos Crew, gave me Joss to paint for him as well. It should be interesting as I've never painted Indian skin tone before. I've almost finished the Nicodem and Lilith crew boxes and should have photos of them early next week.

For my own crews I'm using Dragonforge Design bases. I'll be putting Seamus's crew on the cobble stone and the Death Marshalls on the Wasteland bases. I've used these before for my space marine army and really like them. There will be a review and a brief working with resin tutorial in the near future.

Necromunda – My gaming group has put a hold on our Necromunda campaign while we explore Malifaux. I have all the parts needed for my genestealer cult and hope to get them together soon. I found these really cool GW-style bases from Champ Industries that I'll be basing them on.

Swamped...

Malifaux – I finished the graveyards and swamps I was working on. The water effects really add a ton of depth to the finished pieces. Photos are posted in the gallery. I like having some uniform terrain that can be easily boxed up for travel. 

Monday I took the swamp terrain and a few buildings over to a buddy's place for a 4 player game of Malifaux. I played the Seamus Crew, and the other guys played Lilith, Rasputina and Marcus. We played on a 3'x3' table with deployment in the center 8" of each side. The swamps were considered 2" severe, water terrain, graveyards were as listed in the book and the buildings were impassible terrain.

After flipping for our strategies and picking schemes we set-up. To my right was the Marcus crew, left was Lilith and across the table was Rasputina. After flipping for initiative, the Lilith player activates the Nephilim and carries Lilith close to Seamus and a Belle. The Rasputina player moves the golem forward and the Marcus player brings the sabertooth around towards Sybil and the other belles.

From that point on my luck proceeded to go downhill quickly. Seamus was detroyed by Lilith and the Nephilim. The sabertooth, Miranda and Marcus decimated the belles and Sybil, while the Rasputina player sat back making ice walls. The game was quick and brutal. Marcus won in the end; accomplishing Slaughter, and both schemes he picked.

In hindsight I think 4 player games have to be played on a 4'x4' table. It was fun and we got to the action faster then we did with the other games we played on a bigger table. I think you need to have that first turn or two to get into position and a bigger table provides that.

How I felt

Finishing – It's important to me that my models be complete. You spend so much time painting and basing your models, why would you leave the bottom of the base plain? For me I use a compass cutter and some self stick felt to complete the base. Not only does this give your model a finished look, the felt will help to keep them in place on the battlefield.

Finishing – It's important to me that my models be complete. You spend so much time painting and basing your models, why would you leave the bottom of the base plain? For me I use a compass cutter and some self stick felt to complete the base. Not only does this give your model a finished look, the felt will help to keep them in place on the battlefield.

Some WIP

Malifaux – Today I started making some of the specialized terrain from the back of the book. In order to make sure everything is fair and even I'm using the plastic CD's that come in CD-R stacks. I've been saving them for some time as well as AOL and old software discs. They fit the description of at least 3" so I've made 2 graveyards, 1 scrap pile, and several swamps. I picked up the gravestones at Micheal's (they are on sale for 25% so you can't use your coupon...lame) and they seem to work well for covering terrain.

Read More

On the painting table ... Order of the Chimera

Malifaux – Right now I'm painting two crews (Order of the Chimera/Miners and Steamfitters Union) for a commission. I wasn't happy with the way the sabertooth heads were fitting so I modeled a mane on it. The models themselves are amazing sculpts and didn't need to much clean up. Assembly on the other hand was more difficult because of the small joins I made sure to pin everything and fill any gaps with greenstuff. Below is a work-in-progress shot of the Order of the Chimera. They of course need some work but the base colors are there. 

Read More

Game Club: Paperbag Warriors

Welcome to the battle report section. My gaming group, the Paperbag Warriors, meets twice a week to play various games. Currently we're exploring Malifaux and in the midst of a Necromunda campaign. Depending on how long the games last we will play Magic in between sessions or to finish off the night. 

When I host game night I like to set up the terrain before hand. I prefer to do this for several reasons, first it saves time (every group has that guy who's always late and/or unprepared) and second I like to set up a visually pleasing board that makes sense (when you alternate terrain set-up between players things can get odd). When we're playing a game that uses a 4'x4' board I set-up two options, describe the features and then we randomly decided who choses where we play.

For Sunday's session I set up a pioneer mining town. This board has several impassible small buildings, a 5" graveyard, some large trees, a fountain, a mine (interior counts as soulstone vein), and a large saloon that models may enter. 

The second board was a bog. This has a large swamp (6" tall covering, severe water terrain), some small 5" swamps (1" tall severe water terrain), a 5" scrap pile, a 5" graveyard, two ruins on elevated terrain and a hanging tree (causes terror).