Christmas in October ... Kickstarters Deliver

Random – After what seems like forever some of the Kickstarters I've backed are finally deliverying. Honestly it's pretty crazy when these massive boxes show up at the house. This has been a great week as two arrived at the same time.

First to arrive was my Bug Hunt Coridoors, this laser cut terrain replicates the station from the Aliens movie and is going to look amazing once I have time to sit down and paint it then assemble it. Looking at the sections it seems that if I build everything first I'm never going to be able to get a brush into all the nooks and crannies.

The box was massive and smells interesting, the wood doesn't quite smell like burnt wood but slightly different. Each piece is bagged with all the compaonents needed to assemble it and there is an extensive print out of how to put everything togther. For a project done by a single guy in his garage I'm really impressed with the quality and can't wait to put this together. If you haven't seen it yet Rob Hawkins did an amazing display board using these parts for Sedition Wars. I'm considering doing something similar however this project is going to have to wait until my marines are complete.

Next up Zombicide Season 2 arrived. I couldn't really pass this one up as the few games I've played with the core game have been really fun. With the Kickstarter you go a pretty decent amount of freebies for backing the expansion so I jumped in. As with the other project this was a huge box full of stuff. I like the though C'MoN put into the packaging for the shipping box. They had nice styrofoam spacers that kept everything from moving around and a nice cardboard box to hold all the Stretch goals. Little things like this show they continue to learn from each kickstarter project, and their business model of using Kickstarter as a preorder system is working for them.

Built to Fail ...

Warhammer 40K – Lately I've been playing a fair bit of 40K. With the new marine book I've rekindled my love for the game. Regardless of GW's pricing and corporate policies the game itself is enjoyable and fun. Sure their are some weird rules and some careless editing that can cause confusion and pain during a game but overall it's just plain fun.

With my 4'x6' board currently dominated by the near future city I've been working on (I swear I will post progress sooner or later) many of my recent games have been played using this board. For as packed full of terrain as it is the games have gone pretty smooth. For the first few we just played the building interiors as impassible terrain and kept the fight in the street. While this worked well it seemed to be missing something.

In my most recent game we decided to delve into the big book and figure out how in tact buildings are supposed to work. In previous editions the rules for buildings were pretty vague and left much to the obligatory house rules. This time around they actually put some thought into the rules and gave pretty solid guidelines on how they will work. Essentially buildings are treated similar to a vehicle in which you can shoot a structure and cause damage to it which in turn effects the units inside. The guidelines base the armor value on the size of the structure and its function which then determine how many models can fit in it, how many fire points and what type of protection it offers.

Since my board is mostly 9"x9" structures that represent a habblock or business district each building is essentially the same as a drop pod. Which you would think means they are pretty filmsy however in practice they are anything but.

We played a three player game with two marine players facing off against a guard army. The set up seemed to favor the marines as the guard player was forced into a corner dominated by a large complex. Essentially three different buildings consisting of multiple stories with bridges. As it turns out the guard player was able to fit most of his army inside the buildings making it very hard to shoot them. Over the course of six turns he stayed holed up in the buiding taking pot shots out the doors. Duting the last turn i was able to score a penetrating hit on the building finally and caused catostrophic damage. This killed off over 50% of the guys in the building and caused those on the roof to tumble to their death. Pretty game changing if this had happened earlier in the game it would have been devastating, this late in the game it didn't do much.

I like the rules for in tact buildings and think they add a lot of flavor to the game. I also like that they have a certain amount of risk/reward built into them. Sure you can take advantage of holing up the whole game but one luckily shot could bring the whole thing down around your ears. I'm tempting to build a force geared to taking out structures to see what kind of impact that will have on the game when using this board.

Gamer Gear - Showing Your Colors

Random – A while back I did a few custom jerseys, at that time i had ordered a few for myself that I never got around to to designing the final look and feel. In an effort to tie up loose ends I finally had a chance to revisit the project.

I had ordered a throw back black LA Kings jersey, this is the one with the bright yellow, white a purple scheme. It just so happens that the colors match up with my Twilight Ravens Space Marines perfectly. Part of my problem was the chest on this jersey is so large that the standard embroidery hoop wouldn't be able to handle the stitching. So I let the project sit on the back burner until I could come up with a better solution.

Recently I found some heat bond in a box of fabric while cleaning out the basement and realized this would be the perfect solution for my oversized logo needs. Heatbond in a glue that comes on a roll. You iron it on to the back of a piece of fabric and then once it cools pull off the carrier sheet and it leaves the glue attached to the fabric. You can then cut your design out of the fabric and iron it down to create a permanent bond.

After some experimenting I settled on doing my raven logo on a white shield for the front of the jersey with the Astartes Numeral Three on the back and sleeves. I primarily run my marine lists using my third company so I figured I'd represent with the jersey. 

With the extra fabric I had on hand I also cut out the logo to put on a plain gray hoodie. Honestly having unique gear to wear while your playing adds a bit to the overall experience.

While the heat bond is a permanent solution I really wanted to have the appliques finished with a satin stitch around the edges. Luckily my mother is a skilled freehand quilter and offered to do the stitching for me once I explained my conundrum. 

I'm happy with the way these turned out and am eager to play some 40K with my new gear.

Onward to the Apocalypse ...

Warhammer 40K – So I broke down and bought the latest apocalypse book. It happen to be on the shelf at my local store for significantly less than the MSRP so I figured it would be good to have just in case. My group has been talking about trying to get in a "big" game once every few months where we could spend a Saturday or Sunday playing all day. This my or may not happen...

But I'd rather be prepaired just in case as the designated "organizer/president" of our game group the responsibilty for having the rules and planning events is usually mine. 

The 2013 Apocalypse rulebook is about the same size as the core 40k book with the majority of it taken up by pages of painted models and datasheets for all the races of 40K. The actual rule potion is fairly small and uses minor additions to the existing ruleset to better mimick a large scale battle. Notable among these rules are strategic assets, super heavy vehicles and some command structure changes. Also rules for massive template wepons are included in the book with drawing the illustrate how to make your own. Of course GW does sell these large scale templates and asset cards as a linited edition product, you can probably get by with photocopying from the book and making your own templates.

As someone who has built a full battle company of space marines I was interested in the data sheets for marine lists. These are only a few pages but they do give some interesting options if you own all the models needed to make a formation. For example having a full company gives you the option to fire overwatch with all units rather than just the one being charged. Kinda cool but nothing ridiculous.

The other reason I picked up the book is to have the most current rules for the superheavy vehicles. There are several charts you need to have access to included in the book as well as the rules for all the large scale pastic kits and some Forgeworld models. While I may never own a Titan it's fun to read the rules and dream... 

The book is not a must have by any means and you can probably get by without it unless you have your heart set on playing with superheavy vehicles. I really feel like the minimal amount of rules could have been included in the core 40K book as an optional way to play with the data sheets being part of the codex releases that seem to be happening every month. If you want to use any of the forgeworld varients you still have to pick up the correct Imperial Armour Supplement so this book fills a very minor niche in the hobby.

A thorough application of firepower ...

Warhammer 40K – I had a chance to get my second game of 40K in with the new space marine book and i have to say I'm still loving it. Unfortunately I neglected to take photos during the game. But since I've been neglecting the battle reports section as of late I figured a text write up is better than nothing.

We played 1500 points. I ran my Twilight Ravens (as an Iron Hand Successor) against my buddy who ran a White Scars (Dark Angels using marine codex) detachment paired with an allied force of Deathwing Terminators. I don't have his exact list but this is essentially what we ran:

Twilight Ravens (As Iron Hands):

HQ – Master of Forge on bike with conversion beamer 

TROOP – Tactical Squad, 10 man in a rhino with flamer and missile launcher 

TROOP – Tactical Squad, 10 man in a rhino with flamer and missile launcher 

TROOP – Tactical Squad, 10 man in a rhino with flamer and missile launcher 

TROOP – Tactical Squad, 10 man in a rhino with flamer and missile launcher 

TROOP – Tactical Squad, 10 man in a rhino with flamer and missile launcher 

TROOP – Tactical Squad, 10 man in a rhino with flamer and missile launcher 

ELITE – Terminator Squad, 5 man power fists and storm bolters 

Dark Angels (White Scars)

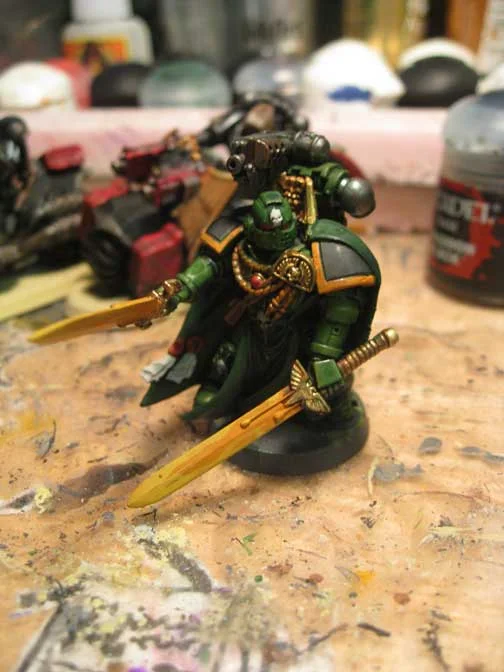
HQ – Chapter Master on bike with burning blade and relic shield

HQ – Kosoro Khan on Moon Draken

TROOP – Bike Squad, 5 man with 2 grav guns and grav pistol

TROOP – Tactical Squad, 10 man, plasma gun, plasma pistol, plasma cannon, drop pod

Dark Angels (Allied Detachment)

HQ – Belial

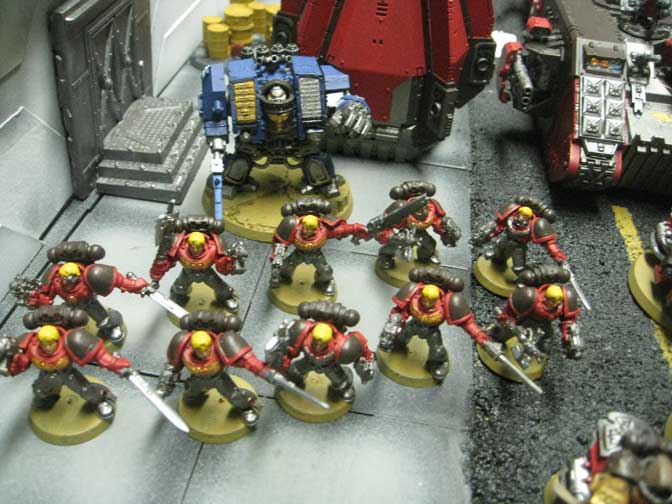
TROOP – Terminator Squad, 10 man mix of thunderhammers, power fists, plasma cannon

FAST - Dark Shroud Land Speeder 

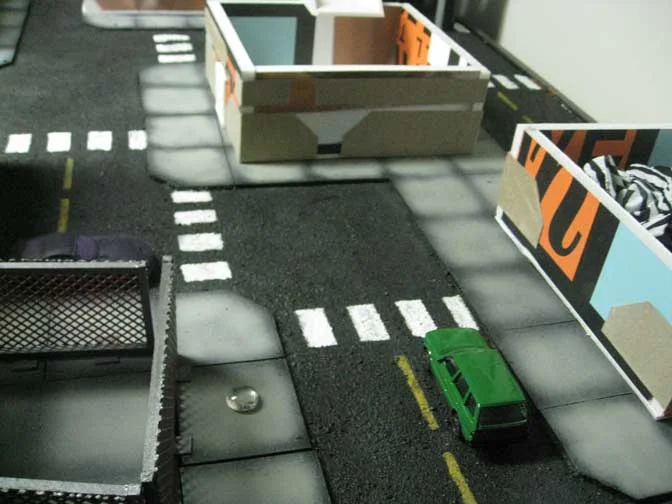
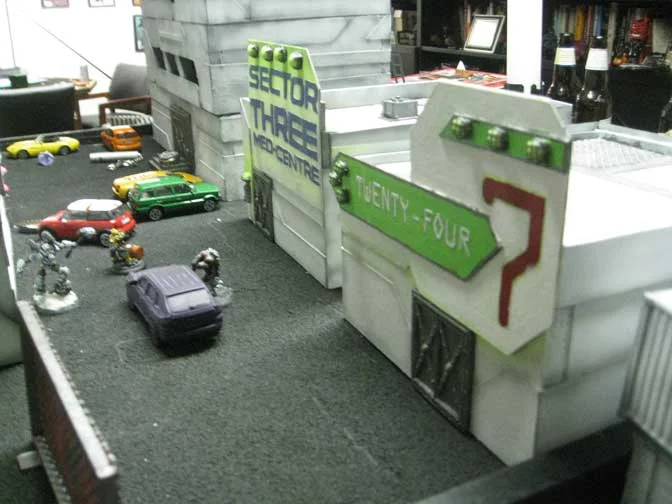
We rolled up the Purge the Alien Mission with the diagonal deployment. This is the first time playing 40K on my in progress city board so it was interesting setting up. We called all the buildings buildings and said the roofs were battlements (not that is mattered with the forces we used). I rolled the Furious Charge Warlord Trait and he had Defender of Humanity on his chapter master. I chose the more open deployment zone and set up all my rhinos on the starting line with the Master of the Forge sitting back. He deployed his bikes, and shroud with the pod and terminators coming in on turn one.

Turn One:

I gunned the engines and spread the rhinos out to cover and block as much of the city as possible.

He dropped in behind my lines and was unable to do anything to the rhinos, despite his best efforts.

Turn Two:

Everybody got out. My Terminators Teleported in. I focused on the two squads that dropped in and was able to eliminate half the terminators as well as the entire drop pod squad. The bikes were more difficult as I was only able to score a single wound on the chapter master. First Blood goes to me.

My opponent sent the bikes down a narrow alleyway (foreshadowing) and killed half the tactical squad with a grav gun salvo. His chapter master split from the group and headed for my horde of maries down the block. The rest of his army was able to kill of two marines in the shooting phase. In assault the bikes couldn't make it. Belial and the terminators killed three more marines and the remainder of the squad fell back.

Turn Three:

I moved a rhino to block the alley containing the bikes and rammed the dark shroud with another to block the other end of the alley. I didn't do any damage to the land speeder however I did lock the nasty bike squad into an area they couldn't get out of. I focused fire on the remaining Deathwing models and the Chapter Master to whittle them down to just two models and took some wounds off the chapter master. The conversion beamer did nothing as we were to close for it to have any significant armour penetration.

He fired into a tactical squad and took out a few models with the land speeder. His chapter master called down an orbital strike which took a hull point off a rhino. The grav guns immobilized the rhino blocking the exit to the alley. This is the point he realized he couldn't get rid of them with the grav guns as the wreck will still block the alley. The assault phase saw him tear through a tactical squad with his chapter master leaving three marines that stood firm. Belial took out the last two members of the squad he was chasing after. 

Turn Four:

With a ridiculous number of models still on the table I considered my options. Firing at Belial I was able to reduce him to just one wound remaining. The rest of my marines jockeyed for position on the table. During the assault phase my terminators moved in and the brave leader challenged his chapter master. He of course died horribly. However his brave sacrifice allowed the terminators to reduce the chapter master to paste. Slay the Warlord for me.

The Dark Shroud killed a marine during shooting and Belial then assaulted my Master of the Forge. Belial was unable to breech the armour of my warlord and my attacks back were able to kill him.

Turn Five:

Game Ends.

I scored 4 VP for killing his units, 1 for First Blood, and 1 for Slay the Warlord. He scored 1 VP for the squad he killed and 1 VP for Line Breaker with his drop pod.

In Summary:

The game was really fun my Feel No Pain made a difference against the grav guns but other wise I didn't benefit much from the Chapter Rules. I like the amount of scoring units I brought however in a mission like this it could have gone horribly wrong as I brought 14 potential VPs to his 8. However having 66 bodies on the table seems like a good way to deal with anything that might come up.

My opponent made some significant mistakes namely falling for the bait to head down that alley and then charging into a large squad with his chapter master allowing the terminators to get a counter charge. I also don't think sinking that many points into three HQs is a good idea. There was just no way for him to do enough wounds to my force in 6 turns even if he was able to hit with every shot and kill something.

The allies rule annoys me a bit. I like the idea behind it and I like the unique army builds you can make however I feel like it is open to abuse. Especially when a force is painted to look like an existing chapter like Dark Angels, Blood Angels, Ultramarines etc. I feel if you want to use or abuse the allies rules or the chapter tactics it's best to paint your stuff in a unique scheme. That way there's no confusion looking at the table and seeing Ravenwing bikers in the studio scheme and having to remember that they are White Scars and only the White Terminators are Dark Angels. It's a minor thing but still ...

Second, with allies if you chose to use it to represent a cohesive force you NEED to separate the detachments visually. Something as simple as an army badge or a helmet variation would help. Otherwise it's to easy to get confused with what is what. Sure you might know that this purple squad is White Scars and this purple squad are the allied Iron Hands but unless there is a consistent distinquising feature to separate the detachments your opponent won't know.

Random Commission ... Blood Angels Economy

Warhammer 40K – Kind of an odd commission to share today, a friend of mine took a shot at painting up his own space marine chapter. For a beginner I think he did a pretty good job getting them tabletop ready. He asked me to apply the decals to the models and seal them for him. 

So a pretty simple commission of applying waterslide decals and sealing them with a satin clearcoat. Above you can see the photos of how the models were supplied to me and below you can see the shots of the models after having the decals applied. A simple thing like unit markings can really bring a tabletop model to the next level.

Go Big or .... Near Future 4'x6' Board Progress

Terrain Making – After making the initial 3'x3' city block board with 3"x3" squares I decided that I needed to go all out and do a 4'x6' table. Between the two smaller near future boards I've been working on I have enough buildings to populate a larger area. I've always wanted to do a full city so I decided now is the time to do it. Having been successful with the smaller board I have a good grasp of what works and what doesn't. I made a quick trip to Home Depot to pick up a 1" thick sheet of insulation foam to act as the topper for my 4'x6' table. A quick stop at Michael's for some clean sheets of foam core and I was ready to go.

After trimming the insulation foam to fit within my tabletop I then measured out a 3"x3" grid over the entire surface. Once the grid was in place I moved the buildings I have around on the board until I was happy with the layout. My goal was to have some straight road sections without have a clear shot straight across the board. From prior experience, city blocks set up on a standard grid make for boring battlefields as their are to many "kill zones" that allow over watchers or snipers to control to much of the board. With the layout I settled on there are enough blind spots to offer cover from the various sniper nests.

The tedious part of the job took me two nights of cutting 3"x3" squares of foam core. While I probably could have just painted the grid on to these I find having the physical separation of the individual blocks to be more visually pleasing. Once I cut them all to size I set off with a large bottle of tacky glue and began gluing down the foam core to the insulation foam base. This process took another night of tedious work but the final result fit exactly what I had in mind.

I then cut out storm drains from granny grate and glued them in place at various points along the street sections. Little details like this help to bring the whole city to life. I opted to not include sewer drain covers at this time. I may change my mind before painting begins but right now I don't think I want to add them.

Once everything had dried overnight I took the sheet out to the garage and began applying the sand texture. For this I use a gallon of wood glue. I've found that wood glue adheres to the foam pretty good and dries solid enough to withstand the rigors of gaming. Working in sections I paint the glue down with a wide brush and then liberally coat the glue with sand. More is better at this point, you want to have the sand piled on thick enough so it will sink into the sand and give you the texture you want.

After this dries for a few days (you have to be sure the glue has set otherwise you'll get weird marks in the final texture) I use a shop vac to remove the excess sand. If you're smart and clean the shop vac prior to vacuuming the sand you'll be able to salvage the excess for the next project. 

After everything dried I painted the whole board with Behr Premium Paint + Primer. I find this covers well, is durable and comes in colors that match my other paints. After the base coat I went in with my airbrush and painted everything else. Starting with black I slowly worked up highlights to get a decent transition for the concrete slabs. Overall I'm happy with the results thus far.

Paving the Way - City Block Painting

Paving the Way - City Block Painting

Terrain Making – I seem to be getting better with the airbrush, after the primer dried on the 3x3 city board I went in and air brushed the city streets and the the blocks. The trick is to apply the paint in layers starting with the darkest and then building up to get a smooth transition between colors. 

Read More

3x3 - 3x3 - 3x3 - 3x3 - 3x3 ...Repeat

Terrain Making – While I love my 3'x3' Zuzzy mat I decided to build a 3'x3' base board to go with this near future stuff (Ideally I'll also be able to use it with Deadzone). I used the same wooden framework and insulation foam core as I've done with my Malifaux boards.

While waiting for the caulk to dry I started cutting out 3"x3" squares to build the city blocks for this board out of 1/4" foamcore. With small sections I don't think I'll run into a warping issue with the foamcore but just in case I applied my glue generously.

I figure using 3"x3" squares to build the foundations will give me an interesting look that serves the dual purpose of creating a grid for Deadzone. (As I've said before with the amount of games I like to play making the terrain as multipurpose as possible save me some space.) The 3"x3" slabs of concrete will also help to create a sidewalk for the various buildings as well as clearly define the roadway.

After glueing the squares into city blocks and defining the streets and alleyways, I cut some drains out of granny grate and glued them down onto the street. Once that had dried overnight I used some wood glue and play sand to texturize the street. With the high humidity this took quite a bit longer to dry than it normally does.

While waiting for the glue to dry I started cutting the basic shapes for more city buildings. The last few I made didn't fit into the parameters for Deadzone terrain exactly so I decided to make some additional buildings that match up with the grid. I kept 3.5" high as my standard for the height of A floor of a building and kept all the lengths multiples of three. They seem to work pretty good and I'm considering adding several stories to each of the buildings. 

To paint the whole thing I picked up a quart of Behr Premium Paint and Primer in a color called Pencil Point. This is a nice deep gray that only requires one coat to cover and improve overall adhesion. I like how thick the paint is as it helps to fill weird gaps and seal the sand to prevent chipping.

More Airbrush Action - Near Future Terrain

Terrain Making – I'm getting the hang of using the airbrush with the second set of buildings for the Near Future board. It seems that consistent pressure and paint gives a smoother finish than short controlled bursts. Which is odd because it goes against everything I've been taught but hey ... whatever works.

After lining the seems with a dark gray I went back in with a white to do the bulk of the painting. I think both buildings took me less than twenty minutes to cover with a solid base coat with basic shading. 

Next I went in and painted the details with a traditional brush to pick out signs and metallic parts. My plan is to go back in and add some glow effect with the airbrush around the light globes.

Let's Go Shopping ... More Near Future Terrain

Let's Go Shopping ... More Near Future Terrain

Terrain Making – With the exterior of the two larger structures in a playable state I've moved on to building some smaller buildings to fill in the board. On a 3'x3' including all the structures might make for a cluttered board however in small scale skirmish games cover is key to a good game. Without it you'll fall victim to the sniper on a roof more often than not.

Read More

Airbrush Action - Learning on the Fly

Terrain Making – Last Christmas I received an airbrush kit from my in-laws, nothing super fancy but just a simple starter kit as I've been meaning to try airbrushing terrain. Being as most terrain elements are fairly large painting with a regular brush can take some time and effort to smooth thing out. Up until now the kit has sat in my basement next to the "pressure pot" (that I also received as a gift) that I need to pick up the pipe fittings to convert it to a proper "casting pot."

I postponed busting out the airbrush until now because airbrushing has a huge amount of set-up and takedown work. First I needed to clear out the garage to avoid potentially over spraying on stuff I didn't want to be painted or have a chalky misting of overspray on. 

Next up was learning how to take apart and reassemble the brush. When I was a kid my mom bought me a cheap plastic airbrush that didn't last long as the tips were plastic and didn't have instructions on how to clean/take them apart. After slowly destroying that airbrush from lack of care I lost interest in it and moved on to traditional brushes. As an adult with an appreciation for "having nice things" I spent a long time watching videos and reading articles about how to take car of the brush. All of them insisted on taking it apart and reassembling it clean so you don't mess it up.

Armed with a few drop cloths and the near future terrain I prepared my spray room and set everything up. In order to feed paint through and airbrush you have to thin it down. I chose rubbing alchohol as it dries fast and doesn't mess with the colors to badly. (Note: old thick paint will not thin down no matter how much you thin it. The chunks will clog the nozzle and force you to take everything apart and clean before you can spray again.)

So after cleaning the chunks out of my nozzle and a trip to the store to buy fresh paint and empty flip top bottles, I was ready to paint. I used the house brand of Michaels craft paint which is pretty thin to start with. Mixing it 50/50 with rubbing alchohol yeild me with a thin paint that sprayed without splattering. 

Deluxe Apartment in the Sky ... Near Future Progress

Terrain – I'm trying to spread my time on this project so I can keep the various structures in the same state of completion. With previous projects I've been gung ho and plowed through until completion, which resulted in some less the optimal terrain pieces for actual game play. (Notably the Qi & Gong and Ressurectionist Lab, both have some spots that are hard to navigate during the game notably because of fat finger syndrome)

For this board I'm trying to get each piece to a semi finished state to play some test games before I move into painting. Because something that looks cool and fits the models doesn't necessarily mean it will be a fun piece of terrain to play games on. 

My major concerns with the apartment building lie with models moving around inside. While it was easy enough to build the floors to be stackable and removable, I'm not sure how much scatter terrain is needed inside the building. Sure it will look cool to have it fully furnished, but will it hinder gameplay?

One of the issues I have with all the laser cut MDF buildings that have popped up in the market as of late is the last of interior details. If this is an apartment complex, how do you get to the second floor? Catwalks on the exterior of the building are pretty inefficient and unlikely, unless the buildings are scavenged together from junk. Sure it makes for decent cover and what not, but then so does just building a bunch of random shapes like a paintball field. Not exactly realistic (in a game with alien soldiers wielding chainsaws and laser guns realism is key ... right?) which for some reason bugs the hell out of me.

To attempt to solve this I build a stairwell within the apartment building. It took a bit of trial and error but eventually I found a location that would be easy to move standard human size models up and down as well as be able to replicate the firefights that happen in said stairwells all the time in movies.

We Be Clubbin' ... Near Future Board Progress

Terrain – I spent some time working on the club terrain piece for my near future board. After constructing the walls I realized this was going to be a rather bland structure since it has no windows and only one entry point. The interior is fairly interesting with several height variations leading to the private rooms and stage as well as the main entry check point/bar.

To add some additional interest to the building exterior I've cut some strips of lightweight cardstock into "futuristic shapes" (yes that means variations on hexagons...) While I was cutting strips Empire Strikes Back was on Spike so I gleaned a little inspiration from the set pieces in the film. Most of the futuristic feel of the set comes from the various panel shapes in the background. I also have been paying more attention to newer commercial buildings and noticed most of them use something called efface for the exterior. Essentially what that means is the exterior walls are covered with a foam product skinned with concrete, this allows for interesting shapes at a low cost.

Taking these two points of reference I've added quite a bit of exterior detail that will bring out interest areas without resorting to the typical rivets everywhere look of some futuristic terrain.

I also created the removable roof. Initially it fit a little to snug, after trimming the paper backing off the foamcore on the interior side it is now easier to remove and shouldn't cause to many problems lifting off during gameplay to place models inside.

For the large sign on the exterior I opt to go with a silhouette and a large billboard. I'm still contemplating how I want to do the name of the club. Most likely I'm going to cut out the letters and paint them like neon but I'm still on the fence. For the actual name I'm leaning towards "The Slippery Kitty Lounge" this seems to be a solid name that will fit in numerous settings. 

The roof needed quite a bit of detailing. Because the structure takes up a significant portion of the 3'x3' board, I have a feeling the rooftop is going to be a popular perch. Because of this I added some HVAC units and other structures to the roof to provide some cover. Ideally I don't want the roof to be just a sniper's nest but an area that could be contested by several models without becoming a no mans land if there is a model at a higher vantage point. The HVAC units were made from some Platformer parts I had laying around as well as some other bitz.

I still have some other details that need to be figured out before I can move onto painting this building but at this point I think it's ready for a test game to be sure it works as intended.

In the year 2000 ... Building a Near Future Board

Terrain – I've begun the groundwork for my near future board. After doing a few sketches and looking at the large amount of laser cut terrain available in the market today I decided to pull some inspiration from these designs. While I really like the look of the laser cut mdf I can't justify the cost when I can build eactly what i want myself. Sure it might be easier to just buy and glue together a kit (probably will go that route in the future...) but I'd like to build everything from scratch for this board.

After laying out some paper shapes on my Zuzzy mat I got a rough idea of what type of layout I wanted to create. My thought is to create a slum/industrial area and I drove around Detroit for some inspiration. In many seedier neighborhoods you have truck depots/shipping yards that but up against residential areas and also feature some of the less desirable businesses. For my purposes this is going to be the ideal battleground. The structures I have planned are a three-story apartment building, liquor store, gentleman's club and a fenced in shipping yard; combined with the variety of 1:43 scale cars I've found I'll be able to detail out the neighborhood easily.

The first step was determining a size for my buildings as there are several different systems I plan on using this board for it was important to make sure the scale made sense for everything. In MERCS the movement cards are about 3.5" long, so I used that as my basis for the height of a standard wall, this way it's easy to determine how many MP it takes for a model to ascend a level. Most other systems have 4"-6" as a standard move so this size will work with them as well.

I happen to have a bunch of 1/2" gator board that I saved from a dumpster (technically) which I decided to used as the basis for my walls. The nice thing about gator board is it has a styrene skin which holds up better than paper. This board is very dense and provides a sturdy foundation for the walls, especially when cut down to small sections like these buildings. It is however difficult to cut as the plastic skin is so durable it will take a few passes with the blade before you get to the foam.

After messing around with a few designs I came up with a look I like for the apartment building and have begun cutting out the windows and cutting cardstock to detail the exterior of the building. I'm going to give the impression of concrete formed material with some geometric patterns. I think this will look futuristic enough without going over the top.

I also cut out the walls for the club. I went with an "L" shape that can break up the table in some interesting ways. My plan is to fully detail out the interiors of these buildings and add removable roofs so you can easily enter and exit them.

Next steps are to continue detailing the building exteriors and devise a method for stacking them that won't be to difficult to remove during game play. 

Chop Shop – Repainting 1:43 scale cars

I decided to begin work on my Near Future board. Well, not really the board itself but rather some of the scatter terrain. With all the cars I have laying around now it makes sense to begin the repaints so they match up with my style of painting. While I suppose I could just dip them in stain and call it a day ... that's not really my style.

Step one is to mask off all the windows and headlamps. I like how the clear material looks and don't want to loose that with the repaint. So I dug up some blue painters tape and began the tedious process of masking and trimming each window. It's not a difficult process however it takes time and patience to do it right and not scratch up the plastic with my blade.

After trimming them up I sprayed each car with Duplicolor Dark Gray primer. I really like this stuff it drys fast and smooth giving me a nice surface to paint. 

I've decided to recreate some of the cars I've pimped out in Saints Row 3. I really like the purple and silver scheme of the protagonists in that game and think it will add some much needed color to what could be a rather bland board. (most urbanscapes have this boring gray tone which I want to try and avoid this time around). 

I'm also working with some Laser Decal paper to try and figure our how to tint the windows out. I'll probably add some of the decals to the windows as well to call out and personalize the cars similar to what you see in urban neighborhoods.

Eye in the Sky ... Storm Talon

Warhammer 40,000 – Over the weekend I had some time to put together a few plastic kits I've had lying around for a while. First up were two Storm Talons for my Space Marine army. I haven't picked up the revised rules for flyers (and honestly I doubt I will a new codex is probably on the horizon...) However based on the pdf i have from the White Dwarf they seem to be a reasonable investment for the Fast Attack slot. 

Being able to escort a reserve unit into play can bring a nice 1-2 punch and I've been working on some lists featuring Khan that take advantage of Out Flank. 

The kits are easy to assemble just like most of the plastice kits GW puts out. I was a little bummed at how small the model is when put together (it's slightly larger than a lans speeder) but over-all its a cool kit with a nifty roatating engine housing.

Of note when assembling the kit you may want to paint the cockpit ahead of time, I chose not to and am dreading going in to paint all the little lights and screens. Luckily the cockpit glass will obscure theses details so it's not going to be a huge deal if the interior is a little sloppy. Also of note is the printed instructions for the optional weapon systems are numbered incorrectly. If you want to use the heavy bolters or lascannons there is a separate weapons housing that fits the batteries/ammo box. In the instructions it tells you to use the same parts for all three options.

I really hate the GW flying stands. The "X" shape of the acrylic catches the light from multiple angles and as such doesn't disappear into the battle field. I've opted to use the 1/2" flying stands from Dragon Forge Designs as the solid rod disappears better and seems to be a more stable option. The connecting widget that comes with the stand doesn't fit on the Storm Talon very well, however a little sniping and sanding and it fits nicely on the bottom of the cockpit and looks a little like the bottom thrusters.

Special Salamander - Captain Pellas Mir'san

Warhammer 40,000 – A while back I painted up a Salamanders force for a friend. He's really liking the list he has but as of late has decided he wants to add some different force commanders. I let him look through my Badab War books and he really liked the two characters available to him in the book.

The first character is a special dreadnaught, Bray'arth Ashmantle. This beast of a commander is pretty cool and Forgeworld makes a model for it. 

The second Salamander character is Captain Pellas Mir'san, which currently does not have a model. When I first looked at this guy during 5th edition he seemed pretty mediocre, cool concept but he didn't really change the force to much. Looking at him in 6th edition with Challenges, his abilities get significantly better. Essentially he's a duelist armed with two power swords and a combi-flamer. If he's in base with and enemy character he can either gain the +1 attack or deny the enemy an attack. Pretty nifty.

To build him I rummaged around in my bitz box to find the correct parts. I had an extra captain from Assault on Black Reach that I thought would make a passible base for the conversion. Next up were two power swords, one that came with the captain model and another that I think was from the force commander box. Since his hands would be full with the swords I decided to build a predator style combi-flamer to mount over his shoulder. By attaching it to the backpack he looks similar to the tech marine models, which ties in with the Salamanders forge father look.

After a bit a clipping, sanding and welding the plastic together I have a pretty cool model to represent this character.

Transformers ... Getting more use out of tanks

Warhammer 40,000 – Oh look another green tank! This time around I'm working on a Razorback/Rhino for the Dark Angels commission I've been grinding through. My client was creative with this one and used 3D Studio Max to sculpt some custom parts and have them 3D printed by Shapeways. From what he was telling me they were really reasonably priced running about $2 a part (which is comperable to only bitz sellers) so if you have access to a 3D modeling program you can make some pretty cool unique stuff.

He created a front door hatch similar to the Rogue Trader style rhinos, some custum doors and a rear hatch variation that looks really cool. It looks like he was also able to make his own variation on the gun cowel and turrent so with one kit he has both options he'd plan on using.

Paint follows the same formula as the rest of the army, green base, wash, edge highlight. Then go in and get the other colors.

Also in this batch is a Deathwing Apothacary. It's weird painting bone and bright white on the same model as it can look like a mistake. However that's the official scheme so I'm going to stick with it.