Red Chapel District (Downtown Malifaux Part 3)

Malifaux – Having cast up my road sections and some brick wall section I've begun the time intensive portion of this project. I probably would have better luck if I made my road sections with notches to fit together like a jigsaw puzzle. However I didn't and am going to have some serious gaps to fill in. I think ultimately this is going to strengthen the entire project (as well as subtlety add no slip areas).

While waiting for the resin to set I decided to begin adding blocks to the board. I like the idea of a city built on a city on a city, which according to the fluff so far seems to be the case. The newer areas are built from renovated old buildings or simply built on top of the existing structures. I imagine it to be like Jerusalem or another ancient settlement in which multiple cultures have occupied the same area over the course of centuries. 

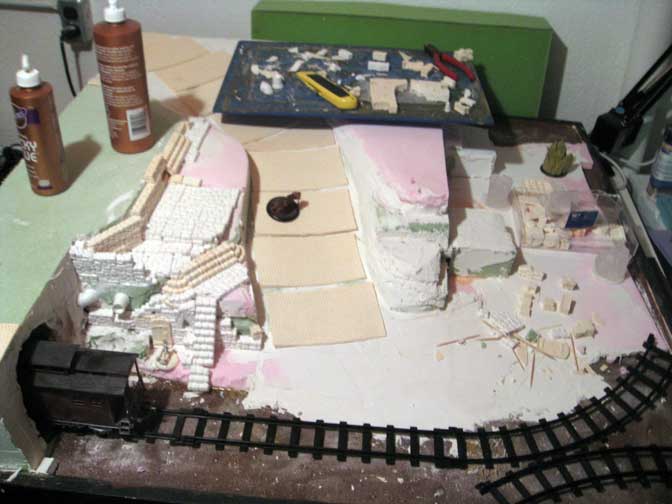
With that in mind I began adding flagstones and fieldstone walls to one area. The fieldstone is going to represent the older structures and or buildings cobbled together from existing material. I'm going to use the gothic stones for new structures like the train tunnel and bridges. Hopefully I'll be able to make these work together and not look like a jumbled mess.

The first area I've been working on is the stairway along the main street. As this leads down near the tracks I wanted to create a maintenance room. This could lead down to the sewer or just serve as an area for rail workers to rest. I imagine small rooms like this throughout the city hidden in forgotten places server as hideouts for near-do-wells, the poor and forgotten or laborers. 

I've also decided that the buildings will not be permanently affixed to the board. Dragging it back and forth from my garage to basement (for sanding etc) I learned that I can't go much higher with the board and still be able to go up my narrow stairwell. I'm really glad I didn't block in the buildings before learning this. So now my focus is to build the basic board and texture it appropriately. This will allow me to swap out buildings and build a ruined version of them to represent the Slums and Quarantine Zone as well.

On the painting table ...

MERCS - This year for Halloween, my Tuesday night gaming group is planning on running a MERCS game using the zombie rules I came up with earlier this year.  As I got distracted with some other projects I never got around to finishing up the Studio Minatures zombie horde.

I think part of the reason I lost interest in painting these models is the shear number I had to finish up. When you have 40 or 50 zombies sitting on your table the first instinct it to assembly line them to get the job done. Of course this means your burn out fast and don't lavish the attention these models deserve. 

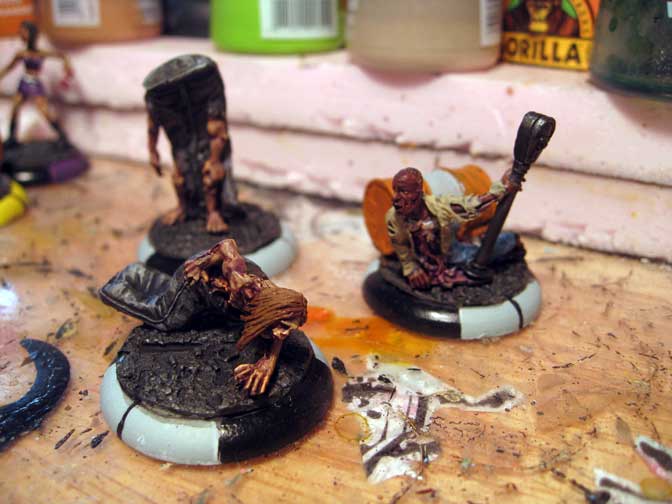
So I've decided to break the horde down into more manageable chunks. The first batch I'm working on wrapping up are the Zombie Strippers from Reaper's Chronoscope Range. These sculpts are pretty fun even though they tend to be a little clunky, I think it adds to the undead nature. 

I started with a base of Foundation Flesh followed up with a purple wash. This gives that bruised base color that I like for fresher zombies. Once that dried I used Elf Flesh as the first highlight followed with an Ogryun Flesh wash. To give them a variety in their state of decay some will have a greyish highlight applied while others with have a pale flesh tone. I'm trying to avoid the green pallor because these are fresh zombies and not from the grave. 

Before applying the final highlights I've taken red ink and applied it to all the wounds, around the eyes, mouth and hands of each model. The ink gives a slight sheen which is more representative of blood. 

To be able to tell the difference between the different types of zombies (walkers, wailers, etc.) I'm using a different color to indicate the flank and front arcs of the models. This makes game play easier and clarifies what the various zombies could be.

Choo Choo Catchu ... Tunnel of Love

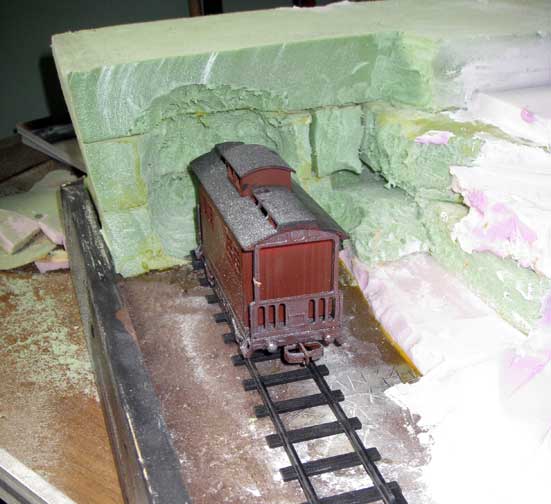
Malifaux - Having sanded down the rough shape of the downtown streets, it's time to work on the actual plan and making it work. I want to add the train (which is still unfinished...) that I was working on for a possible Breach location (lost interest in that project ... for now) to this project. As I fleshed in the rough shape of the mountain/hill I left an area for a tunnel. 

To build the tunnel I'm using the Hirst Arts gothic bridge mold. This mold can create a nice arch which will serve as the tunnel opening. 

Before I can build the tunnel however I need to blast out the interior. So out comes the trusty dremel to bore out the tunnel from the green foam block. You're probably wondering why I didn't just cut the arch out of the foam before I glued it into place. Well there are two good reasons: 1. I'm trying to create this board in a somewhat organic way so that it feels more like the city filled in around the existing terrain (in other words I didn't have a solid plan and got impatient) 2. By building a solid block to begin with it should in theory be stronger than if I had cut a glued an empty arch into place.

The question that come up next is do I bore al the way through to the other side or do I make it a faux tunnel that isn't functional. As the "bridge" over top is about 6" wide I don't think making the tunnel functional is going to have much effect on game play as it's to wide to comfortably move models under. However if it goes all the way through there is the coolness factor of having the train coming through the tunnel.

Ultimately coolness wins out. My initial though was to smooth and finish the sides of the board edge to match the black base, but I think it's potential more of an enjoyable experience to see the edge of the board as rough earth. Maybe...

Downtown Malifaux - Stage 2

Malifaux – I'm getting ready to move into stage two of my downtown board. I still have several other items that I'm going to need to cast and/or sculpt but I'm getting antsy to start the larger portion of the project. 

Because this is going to be a fixed terrain board I need to do some prior planning before moving ahead with it. A few rough sketches give me the general idea of how I want the board to lay out. I'm not going to go into detail with the buildings at this point because I'm more of a hands on visualizer.

I have a base board that I built previously, I was never really happy with the way it turned out so rather than build a new base I'm going to reuse this one (much like a painter with a canvas). Step one is to build up the elevations to fit what I'm envisioning.

The goal is to have a gently sloping winding road traversing the center of the board. One side of the board will be a higher elevation than the other and I want to work a railroad tunnel into that side of the board as well. The far side of the board will be at ground level with a number of staircase in the alleyways. 

The trick is going to be fitting everything I want on the board while maintaining playability. I'm not sure if finishing the building interiors is going to work or not. While I'd love to detail out each structure interior it seems like it may make the board more difficult to use. From past experience lifting a level makes things shift and slide. 


Downtown Malifaux - Stage One ... Revisited

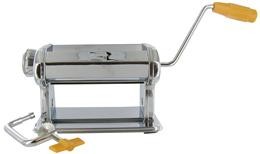
Malifaux – So I came to the realization I suck at using a rolling pin. After several attempts I've broken down and bought a "craft" pasta machine. Luckily as was able to pick it up for 40% off retail and I think I'm going to get quite a bit of use out of this tool.

While I was at the craft store I also picked up a brick of sculpty to try out with the machine. I'm a little nervous that milliput or greenstuff will get stuck in the machine. 

Working the machine is simple enough you set how thick you want the clay, stick a blob on top and turn the crank. Voila perfectly uniform flat clay. Of course there's a bit more to it than that but the basic idea is that simple.

So now that I can produce uniform flat sheets of clay it's time to go back to the drawing board and create the cobblestone sheets. I used the same technique as before, bent pipes to create the bricks. Patience is key as if you screw up the pattern you'll wind up starting over from scratch. After two tries, I slowed down and got the results I wanted.

After baking the clay for 15 min. it's ready to mold. Well, almost ... the baking/cooling process caused the edges to curl slightly. So I stored the dry baked sheets under a stack of old text books for a few days to eliminate the curl. 

Next the master for the mold must be glued down to the casting box to prevent it from floating up during the molding process. Because this is a large flat surface area the odds are it will float in the silicone mixture so to save myself from that potential headache I'm going to be sure to glue this down to a sheet of plasticard the exact size of my mold box (a 5x7 acrylic box frame)


Around the Web

I wanted to take some time to talk about some recent happenings on the web. These are just cool new finds I've recently come across or sites that I've been asked to talk about. 

First up is the new official Malifaux site. This is a really nicer designed site that is reminiscent of an old newspaper. I like how the product descriptions are set up like news stories and there's a pretty decent amount of information about crews and potential uses of models.

Not to come off as a total fanboy but this is probably the best integration of world/story with product I've seen for a tabletop site. It's also great to see a city map and other downloads collected in one place. My only issue is that some of the links go back to the forum for the downloads rather than directly downloading.

Next, I was asked to take a look at the Pull My Finger Project this is an ambitious community project with the goal of creating a comprehensive collection of tactics for Malifaux. So far they've collected a decent amount of articles but are in need of help to finish it up. While I think this is a neat idea, the inherent problem with any "tactics" articles are that they encourage a single-minded style of play rather than encouraging players to experiment and learn on their own. Of course for new players it's helpful for them to be aware of the common tricks and tactics however I would discourage them from thinking these tactics are the only way to play certain models. The project has some lofty goals and I wish them the best of luck.

Lastly my friend Breadcrab has started an immensely humorous thread on the Wyrd Forums. It's essentially a blog about him teaching himself to paint. The off beat references are great as well as the general tone of his writing. Check out The Ballad of the Midnight Painter.

I've also noticed an increase in Malifaux blogs as of late, which is really great and some of them are providing great content well worth making part of your regular reading.

Max Von Deadlock's Miniature Madness - Great site that covers several games. Good battle reports and great painting 

Tales From the Warzone - Pretty comprehensive site that covers a ton of systems with regular updates.

The Dead Tau Project - Regularly updated site that ties into the Gamers Lounge Podcast.

And while this isn't really recent I did just stumble upon a great tutorial from Dark Templar about working with resin bases. Well worth the read especially if you're looking at picking up bases from a small shop.

These are just a few of my more recent finds.


Downtown Malifaux - Stage One

Malifaux – After this year's family vacation I have a boatload of inspiration images for the next big project I'm going to do. My goal is to build a super detailed fixed board based on the town of Eureaka Springs, AK. During my visit to the town I was really impressed with the cramped vertical feel of the town. I think it will make for an interesting game board. I've been leery of doing a fixed terrain board since the tend to get boring after a while. However I think I'll only bring this one out for special events or con demos. 

This time around I'm going to plan ahead and build all the individual components before I begin.  I want the cobblestone to match the bases I've used for my Ressurectionist forces, so first things first I need a way to create lots of cobblestones that can be used for the street. Having learned my lesson with the sewer board, I ruled out cutting individual stones. The process was far to time consuming and won't give me exactly the look I want.

So off to the craft store. After looking around at various options that might work I settled on some brass tubing. The tube is of course a tube, so I had to carefully bend it into a rectangular shape. I did this with two different size tubes so I could create some variety in the pattern. 

I then mixed up some miliput (apoxy sculpt might be a better choice but this was 40% off) and roll it out into a large smooth flat area. Once that's done it's a simple matter of taking the tube and pressing the pattern. Repeat until the area is covered.

This didn't work out as well as I had hoped so before I move on I need to research a better way to flatten the putty. I think a clay roller might work ... unless we have a pasta maker lying around.

Once I solve the flatness issue, the next step will be to cut this into squares (or a large section) and make a mold. This will allow me to quickly duplicate the process to cover the streets. I'll also create some optional pieces to create more interest like man-hole covers and grates. 

Undead Horses, couldn't drag me away

Malifaux – A while back I picked up some undead horse from Reaper. I intend to use them for a special "Doner Party" Scenario. They also look pretty cool pulling the supply wagon, so I think I'll get some use out of the models. I based them the same as the rest of my Ressurectionist models with a Victorian-style cobblestone base. I'd probably be better off putting them on a wasteland or ice base for the scenario, but I'm all about getting multiple uses out of a model.

To paint the horses I started with a base of Deneb Stone, from the foundation line. I then did a wash of Ogryn Flesh followed buy a wash of Leviathan Purple. This created the bruised flesh color I wanted. I then mixed up a light beige highlight color and applied that to the model. And followed that with a light Sepia wash. After some minor highlights the skin is complete. 

I painted the muscles and exposed guts with a deep crimson and followed that up with the same washes as above. I'll go back in a add some of my "any color red" highlight and a touch of gloss varnish to finish up.

The hair was painted with a dark gray followed by a black wash. (easiest way to paint black IMHO).

Wyrd Gencon Order Arrived - First Impressions

Malifaux – This year I kept my Gencon order pretty light. I picked up the new book (love seeing my name in print) and the Nightmare Hanging Tree which netted me Miss Terious the special edition Death Marshall. Wyrd must have had a massive amount of orders again this year as it took much longer than normal to get this in hand. No worries as the models aren't out for general release for a month or more I wasn't in a rush.

Quickly flipping through the book I noticed it's a little smaller than the previous books. This makes sense as there's not a huge add-on to the rules. Essential Storm of Shadows is a faction book for the Ten Thunders. The catch is all the Ten Thunders models in this book are dual faction, meaning they can be used either as Ten Thunders or within their native faction. The idea behind this is the gangs from the Three Kingdoms are infiltrating the existing factions. A nice bit or rules reflecting fluff. 

The art and design of the book is very much the same as the last two books, so fans of that style won't be disappointed. They've also kept with the story, rules story format so you can sit down and read the book cover to cover.

I haven't sat down to read through the book yet, but will post a full review after I've had some time to thoroughly read it.

The next items that I pulled from my big box are the new plastic models. The Hanging Tree and Miss Terious, both are special edition models which in itself is impressive to do a small run of detailed plastics. The boxes these models come in are huge, I can see this being a problem for stores with limited shelf space as the Miss Terious box is almost as big as a crew box by herself. It seems like they could have better designed the boxes to take up less space and use less packing material, but it's a minor thing I imagine retailers will voice their concern as more of the line comes out in plastic and the number of skus overwhelms the existing shelf space.

Taking the model out of the box the plastic appears to be a solid grey similar to the GW plastic but not quite as brittle. Miss Terious in in a bunch of small pieces and the detail is pretty good. She does look very different then the metal minis in the line, I don't think that's a bad thing and I won't be able to finalize my opinion until she's painted as next to the other Guild models I own.

The Hanging Tree came in an even bigger box, however this one has foam pads to keep the sprues from banging together. A nice thing considering the limited nature of the product however not really necessary as the plastic seems to be very durable. I'm not overly impressed with this model. It's clean and pretty sharp but compared to the Nightmare models of previous years this one falls kind of flat. Again first impressions only my opinion will probably change once I get it put together and painted. 

My plan is to pick up a Garden of Moor cemetery set and have a themed terrain set using the Hanging Trees. Of course given the amount of projects on my plate that isn't going to happen until later this year. In the meantime I should be able to incorporate them as terrain pieces on my other boards. I don't really see using them as Hanged models given the dramatic increase in base size.

Labor Day Special

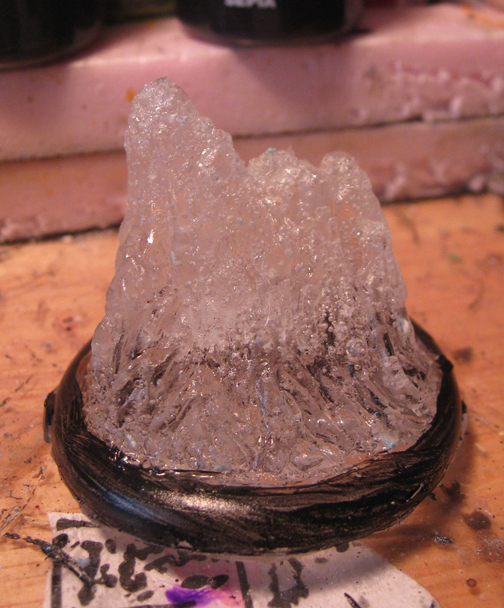
I just added the new Clear Resin 50mm Ice Pillars and 50mm LED Flickering Flame markers to the online store. They're on sale right now for just $10. After the sale I'll have to increase the price to account for materials costs but in celebration of the Labor Day Holiday you can get your now for a special price.

Due to expected demand please allow up to 2-3 weeks for delivery.

Show & Tell – A visit to the show-me state

Last week I took my family on a vacation to Missouri, we spent a few days in St. Louis and then headed off to Branson. Having bought into a vacation club a few years ago we've visited places that were never really on my radar as a place to visit, some better than others but every place has some interesting sites.

We began the trip in St. Louis, a town that has tons to offer for tourists. Most of the museums and parks have free admission and the parking is fairly reasonable. During our stay we visited the Budweiser brewery, Forest Park (home of a World's Fair), the arch, and a really ornate church that features a ton of mosaics. I really wish we had more to explore the city as it seems like there's a ton we missed.

The next leg of our trip encompassed traveling across the state into the Ozark Mountains. Along the way we visited the Merramac Caverns, a cave system which held the hide out of Jesse James. The I-44 also follows along Route 66 and many of the towns along the route have landmarks that were popular during the heyday of "America's Mainstreet," we visited a few of them but most were saved for our return trip.

Arriving in Branson it was painfully obvious why it's referred to as the "Vegas of the Bible Belt," there are numerous theaters and oddities along the strip all of them competing to be the gaudiest, flashiest on the strip. The town is a mishmash of buildings trying to squeeze into the limited space on the mountainside/valley. This results in an area that is hard to navigate and heavily congested during busy periods. There is also no real walking area or public transportation so you have to drive everywhere. The exception is the downtown (which is a bunch of "Hallmark" and 5&10 Stores) which was somewhat disappointing, the bright spot is the new mall complex that runs along the lake and offers a nice walk and fountain show. We didn't visit the outlet malls which are another big attraction for the area, but driving past them they seemed to be the same as other outlets. 

Being close to the Arkansas border, we decided to make a trip to Eureka Springs. This is a really cool little town, built in the Victorian style into the side of a mountain, it's entire downtown is on the national historic registry. It's church was featured in Ripley's Believe it or Not, because you enter through the bell tower. There is also a hotel that has every one of it's nine floors at ground level. The highlight was however the Crescent Hotel which was featured on Ghost Hunters, during the investigation they captured a full body apparition on the thermal imaging. We didn't stay for the ghost tour but did talk to the activities director who gave a quick run-down of the places to visit. Supposedly if you snap photos with you flash in the hotel you'll catch orbs and other oddities. We gave this a shot and did capture a few "orbs," I don't know if they're paranormal or just dust but it was fun to go over them looking for weird stuff.

On our return trip we visited several of the landmarks along Old Route 66, including the world's biggest rocking chair, a town with murals on most of the businesses, and the diner that invented the corn dog.

As with any trip I take to new areas I took plenty of photos of interesting buildings, cave and other things that will inspire some future terrain projects. The town of Eureka Springs was particularly inspirational and I plan on using some of the things I same there on my next big terrain project. 


Army of Darkness

Malifaux – A friend of mine was kind enough to pick up the Alternate Seamus sculpt for me when he was down at GenCon 2011. I really like the sculpt just because it's so silly, the homage to Evil Dead seems to be over some peoples heads but fans can see it right away.

I've gotten my base coat and initial wash done and so far I'm really digging the model. My only complaint is the flintlock looks significantly smaller on this model. The base coat is all GW foundation paint thinned down so it's not so thick. I've also started the road to detailing with some GW washes.

I think I'm probably going to give him red hair this time around. That way I have a young and old version of the Mad Hatter.

Malifaux – Recently I began building tokens and markers for all the special events and encounter scenarios for Malifaux.  The easiest to produce are dynamite counters and treasure counters. These were easy enough to build using the Hirst Arts molds I had on-hand. In the same mold is also a sack that looks close enough to be a Bag of Soulstones. These can double as evidence counters.. 

The other big token I needed to create was a Supply Wagon. Most every model I found was to large to fit on a 50mm base. So I molded my own parts to create a wagon. I think they turned out pretty good, and I made several versions. It's good to have more than one for special scenarios as well as having multiples of all the tokens for events I run. Players tend to appreciate nice table and tokens, instead of generic terrain with pennies or blank bases.

I also built some 50mm column/well tokens. These fit two special scenarios that will be featured in the mini-league I'm running. These are fairly simple carved foam pillars with some green stuff detailing to bring it all together. I like these as they also can fit multiple markers needed for the game.


Mini Malifaux League - Week 1

Malifaux – Week one went off without a hitch. We had 13 players signs up for the three week league with every faction represented. Everyone showed up on time and game wrapped up by 10 pm (most before that). I was happy to see some new faces participating in the event as well as the regular crowd.

Week One used the "Break the Seals" scenario that was featured during the GenCon 2011 event. A fun scenario that involves three columns in the center of the table. On player has to defend the columns the other has to destroy them. The scenario was quite fun, although I did have one player voice his concern that the defender has an advantage. Based on the results I would have to say it is a minor advantage if anything. 

We did have several tables of TerraClips set up and players seemed to enjoy them. I still prefer more three dimensional terrain, but for what they are and the easy of storage TerraClips is a great product. I will say you need to either add additional elements to the board or give height to some of the printed elements to get the right amount of terrain on the board.

Song of Fire and Ice

Malifaux – My experiments with clear resin have finally come to fruition. I finished up my Snowstorm and have made enough Ice Pillars to get through a game with him. 

I've also gotten a technique for doing clear flame wall/growing fire tokens. Painting them with ink mixed with clear varnish makes a realistic looking flame. By adding a LED light to the token it glows and looks pretty good. The lights I've been playing around with were ok but I found some flickering tea lights that create the perfect glow for flame effects.

Of course the mechanism with the switch was far to large for my existing flame markers so I sculpted a new taller version that actually looks more like a raging fire than the previous version.

After casting the clear flame with a urethane resin I dremmeled out the bottom of the base to insert the dissected LED tealight. With that super-glued in place I began painted the flame with the ink mixture detailed above. Once that's done it's just a matter of sealing them again to tone down the gloss. I'll probably offer these up in my online store once I have a quantity built up, but the time a materials to create these is significantly more than the simple plaster versions so the price will be a bit higher.

Mini Malifaux League

Malifaux – RIW Hobbies will be hosting a Mini Malifaux League beginning August 16, 2011. The league will be basically a three week "tournament" in which players will play one 40 Soulstone Encounter each week. This is the prefect opportunity for players to test their new toys presented in Malifaux Book 3 - Twisted Fates, proxies for unreleased models are allowed as long as they are a close approximation of the model they represent.

I've posted the scenarios up on the Paperbag Warriors page. Buy in is $5 and prizes brought back from GenCon will be awarded based on attendance. 

Format is:

• Single Faction

• Domination Format (per Gaining Ground)

• Story-based encounters 

• Painting is encouraged but not required

• Games begin at 7:00pm sharp 


Editorial – Nerd Rage

Note: Apologies to regular readers it's time for another rant. The following is an off topic rant caused by the extreme ignorance of others, we'll return to regular posts next week.

Why is it that gamers/comic guys/geeks in general insist on being complete douche bags on forums and message boards? Is it because they feel so emasculated in real life that they need to vent testosterone in an anonymous venue hiding behind random forums names hiding their information from the masses, lest they be found out as the waste of flesh they are.

As of late on several forums I regularly frequent their has been a huge upswing in nerd rage and douche-baggery. Most notably there seems to be an influx of disenfranchised infinity players bad mouthing Malifaux on their own forums and than dragging their discussion back to the Wyrd forums. I've seen it on Bell of Lost Souls as well, game forums becoming victims of their own success. I fondly remember the GW forums before they were shut down due to the constant stream of "OMG THis Is Sooooooo BrOken!" or "I'm Gona boykot if u dont lower moneyies." Is this necessary? Do gamer's really think they'll gain anything by ranting like this. Or is it really just the immature 10 year old boy in them screaming out because they suck at everything?

I tend to believe it's the later; as gamer's tend to be a vagabond group traveling from new game to new game and back like gypsies in the night or more aptly like dirty carnies dragging there wares about; their fellows develop an extreme prejudice towards new and "better" systems. These players then feel the need to rip apart and discredit the popular game (much like they did the jocks in high school) and make it look bad to their fellows. These raging nerds truly believe misery loves company and they must bring everyone into their cold sad world.

The other group that seems to be more vocally dissing the Malifaux system are the gamers version of "hulked out ragin' jocks" those ultra competitive blowks from across the pond who insist on world wide rankings and a tier system for everything. They've clung to WarMaHorde like grease on chips. Many have left the systems they helped mold into the codex creepy new army every month to attempt and bastardize new systems. Their opponents that get fed up with the nonsense move to a new system only to be followed by the very type of gamer they're trying to avoid.

Now it appears those chaps have decided Malifaux is the game for them and the forums are flooded with the same complaints about VAT, tiers, balance, shipping, and limited release stuff. Why can't people be happy with a system that is just fun.

Additional Note: If you do happen to fall into one of these groups or feel like I have offended you in any way go bitch about it on some other forum. This is not directed at normal fellow gamers but rather those forum Trolls and Hammerheads. 


FOLLOW UP:
It seems that some of the more vocal angry elements have recently left the boards. This is a good thing in my opinion. It sucks when a small really vocal group becomes the unwanted face of a group of players.

This post was originally targeted at a very specific group of forum trolls that turned a pleasant forum into a den of constant complaining and nit picking at minor problems turning a game that has no business being cut-throat competitive in my mind into their tournament go to.

Malifaux – Forging along with my experiments in clear resin I've begun to attempt to cast my flame wall markers in clear resin. My goal is to eventually have these light up. The initial casts were slightly flawed due to the ridiculous humidity. However I think they will work fine for the experiment. 

I'm going to mix ink with a clear varnish to paint the flames. I think that will not only give me more control over where the color goes but also be a bit more durable. After painting is completed I'm going to drill out a space to insert a LED bulb.

Spirited Away

Malifaux – Earlier this month I participated in a Malifaux Tournament and won "Best Sportmanship" which was pretty cool as I don't often get to participate as I'm usually running the events locally. I think I came in around 4th overall and had a blast. The prize was my choice of any of the small boxes, so I chose Snow Storm.

I really like the look of the model and I think it could potentially add quite a bit to my Kirai crew. Creating Ice Pillars, pushing models and providing a much needed tank are just a few of the options I see using the model. Eventually I might break down I pick up a 'tina crew of my own but right now I'm happy to add the Graverobbing (really why not a single ability deals with corpses?) Spirit of Chill to my Three Kingdoms Spirits.

Opening up the kit the first thing I noticed is it is a hybrid kit consisting of the large model in resin and the antlers and child as metal parts. Looking at the resin I'm starting to think the material is prone to issues (excessive flash, nasty mold lines etc) and it might just be an industry wide issue. Some of the mold lines on the legs are really deep, almost like the mold wasn't aligned properly and the fur along the arms and head has some weird flash that requires a bit of patience to remove.

After cleaning up the kit I pinned everything in place. I stuck both models on a temporary base to paint them. At the same time I cast up a clear base to mount them to. [TIP: Urethane Resin hates humidity, if you're having issues with excessive bubbling buy a dehumidifier.] 

I really don't like the two-tone studio paint job so I decided to stick with a monochromatic scheme for my Snowstorm. Luckily I had quite a bit of the custom colors I mixed for my Legion of Everblight models left over. I started with a baby blue base, followed by a blue wash. Next step was to lighten the flesh until I got the cold ghostly feel I was looking for. The child was painted similarly to the way I painted Rasputina a few posts back.

Overall I'm happy with my progress so far and will add some snow to the base to tie it all together.


The Dead Shall Rise

Malifaux – Wyrd just Tweeted some new pictures of the some of the Res. Avatars. Kirai looks pretty amazing.

Love the Nicodem concept it looks really fun. 

I've been following this thread on the Wyrd Forums. Just utterly amazing.