On the painting table ... Cowboy Up

Malifaux – Another Guild commission finds its way to my table this week. This time around is a basic 35 Soulstone crew led by Lady Justice. My client picked up and assembled a Lady Justice crew box, Alt. Executioner, and Sam Hopkins with the Ghost Town base inserts. The nice thing about have the models provided assembled and "cleaned up" means I can solely focus on the paint job and get it done farily quickly. 

It seems that The Guild is the go to faction of choice for most new players. Which honestly makes alot of sense they're very straight forward, have fairly high damage output and a minimal amount of "tricks." The fact that most of the demos I run feature Guild vs. Ressurectionists probably also comes into play. 

With this crew I was asked to stick with a black/brown color scheme. It feels very dark and brooding to me. To paint the gray/black I used a dark gray base and built up the color using a black wash which creates a nice effect for black cloth. I broke down and picked up a few more of the new brown colors from GW's line as it's nice to be able to grab two pots and have your base and highlight spelled out for you. I usually mix my own colors but the new GW color system has its own merits (namely being able to replicate colors at a later date with very little trial and error).

I went with a deep red on Justice's hair this time around and am very happy with the result. Again I'm finding the GW paint system to be convient with the variety of premixed reds that allow you to build up the highlights quickly and easily.

All that's left on these is to apply some gras tuffs and clean up the eyes. Once they're sealed I'll go back in and add some gloss varnish to the water troughs.

On the painting table ... Gremlins

Malifaux – I realized I have several boxes of Gremlins sitting around that I wanted to paint. Every now and then I need a distraction from my main project to keep my eyes fresh and avoid getting bored painting the same thing over and over again. I really have no interest in playing gremlins but the models are cool looking. 

I'm going to try and assembly line these since they share quite a few colors and the process worked well for the Guild models I've done recently. I'm using the skull bases I made up for Hell Dorado, I used one on a undead crab I painted a while back and they made a passable swamp, so we'll see if we can get the same effect with the Gremlin Hillbillies. 

Most of the sculpts are easy to assemble being a single piece sculpt or just needing to add the arms. The warpig is a pain to get together, there's not an obvious spot to mount the gremlin on its back so finding the right attachment point was a bit annoying. Also the head doesn't seem to fit perfectly in place and I'm going to have to do some greenstuff sculpting to fill the gaps. The amount of flash is pretty reasonable only existing around the fingers and slim elements so it was easy to clean them up.

After pinning the models to the bases I used a grey primer. I was contemplating using a rusty red to save some time on painting the earthy elements, but since I've decided to paint the coats dark grey and black. I figure for Sommerteeth he probably looted his cloths from a Guardsman. With Ophelia's clan I'm going to mimic the color scheme of a recent Ortega commission. 

I haven't decided if I want to hold onto these models once I'm done with them or sell them off to a collector. I personally never felt much of an attachment to the Gremlin models other than finding them fun and having a desire to paint them up as the models are really cool.


Ghost Samurai and Honeypots - Unboxing

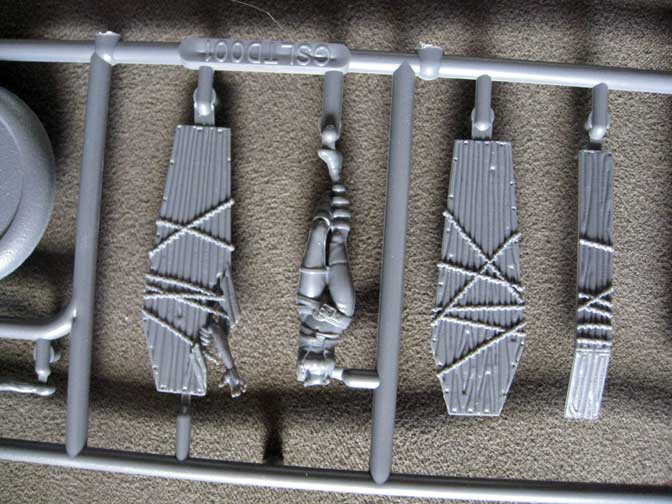
Malifaux – Recently I picked up some new Ten Thunders models to expand my existing Resuresctionist force as well as the small Neverborn force I've been working on. These are part of Wyrd's new plastic line and the quality continues to impress me. 

Initially I thought the plastics lacked the character and humor that the original models in the line had, however as I pick up more of them the quality and proportions are growing on me. Combine that with the ease of gluing plastic models and the end result is pretty great. 

I still feel like it would be beneficial to have more options on the sprues. As they are now you really only get the same static pose as you would with a metal model. Granted the poses are pretty great and dynamic, it would still be nice to have some head or arm options to be able to customize the models so yours look different than others on the table. 

I'll post up more pictures after I get these assembled. I just wanted to get some shots of the actual sprues posted as you don't really see much on the box art and for some reason Wyrd isn't showing painted models in their online store like they used to.

On the painting table ... C. Hoffman, Iron Man?

Malifaux – I've begun work on a C. Hoffman crew. This is the first time I've painted up this particular box and was surprised at the amount of flash that I had to remove. Typically Wyrd miniatures come fairly clean with light mold lines and minimal flash to trim. With all the tiny mechanical bits on these there are a ton of vent lines and other types of flash that need to be trimmed up. 

To go along with the crew box I'm also working on a Steamborg, Guard Captain and Scales of Justice totem. These will all eventually find a home with the other Guild masters I've painted for the same client. 

Most of the construct heavy crews I've painted in the past have been mostly silver and chrome. While that is a good look for most metallic bitz, this time around I wanted to do something different. According to the fluff the Guild has all the money due to controlling traffic in and out of the Breach, since Hoffman is a Guild officer I figure he would have a bit more flash in his retinue of machines. I started with a brass/gold feel and thought it was a bit much, after adding some red to tie in with the Guild colors I realized I had essentially created a Malifaux Iron man. I'm digging the look a feel so far and am hoping I'll be able to translate the look into any other constructs my client might want to add in the future.

You Owe Me ... Dark Debts

Malifaux – After reading the Ten Thunders book for Malifaux, Jacob Lynch's crew was the one that stood out to my as very unique and fun to play. Yes I know they're technically Neverborn and i should just stick win Shang Tsung, sorry Yan Lo, but something about this crew has me hooked. 

Jacob Lynch essentially runs an Opium Den, however in Malifaux it's not opium, the drug of choice is called Brilliance and it eats away at the users soul leaving them as a mutated shell. Pretty cool huh? In game the model has a bunch of cool abilities that tie his mechanics and story together really well. As I've come to expect from any model in Malifaux, just by reading their card and the names of their abilities you get a sense of exactly what their story is.

In addition to the Dark Debts box, I had Mr. Tannen, Mr. Graves and Santanna to assemble. I still can't get over how huge the boxes are for the new plastics, it seems to be such a waste of space. Looking at the size of the sprues there's not really anything that can be done unless the sprues are cut down to fit into something smaller, but at that point you're adding more potential headaches that should be avoided.

The models themselves are really sharp (both looking and literally, the clawed hand drew blood). Just like the other Wyrd plastics these are very thin and proportional looking. A word of caution, only remove a part from the sprue when you're ready to glue it in place. These parts are so tiny and small that it's easy to lose them or mistake them as flash. (Mr. Tannen has a coin in his fingers) On the sprue each model has a designation as A, B etc. all the parts associated with that model are number A-1, A-2 etc. There aren't any paper instructions so good luck figuring out how those tentacles go together. Minor gripe really but given the number of GW kits I recently assembled there's something to be said for printed instructions.

Nice thing about these is the mold lines are very slight, which means very little scraping at tiny parts. After a bit of cursing and searching on the floor for parts that escaped the confines of my tray; I was able to get all five boxes assembled. Jacob's crew looks really cool and I can't wait to pick up some Beckoners as I think they're essential to his crew functioning and are gorgeous models that I must own.

Santana is a cool model. It was pretty hard work earning her and I like the idea of a Henchman exclusive model. But of course they models was also offered as an incentive for the RPG which takes away some of the exclusivity. Of course it wouldn't make sense to tool a plastic die for a one run miniature so I would guess well see several ways to get these in the future. And since I really like the model I don't have an issue with the secondary value dropping because of increased supply. Had I worked so hard to get this as an investment I might be a little peeved about the so called "limited" nature of the sculpt.

Wyrd wants you to support your LGS! Win Stuff.

This February Wyrd is giving you chance to win a Limited Edition Lord Chompy Bits just for supporting your local game store. Check out the flyer at the right for details. (Click for a larger version)

I think this is really cool on their part as Local Stores are really where players learn about new games and meet new people to play with.

I know most of you probably feel like you get a better deal buying from online discount stores, but with the new shipping increases you're probably playing close to the MSRP when it's all said and done. Why not just pick up what you need from the guy/gal that's providing you with a cool place to play and meet other gamers?

By the power of Greyskull ...

Malifaux – Yes I know this is a kit for Warhammer Fantasy. No hell did not freeze over, I haven't started playing that game. When I saw this kit I immediately thought of Nicodems Observatory from Rising Powers. Of course shortly after that I though of He-Man. Then I looked at the price and giggled. Much like most of the kits from GW the price is higher than average but you are getting a nicely detailed hunk of plastic with optional parts (and skulls everywhere). 

Unboxing the kit you have two solid parts for the base and a few sprues with the rest of the details. I could see using some of these parts in other projects and will probably check some bit sellers to see if they have any extras. The instructions were very detailed and easy to follow and the kit went together smoothly. In fact I think it took me more time to remove the mold lines than it did to assemble the entire kit.

I opted to leave the observatory and tower ramparts unattached so it can serve a dual purpose. Other than that minor option there aren't any extra parts in the kit. Which is a bit disappointing as most GW kits have a ton of extra stuff that can be used other places.

Overall I'm happy with the kit. It looks imposing on the field and takes up a decent amount of space. I'm slightly disappointed with the number of places models can stand on the piece, for some reason I though the stairs and broken walkway were larger than they are. Combining this with some Citadel Trees, Wyrd Hanging Trees, and two Garden of Morrs should be more than enough terrain to fill a 3'x3' graveyard themed board. I know I could probably build all of this for way less and have it look just as cool, however I'm experimenting with the durability of these plastic kits. Dragging my desert board back a forth from the game store every week has exposed some of the minor flaws in scratch built terrain. Granted three years of constant use and shuffling is pretty solid for a terrain set I want to see what I can do with some solid plastic kits.

On the painting table ... Fire Breathing Mexican Dragons

Malifaux – Avatars, love them or hate them they are part of Malifaux. Some are very strong and add much to their original form others not so much. Regardless of how good they are in game the models are all pretty impressive. Whenever I'm running a demo I like to have some of them out next to the table as the inevitably catch the eye of on lookers and lead to a bevy of questions.

While I like to use them most of the time I find myself distracted with trying to meet the manifest requirements and forgetting about my actual in game goals. I imagine with time I'll get better at balancing the two and find a god use for these models.

Anyway on to this weeks project. My Guild client continues to add to his collection and has really found Malifaux to be a game he truely enjoys. Recently he picked up the avatar forms of Sonnia Cridd and Perdita and needs them assembled and painted to match the rest of his force.

Most of the Avatars are difficult to assemble with more finiky pieces and joins that require gap filling. I'm not sure why some of them are partially resin and partially metal as opposed to being made of the same material for all the parts. I assume its a cost savings (however if they were all resin weight would be less of an issue in assembly). 

Once I finished putting theme together I had to go in and do some gap filling. Pretty straightforward simple stuff with no need to resculpt details. A quick shot of primer and I was ready to begin painting. Rather than follow the color on the box I decided to go with a red base for Perdita's mount. I think this takes it into the more demonic looking as opposed to the studio scheme which reminds me of The Neverending Story. Sonia's dragon began with a yellow base and orange wash to bring out the details.

Next steps are to go in and pick out the details. 

On the Painting Table - Christmas Joy?

Malifaux – I picked up a Reaper Krampus model to use in some holiday scenarios for Malifaux. What's a Krampus? Click here to find out.

To use this as the model represented in the Wyrd scenarios I needed to mount it to a 60mm base. The reaper model is a bit on the small side and looked a little unimpressive on that size base. I decided to use one of my rocky bases and add some undelivered presents to the base. I think this helped to describe the scene and set a tone for the model. 

After basing it up I added some addtional sand and gravel to smooth the transition point where the boxes had been glued to the base. I quick shot of primer and it was ready to paint. Looking on the internet it seems there are several colors that the Krampus typically comes in: black, white or red. I decided to go with the traditional red devil look as I feel that will really stand out against the snow I plan on applying to the base.

Oretegas finished

Quick update the Ortega crew and associated mercenaries are done. Trying something new and posting from my phone. Bit of a pain to type.

My client loved them and is looking at adding more models to his collection. I'm guessing there will be serveral Guild crews on my painting table in the near future.

On the painting table ... You want salsa with that?

Malifaux – I just started yet another Ortega crew for a commission. It's really not surprising as Perdita is one of the most forgiving masters out there for new players. Pretty much point and shoot, literally.

It turns out Tuesday nights, as my FLGS suggested, is probably the worst night for the players in the area that are interested in the game. So I'm trying to work out a better day that isn't so busy that we can't get any tables. I ran a demo for this client and his friend on Sunday which seems like it might be a good day for the player base (not so much for me ... but we'll see). 

Both players were very excited about the game and had a ton of questions on thing they might want to add and the strengths and weaknesses of the various factions. I think I might need to do another series detailing my thoughts on each faction as quite a bit has changed since the last time I did a faction breakdown.

After consulting with the client he wants a darker version of the crew. He really liked the scheme on my demo Lady Justice crew so I'm modifying it slightly to work with the family. He wanted Perdita in all black leather which is going to be a bit of a challenge to make the model not look flat in an essentially two color scheme but I think the grey with wash technique I've been using for black fabric will work to bring out the detail.

This time around I pinned Nino's coat to the protrusion on the base I mounted him to. I think this is going to increase his durability significantly. Most Guild players I've met have had to do multiple fixes to the leg of the model as the attachment point is very thin and prone to breakage when there is stress put on the model.

After seeing the WIP shots of this crew my client asked that I add in a Convict Gunslinger and Hans. One thing your can't fail with is more firepower. I'm looking forward to painting Hans as he hasn't come across my painting table as often as the Gunslingers have.

Black Friday Deals - Don't forget the little guys

While I'm sure most of you have already done your shopping by the time this posts. I wanted to remind you that Saturday is Small Business Saturday and is a great time to get out an support your local hobby store. Take some time to make a wish list with your store owner and direct your friends and family to that shop when looking for gift ideas for you. If your store owner doesn't do a wish list suggest it as a means to drive sales for his store.

Meanwhile I've put some hard to find items up in my ebay store front that would make a great gift. Check back often as I'm still in the process of cleaning out my game room of pieces I bought because of an unnatural obsession to "catch em all." And while they don't necessarily fit my playstyle or tastes anymore they are great finds and many of the items are out of print and hard to find.

GauntletCON 2012

This weekend my local store is running the first annual GauntletCON. This is pretty cool idea they came up with the showcase what the products the sell are all about and to drive intereest in the community. Essentially they have people coming in from 9am-5pm Sunday November 11th to run demos for all the games they sell. This is also a mini comic con type event as they sell comics as well.

I'll be there running Malifaux demos and the store will have special discounts on all product they sell during the con so it's worth stopping by to check it out. 

For more details check out their website and/or facebook page.

Gauntlet Con seems to have been a success. I was pretty happy with the amount of people requesting demos of Malifaux. I had a prime location near the counter so anyone buying anything stopped to take a look at the board and promo stuff I brought.

Paid in Full: Commissions - How much is your time worth?

Random – Lately the number of inquires I've recieved about commission work has dramatically increased. Many of these questions have been about how to determine a price when doing commission work. So in an effort to answer these questions for the larger population, here's the basic principles I use when putting together a quote.

1. How much is your time worth? When considering doing "craft" projects that you intend to sell to others the first thing you need to consider is how much is your time worth. For the most part you're not going to make $16-$30 an hour painting models or building terrain. Even when painting to a Golden Daemon or Crystal Brush winning level the amount of time you put in usually won't equate to "real job" money. Most gamer's won't pay more to have a model painted then it cost them to purchase so keep that in mind when putting together a price. Also remember if you have a wife and kids or girlfriend your hobby time is probably limited. When I started this site I was between jobs and had much more time to build and paint stuff. Now my time is limited so it's important I enjoy every project I take on and be as efficient as possible so I'm not working for pennies an hour during my free time.

2. What are your material costs and how do you recoup them? Paint, primer, glue, sand all cost money. Good paint brushes and glue cost more. While it can take a while to burn through a pot of paint, you have to consider the costs when figuring your price. One thing I've instituted is buying new pots for army scale projects and billing them as a line item. Once you're done with the project your can give the remainder to your client in case they need touch up or add models they don't need or want you to paint.

Terrain Projects can get tricky as sometimes you use found materials and other times you need to buy foam and other raw materials. Most of the time you're going to buy in bulk and have a bunch of stuff you need to store. If you have limited room you might need to invest in space to store that stuff. Right now I'm not quite at that point but it's getting close.

3. What are your customers expectations? This is a big one. Some customers just want a three color minimum. While other might ask for table top quality expecting to be able to enter them in a juried contest. Managing those expectations and delivering as promised is huge. I've heard many horror stories from painters about unreasonable clients that make requests well beyond what the initial request was and then want to pay less because the quality is what was expected. On the flip side I've also heard numerous stories of painters that send over a quick shot of the base coated model only to have the client "love it and want to know how quick it will ship." That second one is rare but important to remember as some clients dont' want you best work. They just want some color on the models. Knowing this you can save yourself a ton of time.

4. How are you going to get it to the client? Nobody considers shipping costs. One more then one occasion I've  had to deal with customers complaining about shipping, "DUDE the flat rate box is only $5, why does it cost $20 to ship to me in Antarctica? You're trying to RIP ME OFF!" You also see this all over several companies forums. The reality is shipping is expensive, foam and packing materials are expensive. Tracking and insuring packages is expensive. And even it you do everything right the post office, UPS or Fed Ex will inevitably screw up on a one-of-a-kind rare product. It happens, sending boxes across the country or world has risks. Most of the time it's not an issue but when it is will be the one time you didn't insure or track a package. C.Y.A. 

While the post office and FedEx provide free boxes the packing material is not free. Even cheap foam is a $1-$5 a yard minimum. If you're shipping painted models wrap them in foam and pack them well. Otherwise it's likely to be damaged during shipping. For an order of several models you can quickly burn through a large amount of foam and tape. So figure in the cost of shipping and add a few dollars to cover packing materials otherwise it will eat into your already tight bottom line.

5. Don't get burned. When painting models this isn't as big a deal as if you don't get paid keep the model and resell it. So long as it's nothing to obscure you should be able to get at least 40-50% of the retail cost, more if you're willing to wait. But terrain projects are another beast entirely. Custom terrain is hard to sell once its built. Particularly if it's custom to specific client. After getting burned a few times I put forth a 50% nonrefundable deposit. That way if I have to go buy a bunch of supplies for a project I'm not going to be out of pocket if the client changes their mind or "is broke this month bro."

6. Be transparent. Have examples of your work and the various levels of quality and pricing tiers available. Put them out there for the work to see. Eventually people will start to connect with your work and ask about pricing. For example for a table top quality miniature from a skirmish game I typical charge by model size: 30mm - $8-$12; 40mm - $10-$15; 50mm - $15-$30. This gives a good starting point. But for an army level game it's unlikely you'll get that much per model. At this point most people want a "lower table top quality" which falls more in line with the 25mm- $2-$3, and goes up from there.

For terrain projects it helps to come up with some designs you can quickly replicate and make a bunch of them at once. Assembly lines are good for managing time and if you make something that can be used for several systems you diversify your client base. For example the swamps I sell in the online store I typically make 6-10 of them at a time. Since they use water effects it's better to mix a larger pot of it and pour all at once than to make small pot and have a bunch of waste. Having an existing stock also lets you focus on other projects and have a reference point for custom orders.

Being consistent helps you to manage your time and be able to quickly quote a price to a potential customer. I hope this answers any questions for aspiring painters and potential clients.


Brown Black really? – Step by Step Library Board (Part Four)

Relic Knights – Continuing my progress on this library board I've gotten some of my bookshelves assembled and smoothed out. Gluing them together I ran into some issues with gaps and shelves that are slightly different heights. I used some Dap spackle to fill these in.

After sanding them smooth, it time to paint. I found a dark brown satin finish spray paint to do the base coat. I have this crazy idea that the book shelves should be the same color as the Ikea book shelves I have in my game room. The problem I have is: What color is black brown exactly? It's not really a color at all at first glimpse it seems like I could take in in and have it color matched at Home Depot, unfortunately the effect seems to be from layering two colors so you get hints of brown when the light shines on it.

My solution was to spray them with a dark satin brown and then apply dark walnut acyclic wood stain. This did my basic shading for me and brought the color closer to what I was looking for. I'll tweak it more as I move into the detail painting of the shelves.

With the sections I've base coated so far I have a pretty decent area of the board covered and once I add in some statuary I think it will start to look more like what I've envisioned in my head.

Shelved - Step by Step Library Board (Part Three)

Relic Knights – With the basic board done it's time to populate it with terrain elements. I sat down and did some sketching to plan out what it is this board will need to feel like a library/school. Usually I don't really sketch anything when I'm building terrain as I like to play it by ear and build what I see looking at the parts I have to work with.

While that system has worked well for me in the past it also have some drawbacks, namely not having a solid plan means some projects just go on forever. I've also run into the problem of playing it by ear and having a piece that looks great but is impossible to store. 

After doing some thinking I decided that I will need several elements to make this board look and feel like a library. I also came up with some optional elements to make it feel more like a school, anytime a board can pull double duty with minor tweaks you should include that in your planning.

BOOKSHELVES – I decided the primary terrain element for this board is going to be various bookshelves. To make the best use of my time I decided on several configurations that could be easily repositioned to create a new layout and were small enough to be easily stored. I settled on a single-stack L shape, a double-stack L shape, a single stack S shape and a few straight sections.

STAIRS - I'm still looking for some inspiration on these. My first thought was to use wooden balls and build the stairs going around them. I think that could look mystical and cool, but I'm afraid they won't have enough height. I've been looking at using a tube and ringing the steps around that to give some more height and provide someplace for snipers to nest. 

STATUES - I need to find some cheap Egyptian style statues. I see this more as a library/museum of mystical power and history so incorporating some statues and other relic type items will give more scatter terrain and add a bit more character to the table. While the bookshelves I found are really cool a table of nothing but bookshelf is going to feel like a simple dungeon.

ARCHES - To help give the feel of being in a massive structure I'm considering building some arches. These will provide some more interest areas as well as some minor cover for long hallways. I'm not 100% sold on the idea yet but will  probably at least build one to see how it looks.

Here's the optional stuff. To try and get more life out of this board I'm considering adding some school elements.

DORMITORY - Essentially the idea would be to create some rooms (or walls) that can divide up sections of the board into rooms (essentially buildings on something this big). I have some beds that will make a good dorm room, they're just over 1" high so it will be a bunch of light cover in a small area that could be interesting.

LOCKER ROOM - I'm not sure about this one. On one hand I think it could be fun to build on the other I don't know how functional it will be in game terms. I'm going to revisit my sketches before I try to build anything.

BOILER ROOM - This will be easy a room full of pipes and techy looking things. Gives me the chance to pull in some additional sci-fi elements and add some grime to the table. I'm not sure it's necessary yet but as an option I like it.

STAGE - Most schools have stages for presentations and talent shows. If I build one this could potentially serve double duty as the Star Theater for Malifaux. Not sold on it yet but we'll see.

Picky about Plastic

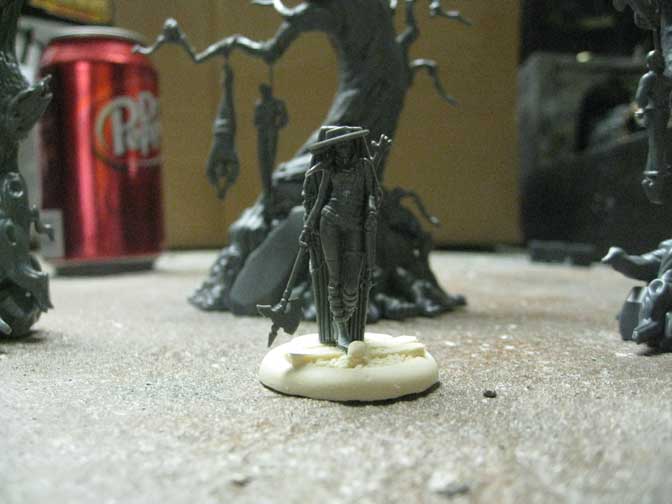
Malifaux – Having had a little spare time this week I busted out my Hanging Trees and Miss Terious models to put them together. While my initial impression wasn't love at first sight working with the plastics turned out to be a fairly enjoyable experience. The plastic is harder then the GW stuff so having a fresh Xacto blade is key to cleaning them up. And while it is much harder there are still a ton of fragile parts particularly on the Hanging Trees. One nitpicky thing that bugged me is the lack of instructions, the Hanging Trees have quite a few pieces and while it's easy enough to figure out where things line up I still had an extra branch piece that I couldn't figure out where to glue it on. The main trunk also fits so tight I had a difficult time getting it to fit into the slot. Which means there's a nasty gap that needs to be filled.

Miss Terious was a more difficult assembly, the parts are very small and gluing them together was and exercise in frustration until the glue reacted with the plastic, after that it held like a dream. If you decide to use a scenic base there's no good place to pin her to the base as her feet are tiny. I wound up using gorilla glue to mount her to the base and then attached her to the coffin in a few spots before gluing that to the base as well. The model is pretty amazing looking by itself, however standing next to the existing metals she looks small. I appreciate the realistic proportions Wyrd tries to maintain how ever the face on this model is so tiny It's going to be a challenge to paint. 

Having assembled the models I can appreciate them as stand alone pieces. However when compared to the existing line they look very different so much so that then almost seem to be from a completely different range. The trees were a bit of a let down, they look great but the hype around their release implied a bunch of extras on the sprues which wasn't the case, you get two birds per tree which are needed on each tree to add interest areas to the top branches.

Next step is to get some paint on them and see how well they blend in then.

Back-to-School Beginner's Malifaux League

GG_beginersleague.jpg

I'll be running a four week beginner's league at Gamer's Gauntlet. This is a great chance for new and old players to get started with the game. The league is set up to award players for building and painting a table ready force.


Each week players can score a number of league points by playing games and painting models. Each point equates into a lotto ticket for the prize draw at the end of the league. The league is FREE to join and will begin 9/11/12. Weekly scoring sheets should be turned in by 10:00pm Tuesday each night of the league and the final drawings will take place 10/2/12 you must be present to win.

Gamer's Gauntlet is located at:

20564 Hall Road 

Charter Township of Clinton, MI 48038

(586) 412-6677


League play takes place 6-10pm Tuesdays.

Doctor's Orders

Malifaux – Dr. McMorning is one of my favorite masters, however I don't play him as often as I like because Seamus and Kirai get most of my table time. This week I decided to try something different to see how it would work. In an attempt to get in more  games for Dead Heat my group has been playing mostly 25 stone games, so I set up a game against a Guild player to try of this experiment. 

Read More

It's Growing ... Gamer's Gauntlet Demo Nights

Malifaux – The turn-out for demo nights seems to be growing steadily. Which is pretty inpressive since the store still doesn't stock the game. (Soon I hope, let them know you'd like Malifaux and MERCS stock by emailing them here). I had about seven players on Tuesday with several people interested in demos. 

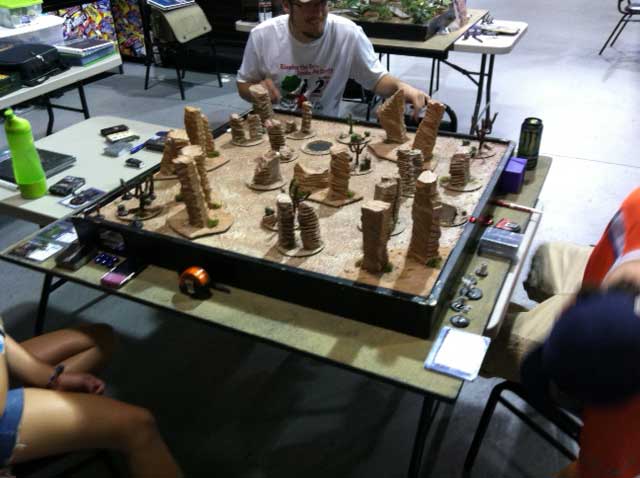
This week I brought out the desert board for a change and it seemed to catch the attention of most of the people who came into the store. With an odd number of players I had a group that played a three-way encounter. Collette vs. Zoraida vs. Perdita. They played shared treasure hunt and Zoraida came away with the win (8 points), Collette was a clse second with 4 points.

Some of the guys that tried out MERCS a few weeks ago came back with full crews, the battle maps and token sets this week as well. I'm glad to see that game is catching on as well as it's my favorite way to round out a night of gaming. Although watching them play on a 2D mat was a little odd looking it seemed to work out fine and made it much easier to transport then my boxes of terrain and tables.

Setting up your own demo night:

• Talk to the store owner and see what night they have space available. 

• Explain the system you want to demo, if the store doesn't stock it currently ask if they do special orders. Also ask if they'll start stocking the game if you can generate interest. 

• Prepare a demo table, if the store doesn't have terrain available or the terrain they have isn't appropriate or impressive. 

• Have several crews/models painted up for use

• Bring enough supplies (measuring devices, stones, cards, dice, markers, tokens) for several people

• Have other experienced players on hand to assist with longer demos

• Talk to every person that comes by looking, be friendly and ask general questions to gauge their interest. essentially you become a salesman for the game, your commission is a good community.

• When someone expresses an interest in learning more, do a quick demo of mechanics, then offer a longer demo if they want to learn more. (if you have a crowd it's helpful to pass them off to an experienced player for a "full" game.

• Promote the night, posters/flyers posted in the store, post on forums, join web groups and post there. If you don't get the word out people won't know to come in. 

• Stick with it, the first few nights you might have a weak turnout, but stick with it and eventually more players will show up.