Ahoy! - Star Nebula Corsairs Building Progress

Ahoy! - Star Nebula Corsairs Building Progress

Relic Knights – My quest continues ... I've just wrapped up building the full faction of Star Nebula Corsairs from my Relic Knights Rewards Package. During the initial Kickstarter this was the faction that peaked my interest the most, I've always liked the idea of space pirates so this is right up my alley.

Read More

Crystal Configuration Conundrum

Crystal Configuration Conundrum

Relic Knights – One of the key features of the Relic Knights universe is the growth of Esper Crystals. These are supposed to be running rampant across the Last Galaxy as the Darkspace Calamity approaches. In the videos I've seen from Soda Pop it looks like they use Gale Force 9's Battlefield in a Box crystals, which look pretty cool unfortunately they don't seem to be available (not to mention I want to try and save some money on this project) so I need to figure out how to make crystals.

Read More

They Call Me ... Doctrine Feel-Good

Relic Knights – Wow that's a pretty god-awful headline, I need to work on my puns...

Anyway continuing my press to get all the Relic Knights stuff I received assembled I'm now into the Doctrine. This is one of the factions I was on the fench about during the initial kickstarter but in the end I felt like the look of them was unique and they could present some fun modeling opportunities (ie my library). 

Much like the Speed Circuit faction these are mostly small models with a fair amount of fine detail. It is tricky to work with this material as with these small models its hard to get in where the mold lines are to remove them. The peg and plug sockets go together smoothly and make assembly a dream.

That's one thing I have to say about all the models in the Relic Knight line I've dealt with so far. They are a nightmare to clean up but once that part is done they go together smooth and glue solid with almost no "hold and blow" required (having recently put together some older metal Malifaux figures the "hold and blow" really does blow). I've never been a fan of accelerant because I don't like what it does to the glue in terms of making it more fragile.

Overall I didn't find any major issues with these models as I put them together apart from the standard complaint about mold lines and their location. They do look a little soft in some instances mostly with the faces which at this point I think if may been intentional. 

Checking Out ... First Game of Relic Knights

Checking Out ... First Game of Relic Knights

Relic Knights – Ah summer, the draw of the outdoors: pools, beaches, fresh air, sunny skies, longer hours of daylight ... all these things kill my weekly game night. Attendance to my midweek game night is sporadic at best during the late summer months so it's the best time to try out new games and fumble through the initial games with a lighter attendance. 

Read More

Missing Hell's Belles - Making them work

Missing Hell's Belles - Making them work

Relic Knights – It sounds like all the Hell's Belles packages in the Relic Knights kickstarter were mispacked. This is a bit of a bummer and unfortunate that this game continues to be plagued with missteps on the distribution end. It sounds like Sodapop will be taking care of the missing parts issues once CMON finishing their obligation to ship the pledges to the backers.

Read More

The Doctrine is in ... More Relic Knights (Prep Work)

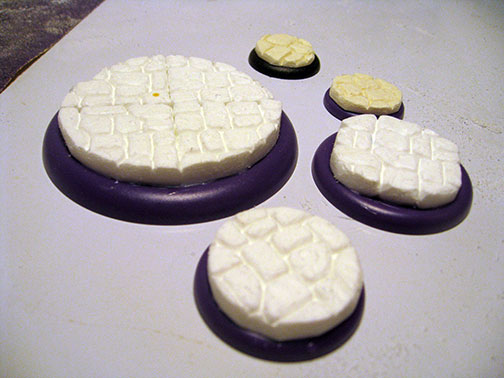
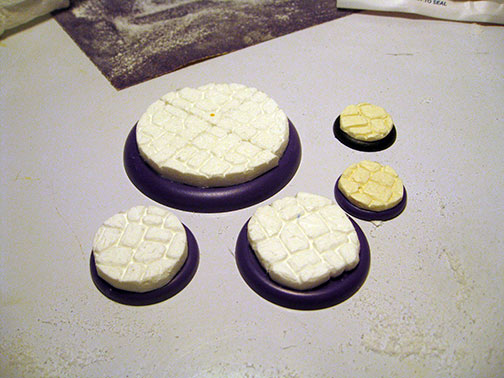
Relic Knights – Next up in the assembly que is the Doctrine. I've received word that one of my clients will be needing this set and he wants to do a flagstone them for his bases. So, before I can build them I need to make up the base set so I can quickly crank these out.

Using the base inserts provided with the kickstarter I traced out the sizes I'd need from an existing cast. After some sanding and trimming I'm pretty happy with how they look. So to save some time I'm going to make a silicon mold of these so I can duplicate them quickly and easily.

Speedy Assembly ... Putting Together Relic Knights

Speedy Assembly ... Putting Together Relic Knights

Relic Knights – I started putting together the Cerci Speed Circuit models and let me tell you they are very different than the Noh faction I assembled earlier this month. The models are much more delicate and as such are less than speedy to assemble. As with the other the details initially look a little soft but I'm guessing once they are assembled and primed it will sort itself out.

Read More

3x3 - 3x3 - 3x3 - 3x3 - 3x3 ...Repeat

Terrain Making – While I love my 3'x3' Zuzzy mat I decided to build a 3'x3' base board to go with this near future stuff (Ideally I'll also be able to use it with Deadzone). I used the same wooden framework and insulation foam core as I've done with my Malifaux boards.

While waiting for the caulk to dry I started cutting out 3"x3" squares to build the city blocks for this board out of 1/4" foamcore. With small sections I don't think I'll run into a warping issue with the foamcore but just in case I applied my glue generously.

I figure using 3"x3" squares to build the foundations will give me an interesting look that serves the dual purpose of creating a grid for Deadzone. (As I've said before with the amount of games I like to play making the terrain as multipurpose as possible save me some space.) The 3"x3" slabs of concrete will also help to create a sidewalk for the various buildings as well as clearly define the roadway.

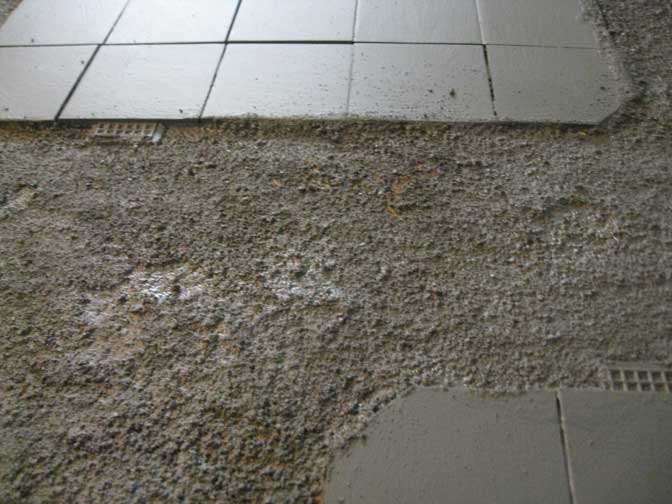
After glueing the squares into city blocks and defining the streets and alleyways, I cut some drains out of granny grate and glued them down onto the street. Once that had dried overnight I used some wood glue and play sand to texturize the street. With the high humidity this took quite a bit longer to dry than it normally does.

While waiting for the glue to dry I started cutting the basic shapes for more city buildings. The last few I made didn't fit into the parameters for Deadzone terrain exactly so I decided to make some additional buildings that match up with the grid. I kept 3.5" high as my standard for the height of A floor of a building and kept all the lengths multiples of three. They seem to work pretty good and I'm considering adding several stories to each of the buildings. 

To paint the whole thing I picked up a quart of Behr Premium Paint and Primer in a color called Pencil Point. This is a nice deep gray that only requires one coat to cover and improve overall adhesion. I like how thick the paint is as it helps to fill weird gaps and seal the sand to prevent chipping.

More Airbrush Action - Near Future Terrain

Terrain Making – I'm getting the hang of using the airbrush with the second set of buildings for the Near Future board. It seems that consistent pressure and paint gives a smoother finish than short controlled bursts. Which is odd because it goes against everything I've been taught but hey ... whatever works.

After lining the seems with a dark gray I went back in with a white to do the bulk of the painting. I think both buildings took me less than twenty minutes to cover with a solid base coat with basic shading. 

Next I went in and painted the details with a traditional brush to pick out signs and metallic parts. My plan is to go back in and add some glow effect with the airbrush around the light globes.

Let's Go Shopping ... More Near Future Terrain

Let's Go Shopping ... More Near Future Terrain

Terrain Making – With the exterior of the two larger structures in a playable state I've moved on to building some smaller buildings to fill in the board. On a 3'x3' including all the structures might make for a cluttered board however in small scale skirmish games cover is key to a good game. Without it you'll fall victim to the sniper on a roof more often than not.

Read More

Airbrush Action - Learning on the Fly

Terrain Making – Last Christmas I received an airbrush kit from my in-laws, nothing super fancy but just a simple starter kit as I've been meaning to try airbrushing terrain. Being as most terrain elements are fairly large painting with a regular brush can take some time and effort to smooth thing out. Up until now the kit has sat in my basement next to the "pressure pot" (that I also received as a gift) that I need to pick up the pipe fittings to convert it to a proper "casting pot."

I postponed busting out the airbrush until now because airbrushing has a huge amount of set-up and takedown work. First I needed to clear out the garage to avoid potentially over spraying on stuff I didn't want to be painted or have a chalky misting of overspray on. 

Next up was learning how to take apart and reassemble the brush. When I was a kid my mom bought me a cheap plastic airbrush that didn't last long as the tips were plastic and didn't have instructions on how to clean/take them apart. After slowly destroying that airbrush from lack of care I lost interest in it and moved on to traditional brushes. As an adult with an appreciation for "having nice things" I spent a long time watching videos and reading articles about how to take car of the brush. All of them insisted on taking it apart and reassembling it clean so you don't mess it up.

Armed with a few drop cloths and the near future terrain I prepared my spray room and set everything up. In order to feed paint through and airbrush you have to thin it down. I chose rubbing alchohol as it dries fast and doesn't mess with the colors to badly. (Note: old thick paint will not thin down no matter how much you thin it. The chunks will clog the nozzle and force you to take everything apart and clean before you can spray again.)

So after cleaning the chunks out of my nozzle and a trip to the store to buy fresh paint and empty flip top bottles, I was ready to paint. I used the house brand of Michaels craft paint which is pretty thin to start with. Mixing it 50/50 with rubbing alchohol yeild me with a thin paint that sprayed without splattering. 

Deluxe Apartment in the Sky ... Near Future Progress

Terrain – I'm trying to spread my time on this project so I can keep the various structures in the same state of completion. With previous projects I've been gung ho and plowed through until completion, which resulted in some less the optimal terrain pieces for actual game play. (Notably the Qi & Gong and Ressurectionist Lab, both have some spots that are hard to navigate during the game notably because of fat finger syndrome)

For this board I'm trying to get each piece to a semi finished state to play some test games before I move into painting. Because something that looks cool and fits the models doesn't necessarily mean it will be a fun piece of terrain to play games on. 

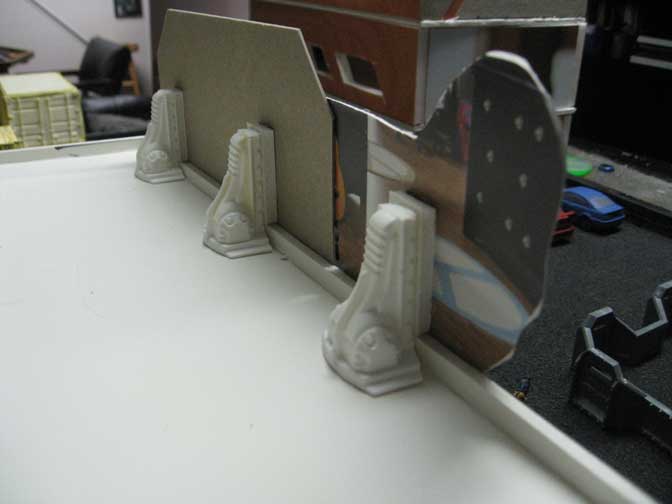
My major concerns with the apartment building lie with models moving around inside. While it was easy enough to build the floors to be stackable and removable, I'm not sure how much scatter terrain is needed inside the building. Sure it will look cool to have it fully furnished, but will it hinder gameplay?

One of the issues I have with all the laser cut MDF buildings that have popped up in the market as of late is the last of interior details. If this is an apartment complex, how do you get to the second floor? Catwalks on the exterior of the building are pretty inefficient and unlikely, unless the buildings are scavenged together from junk. Sure it makes for decent cover and what not, but then so does just building a bunch of random shapes like a paintball field. Not exactly realistic (in a game with alien soldiers wielding chainsaws and laser guns realism is key ... right?) which for some reason bugs the hell out of me.

To attempt to solve this I build a stairwell within the apartment building. It took a bit of trial and error but eventually I found a location that would be easy to move standard human size models up and down as well as be able to replicate the firefights that happen in said stairwells all the time in movies.

We Be Clubbin' ... Near Future Board Progress

Terrain – I spent some time working on the club terrain piece for my near future board. After constructing the walls I realized this was going to be a rather bland structure since it has no windows and only one entry point. The interior is fairly interesting with several height variations leading to the private rooms and stage as well as the main entry check point/bar.

To add some additional interest to the building exterior I've cut some strips of lightweight cardstock into "futuristic shapes" (yes that means variations on hexagons...) While I was cutting strips Empire Strikes Back was on Spike so I gleaned a little inspiration from the set pieces in the film. Most of the futuristic feel of the set comes from the various panel shapes in the background. I also have been paying more attention to newer commercial buildings and noticed most of them use something called efface for the exterior. Essentially what that means is the exterior walls are covered with a foam product skinned with concrete, this allows for interesting shapes at a low cost.

Taking these two points of reference I've added quite a bit of exterior detail that will bring out interest areas without resorting to the typical rivets everywhere look of some futuristic terrain.

I also created the removable roof. Initially it fit a little to snug, after trimming the paper backing off the foamcore on the interior side it is now easier to remove and shouldn't cause to many problems lifting off during gameplay to place models inside.

For the large sign on the exterior I opt to go with a silhouette and a large billboard. I'm still contemplating how I want to do the name of the club. Most likely I'm going to cut out the letters and paint them like neon but I'm still on the fence. For the actual name I'm leaning towards "The Slippery Kitty Lounge" this seems to be a solid name that will fit in numerous settings. 

The roof needed quite a bit of detailing. Because the structure takes up a significant portion of the 3'x3' board, I have a feeling the rooftop is going to be a popular perch. Because of this I added some HVAC units and other structures to the roof to provide some cover. Ideally I don't want the roof to be just a sniper's nest but an area that could be contested by several models without becoming a no mans land if there is a model at a higher vantage point. The HVAC units were made from some Platformer parts I had laying around as well as some other bitz.

I still have some other details that need to be figured out before I can move onto painting this building but at this point I think it's ready for a test game to be sure it works as intended.

In the year 2000 ... Building a Near Future Board

Terrain – I've begun the groundwork for my near future board. After doing a few sketches and looking at the large amount of laser cut terrain available in the market today I decided to pull some inspiration from these designs. While I really like the look of the laser cut mdf I can't justify the cost when I can build eactly what i want myself. Sure it might be easier to just buy and glue together a kit (probably will go that route in the future...) but I'd like to build everything from scratch for this board.

After laying out some paper shapes on my Zuzzy mat I got a rough idea of what type of layout I wanted to create. My thought is to create a slum/industrial area and I drove around Detroit for some inspiration. In many seedier neighborhoods you have truck depots/shipping yards that but up against residential areas and also feature some of the less desirable businesses. For my purposes this is going to be the ideal battleground. The structures I have planned are a three-story apartment building, liquor store, gentleman's club and a fenced in shipping yard; combined with the variety of 1:43 scale cars I've found I'll be able to detail out the neighborhood easily.

The first step was determining a size for my buildings as there are several different systems I plan on using this board for it was important to make sure the scale made sense for everything. In MERCS the movement cards are about 3.5" long, so I used that as my basis for the height of a standard wall, this way it's easy to determine how many MP it takes for a model to ascend a level. Most other systems have 4"-6" as a standard move so this size will work with them as well.

I happen to have a bunch of 1/2" gator board that I saved from a dumpster (technically) which I decided to used as the basis for my walls. The nice thing about gator board is it has a styrene skin which holds up better than paper. This board is very dense and provides a sturdy foundation for the walls, especially when cut down to small sections like these buildings. It is however difficult to cut as the plastic skin is so durable it will take a few passes with the blade before you get to the foam.

After messing around with a few designs I came up with a look I like for the apartment building and have begun cutting out the windows and cutting cardstock to detail the exterior of the building. I'm going to give the impression of concrete formed material with some geometric patterns. I think this will look futuristic enough without going over the top.

I also cut out the walls for the club. I went with an "L" shape that can break up the table in some interesting ways. My plan is to fully detail out the interiors of these buildings and add removable roofs so you can easily enter and exit them.

Next steps are to continue detailing the building exteriors and devise a method for stacking them that won't be to difficult to remove during game play. 

Chop Shop – Repainting 1:43 scale cars

I decided to begin work on my Near Future board. Well, not really the board itself but rather some of the scatter terrain. With all the cars I have laying around now it makes sense to begin the repaints so they match up with my style of painting. While I suppose I could just dip them in stain and call it a day ... that's not really my style.

Step one is to mask off all the windows and headlamps. I like how the clear material looks and don't want to loose that with the repaint. So I dug up some blue painters tape and began the tedious process of masking and trimming each window. It's not a difficult process however it takes time and patience to do it right and not scratch up the plastic with my blade.

After trimming them up I sprayed each car with Duplicolor Dark Gray primer. I really like this stuff it drys fast and smooth giving me a nice surface to paint. 

I've decided to recreate some of the cars I've pimped out in Saints Row 3. I really like the purple and silver scheme of the protagonists in that game and think it will add some much needed color to what could be a rather bland board. (most urbanscapes have this boring gray tone which I want to try and avoid this time around). 

I'm also working with some Laser Decal paper to try and figure our how to tint the windows out. I'll probably add some of the decals to the windows as well to call out and personalize the cars similar to what you see in urban neighborhoods.

Need More Levels (Library Board Part Five)

Relic Knights – Looking at the layout I have so far it's pretty obvious that I need something else on this board. Right now it just feels flat, part of the problem with building a flexible system designed to be easy to store is the overall flatness of the layout. While I think it could work fine as it is with some additional scatter elements strewn about, it doesn't have the jaw dropping cool factor I want.

The solution was pointed out to me by my friend Ben, add more levels. Duh! This of course will solve the flat problem but will potentially then add the storage issue I was trying to avoid with this project.

Here's my planned solution.

Looking at some Super Dungeon Explore boards I found doing an image search I came across one that was a haunted mansion. Essentially the second level was just a block of foam with steps and a guardrail. I think this will solve my flat issue easily but still be ok to store. 

I think this is probably the best way to incorporate some of the rooms I considered during the brainstorm process.

To get started I took a 2" block of insulation foam and trace my 1.5" x 1.5" squares onto it. I'm going to stick with 12" maximum for the size of these as it shouldn't dominate the board. Next I cut down some 1" gatorfoam for the steps. I think this is going to work so I'll make a few more of these before I start the rail detail to be sure it will fit in a rubbermaid tub for transport.