MERCS Multiplayer – First Impressions

Most tabletop games are built geared for two players. The rules are balanced and tested in the most typical type of game you as a player will be exposed to and the rules "work." When you introduce multiple players with most games you'll find some type of breakdown of the system. Most of the time the worst breakdown is the guy that goes first/last getting beat on by every other player or you have a "vulture-type" player that hangs back and swoops in to feast on everyone's scraps. In other systems with limited resources (like Malifaux) you run out of steam mid-way through your activations with four or more players and either leave yourself open to attack or have to be miserly with holding your cards until you MUST use them. And of course there are the systems where one player can quickly run away with a lead that's nearly impossible to catch up to (Necromunda mulit-player). 

If games address multi-player at all it is typically shoehorned in late in development or applied after the fact to sell another expansion/optional ruleset. While this is cool that a game takes the time to cater to gamers that like multi-player the adjustments to the rules don't always equate to a balanced game. Most of the time the games are fun, but homes rules become a requirement so there is a lack of consistency when you travel to other places and play multiplayer.

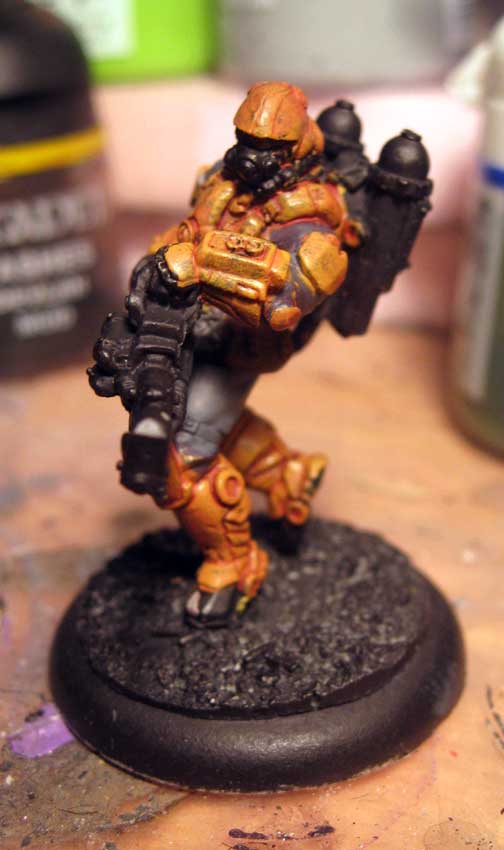
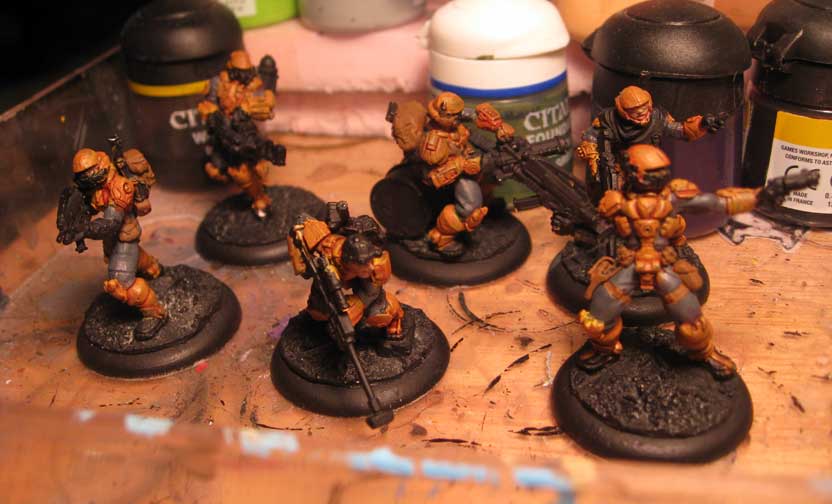
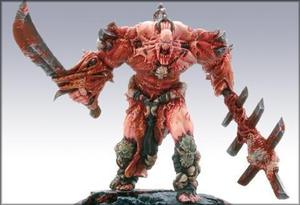
Now that that's out of the way let's get to the point. Earlier this week I had a chance to play a three player game of MERCS. I played KemVar, maverickman played FCC, and breadcrab played USCR. This was really only my second time playing a full game, so I'm still picking up the tactics and learning the ins and outs of the system.  We played 5 man teams and decided to just try and kill each other, last man standing wins.

What impressed me with the game at this level is it truly simulates a firefight (or at least what I imagine one would be like). Getting into a favorable position and overwatching is key to being able to put out a ton of potential damage. Most of the time shooting on your turn is the last thing you want to do, since it's incredibly hard to hit unless you can rack up a bunch of modifiers. Several time we had our heavies in favorable position and triggered each others overwatch to blast away at anything that moves. Because the firing numbers are so high it's not as broken as once might think (unlike Necromunda, where overwatching has the same chance of hitting regardless) because moving targets get bonuses.

The other thing that was interesting was rolling initiative for each guy. Because it's random you have less control over combos with certain models, which means the "last guy going is screwed syndrome" doesn't happen to the same player over and over again (unless you roll terrible). 

To me the multiplayer game of MERCS is more fun than a two-player game because it limits the amount of running and hiding and forces players to get involved in setting up good firing positions. In multiplayer there can be moments of hilarity such as a USCR jumping on a EMP grenade so a Kemvar Sniper can shoot a tag to push someone off a building and other silly things that add another level of fun to the game.

As I said in my initial impression of the game, you need to play a few demos and a few games before it clicks. But once it does I think most players will find this to be a challenging fun game. Not so much if you like lining up hundreds of models and removing them the following turn, but for a sci-fi type skirmish game this is much better than the other systems I've tried and it's fast enough to play between other games.

Product Review – Chessex Custom Dice

It's no secret I'm a huge fanboy. I love stuff that fits with my faction of choice in games, be it buttons, dice, shirts or pins. Unfortunately it's not easy to come by this stuff for every faction or game system. 

I've used Chessex Custom Dice for several projects and have always been happy with the results. The process is fairly inexpensive and really easy. All you have to do is send them a jpg or eps file of the logo or design you want and they can engrave it on the dice. The catch is the logo has to be one color, as it's not a photographic process.

Also it seems like logos that are more solid show up better than things that are outlined. Important to keep in mind as a few of my friends have ordered dice that just have thin outlines and they're pretty hard to read. 

There is a limited selection of colors but for the most part you can find something to fit your needs. I've used them to create six-sided dice for my 40K army and have found they seem to roll better. Of course when using rending lightening claws it's always great to see a bunch of ravens show up. 

I recently found out that they can also customize ten-sided dice. Having recently got into MERCS I have been looking for dice to match the color scheme of my chosen factions. After doing some research I found that ordering a set of ten customized dice isn't really that much more that buying a good set in an odd color. 

Overall I'm really happy with how they turned out. And having something cool and different that no one else has is well worth the $15 a set they cost. I highly recommend the custom dice service as they have the best quality and price of any manufacturer that I've looked at.

On the painting table ...

Malifaux – I'm wrapping up a commission. The final part is a Student of Conflict. While I think this is a cool model, I didn't really enjoy painting it. Something about the sandals was giving me issues. Once I got into the scheme I picked out it seemed to flow more naturally. I think part of my problem is I hardly ever see them on the table so the only reference I had was from the packaging. The color scheme on the package is really dark and didn't feel right for the model in my opinion.

For my own collection I finally got around to painting up the Spirit of Lost Love. After having a terrible game with Kirai last week, I decided to assemble and paint the models I'd been proxying since the book was released. Hopefully this will help knock the rust off, as I plan on playing her again until I get better with the model. My preferred master is Seamus and I've been playing tons of games with him as of late, so my other masters are feeling a bit neglected.

To paint the Spirit of Lost Love, I started with a light blue undercoat. I followed that up with a wash of deep blue. After that dried I went back in with my base color and added highlights which were worked up to pure white. I then went back and lightly applied wash to the recesses and any areas that had to much contrast.

Assault Troops

Warhammer 40K – I've been working on some Assault Troops with out jump packs. These models will serve as troops when I decide to use the Blood Angel Codex as well as when I choose to field Tyberious as he allows tactical squads to swap their bolter for chainswords and pistols.

To give them a hardened veteran feel I'm using the Maxmini steam knight heads. I really like the look of the heads and wish I had picked up more of them. I've been trying to give each marine in my force a unique look so that they stand out as heroic individuals rather that cookie cutter power armor guys.

Using a mix of the available bits I combined some of the Khorne Bezerker torsos that have ammo straps. I also used several parts from the commander sprue. 

Having run out of my GW purple ink I've been experimenting with a suitable replacement. The Leviathan purple wash is nice but I'm having a hard time replicating the deep purple hue the old ink gave. I recently picked up some of the Reaper purple ink and it's closer but not quite the same. I think I'm going to have to use a combination of the two to achieve the desired effect.

Busy like a YellowJacket

MERCS – I've had some time to work on my second MERCS crew. To me the  CCC are more or less the generic "hero" faction in the game. They're really solid all around and seem to be more forgiving tactically than the other factions. I picked them up at the same time as my KemVar with a special deal on the MERCS site.

I've found that anytime you want to get your playgroup into a new game you have to pick up at least two of the factions. If you don't odds are you're not going to have anybody to play with, unless the game turns out to be a surprise hit that takes off (or has a long standing following). 

I decided to paint my CCC in a scheme close to what it pictured in the book. This is partially because I've always wanted to do a yellow "army", and partially because I really like having "official" schemes with a game that is just starting to gain a following. 

To begin I assembled and cleaned up all the models. The MERCS miniatures don't have terrible mold lines like some models but with this group I did come across quite of bit of flash. Mostly it seems to be from channels on the thinner bits. I than pinned the models to my "Imported from Detroit" base set. Given the home base of the CCC an urban base set seemed to be the best choice. After the glue dried I primed them using Duplacolor Black Primer. I've really grown found of this primer as it comes in several colors and goes on smooth, I've also never had an issue with it fuzzing up.

To block in the color I use Adeptus Battle Gray and Iyanden Darksun foundation paints. I really like the coverage these provide. They do require some thinning as out of the pot I find them to be far to thick. I then used Baal red as a wash on the yellow to bring out the detail. From here it's just a matter of picking out all the details and working up the highlights.

To create the Asphalt on the bases I used a dark gray, dry brushed with a light gray and washed with two coats of black wash. The shells were picked put with copper, washed with Devlan Mud and highlighted with gold. If you'd like to pick up your own set of these bases they're available in the online store.

It's so clear now...

I've begun experimenting with Crystal Clear casting resin. I was inspired by my friend Dave's (nerdelemental) current ice pillar project and decided to work on something similar. Dave was experimenting with using Envirotex Light to make casts which turned out really cool.

Snatching up his idea I visited the local plastics/SFX supplier to see if there was a material that might work better. They suggested trying Smooth-ons crystal clear series. To be honest looking at the giant red sticker on the box warning about toxic fumes I was a little nervous. The salesperson assured me it wasn't as difficult to work with as it seems, so I picked up a trial size to test out.

According to the box it's best when the material is less than 3" thick. My mold for Ice Pillars is pushing the limit but I figured why not try it out. Worst case I ruin my mold and have to make another one. At the same time I go out the mold I created for my rock bases to see what type of effect I could get.

Mixing isn't quite one to one so it's recommended to use a scale. Also it's important to gently stir the product to prevent bubbles. According to the instructions it takes 16 hours to cure. I found I could pop them out after 10 hours but they are a bit tacky. Lesson learned: put the bases on wax paper or some other nonstick surface the yellow bits are from a cardboard box I set them on ... doh!

The end result is pretty cool and I think I might offer them up on the online store once I work out the kinks in casting. 

Adepticon Adventure

So last week I decided to make a trek out to Chicago to see what Adepticon is all about in person. I've always heard stories about how amazing the terrain is and what a great con it is, so the time had come to finally go check it out. Because I made the decision so late all the events that I'd be interested in playing were sold out, bummer. The bright side is because Adepticon takes place in a hotel (next to a mall) they let anyone in to look.

So I drove out with my wife friday night and checked into our hotel (the Stay Inn is really nice for the price and has a great breakfast). By the time we arrived it was to late to check out the con and we were both exhausted after a long week of work and a 5 hour drive. 

Saturday morning we got up bright and early, filled up on a free breakfast and headed over to the con. Upon entering the hotel the grand ballroom is off to the right with a large dealer both outside. They had tons of boxes of bits and old models available with masses of gamers sitting on the floor digging through the bins. Walking into the main hall there's a tons of tables all filled with 40K players. Along the wall are some really impressive dioramas and displays, with the Crystal Brush and dealer booths on the other side. Looking at the tables I wasn't overly impressed. The terrain was all of nice quality but nothing spectacular lots of GW plastic kits, foam hills and miscellaneous forests. Each board had a general theme which was nice. Maybe I'm spoiled but it was of similar quality to what I've seen in better game stores across the country.

The dealer booths had plenty on painted models on display as well as special con pricing. I wound up picking up a few minis from the Cool Mini booth even though they weren't discounted not paying shipping is a bonus. Two Black Library authors were on hand signing books (didn't pick one up to get signed as I wasn't a huge fan of the recent work they had available). Black Library also had some pre-release books at the show.

The Forgeworld booth had a ridiculous line and the con mini sold out early. The new models they had on display were very cool and well worth the second mortgage you need to take out to afford them. Armourcast had a nice display with tons of cool bits and pieces, I still love the cinematic effects.

After touring the hall, we had a chance to check out the Crystal Brush competition. The models were all amazing, photographs don't do them a bit of justice. To see this quality of painting is something that has to be experienced in person. I know from experience how difficult it is to get a good picture of a painted mini and even with the best set-up it doesn't quite capture all the nuances of the work. I posted up the photos I snaped of some of my favorites in the gallery under Adepticon 2011. 

I briefly had a chance to meet Nathan Caroland as well as Werid Sketch and Zee of Wyrd Miniatures.

After a few hours of walking around the con, we made a trip to Oak Park to check out Frank Lloyd Wrights home and a few other historic homes in the area (my wife's an architecture geek). Very interesting and inspiring for some future terrain projects.

After diner I headed back to the con to watch some of the open gaming going on. I brought my bag with me but didn't wind up playing (to exhausted). 

Sunday, we swung by the con one last time to check out the gladiator event and gawk at the Crystal Brush entries one last time. From there we headed downtown to visit the Field Museum.

For those who don't know the Field Museum was create during the WPA days. It was also the museum featured in that Ben Stiller movie. For me the coolest part of the museum were the displays. Tons of interesting modeling techniques were used to create realistic models of different eras. I found some great inspiration in several of the displays that I'll probably incorporate into a future project. And of course there's the dinosaur bones which made me feel like a kid again.

Overall it was a great trip and I'll probably get some of my gaming group together to actually participate in the con next year. I think if you're not playing it's fun to check out but you can only wander the halls for so long before it gets old.

Now Available – Rock Bases

I'm proud to introduce the next set in my line of round lipped bases, creatively titled

Rock Bases. These are great to represent a mountainous region or to add some height to a model. There are several variations in each size with bases available in 30mm, 40mm and 50mm. 

The realistic texture was created using actual rocks. Cast from a urethane resin they're much easier to pin models to than real rocks and much lighter.  

Welcome to the Cause

MERCS – I recently started assembling and painting my KemVar squad for MERCS. The Miniatures are really nice and easy to assemble. There are very few pieces to glue in place and the parts that do need to be glued are easy to pin. I'm not a huge fan of the dreadlock head as it seems out of place for the look of the rest of the troopers. Luckily the assault trooper comes with two heads, so it was a simple matter of swapping them.

I was amazed at how little flash and mold lines there were on the models I put together. The quality is impressive. My only real issue was a bent gun barrel on the sniper, but that was easily fixable. To base the models I'm using the Rock Bases I recently created. The background info on KemVar lists them as being based in South America, so I'm going to use the Rock Bases to create a jungle feel for them. Which also seems appropriate since they have Predator style stealth suits.

For color choice I chose to stick with something very similar to the scheme pictured in the book. I like the green and white as it stands out on the tabletop and will tie in with the base once it's finished. Since I used black primer I'm working with the GW Foundation paints for the base colors. They offer excellent coverage and a quick wash will get them tabletop ready fairly quickly. From there it will be a matter of painting the highlights and upping the overall quality of the models. 

The nice thing about the game is you only have six models per faction so it's easy to take the extra time to get them right and still get the models on the tabletop quickly. I'll be posting more photos as I progress. The CCC is next on the list as soon as I can finish my "Imported from Detroit" base set (asphault, tires and bullets shells).

Interview – David Freeman, Cipher Studios

I recently had a chance to talk with Dave Freeman of Cipher Studio. Cipher picked up Hell Dorado and has begun releasing it in English.

TE – For those that don't know what's your role with Cipher Studios? Could you provide some background on the company and your own experience in game development?

DF – I am the COO and Design/Development Manager at Cipher Studios. I spend most of my time doing scheduling, management of remote freelancers, editing, co-ordination of translation, and development of games/rules. I have also done our web design so far, meager as it is. Cipher Studios was founded in January of 2006 with Anima Tactics as its first product. I joined up in 2009 and we have been working to bring great gaming entertainment to the public since. As to my experience in game development, I worked at Sabertooth Games, a division of Games Workshop, for about five years. While there I managed organized play, was the lead developer on the Lord of the Rings Tradeable miniatures game, was the lead designer/developer on the Ultimate Fighting System CCG, made card sets for WarCry, the warhammer fantasy CCG, and the Horus Heresy and Dark Millennium incarnations of the Warhammer 40k CCG, as well as working on other unreleased game products. I have been a gamer since I was in grade school and have played most types of hobby games from RPG's to chit based strategy games. My favorite genre's are CCG's and table top war games.

TE – Hell Dorado seems to be picking up steam, do you have any updates as to when the rules will be released in the US?

DF – The finished layout files for the English book have been sent to the printer in the last few days. I hesitate to name any concrete date that we will have printed copies at this point, but it is off being printed right now!

TE – I've never played the French version of the game, but have oogled the minis for a long time. Are there going to be any significant changes to the ruleset? How comprehensive are the quick start rules, they seem to be a solid starting point for the game?

DF – We haven't made any significant changes to the rules system. The system that was in place is quite good, and I saw no reason to reinvent the wheel. The quick start rules are pretty comprehensive they give the basics of how combat and abilities work, anything that was missing is technical clarification and more complicated special rules. The special abilities section was written to only cover the figures that are in the starters for the game. The quick start rules have worked so far at teaching players the basics of the game, which was their goal. I am planning on making a PDF out of the complete English rules and scenarios sections and posting it at some point so players can easily refer to it as well.

TE – It seems as though the minis are slowly being released with the starter boxes and a few blisters available at the moment. Are there plans to ramp up the release of models, do you have a tentative release schedule?

DF – We are planning to do 5 releases a month for the foreseeable future. We have gotten a little backed up due to technical difficulties and getting some materials printed, but we seem to have most of that straightened out at this point. In the rest of this month and April you should see these figures hitting distribution ...

• Great Damned On of Wrath
• Saurav-Geet
• Blessed Warriors (2 in a blister)

• Sara Zingaresce (With 2 lemures)
• Blade Master, Hybrid
• Infernal Ambassador
• Retiarius
• Thirty Coins
• Dibbukim (2 in a blister)

• Lemure Pack B (3 in a blister)
• Husaym al Din
• Blades for Hire (2 in a blister)
• Damned Rank and File (3 in a blister)
• Arquebusers (2 in a blister)
• Succubus
• Jaws of the Deep
• Pillar of the Faith, Halberd

This is to catch up on the back up that I talked about earlier.

TE – What games do you currently play? How have they influenced your design?

DF – Well of course I play Anima Tactics and Hell Dorado quite a bit. I also play Warhammer 40,000, Space Hulk, Dominion, Dust Tactics, and Acquire fairly regularly. I own lots of games and it can be a challenge to play them all with any kind of regularity. On the professional note, I try and determine what makes any game I play fun, not necessarily just for me, so that I can bring things of that nature into my own work.

TE – What's your favorite model in the Hell Dorado range? Anima Tactics?

DF – Currently my favorite figures are Vincenzo Maculano de Fiorenzuola for Hell Dorado, and Marchosias for Anima Tactics.

TE – Cipher seems to be a fairly small company, do you think that makes thing more challenging or do you feel a leaner company keeps things running smoother?

DF – It really depends. In some situations being small allows you the agility to adapt and address issues. In others it means you only have limited resources and must make and execute realistic and achievable plans.

TE – How much of the original art from the French version of Hell Dorado will be in the new book? Is there much new material?

DF – For the most part we have kept the book almost exactly the same. It hasn't seemed to be a huge priority to develop brand new art when many players have not seen everything that was in the original book. We have started new asset development, but those are to be used in new releases and later books.

TE – Does Cipher have big plans for GenCon this year, if so can you share any details?

DF – We are currently discussing what we will be doing at Gen Con this year, unfortunately our plans aren't concrete yet so I can't share them.

TE – Is there anything else you'd like to share?

DF – Thank you for the opportunity to talk to you and your interest. I hope you, and all of the miniatures enthusiasts out there, enjoy Hell Dorado as much as I have!

Waterfalls ... stick to the lakes you're used to

Helldorado – Painting is almost wrapped up on my Hell board. I dry brushed the the whole thing with a lighter grey and tan. After that dried I used a water-based wood stain to shade the entire piece. The woodstain is cheaper than using inks or washes and gives a similar effect. To apply the stain I stipple it over the entire board, while it's still wet I take a rag and gently wipe off the stain. Paying particular attention to the edges and areas that would be worn to remove as much of the stain as possible.

Now that that's done, it's time to get started on the water effects. This is going to be the trickiest part of the process as I've never built a waterfall and the techniques I've found online all use different products.

I picked up a Scenarama water kit to see how they recommend building the waterfall. The kit is a bit pricey for what you get but I used a 40% off coupon at the craft store to get it for a more reasonable cost. It comes with some glossy water (which I assume is little more than a thick gloss paint) as well as a thicker paste that dries clear for texturing the water. They include a sheet of wax paper to build the waterfall with the thicker paste. After it dries you peel it off and attach to the area where the fall will go. 

I'm a little leary of this process as I don't think it's going to give me the effect I'm looking for. However since I have it and you create everything separate I'm going to give it a try.

The other option I've found uses clear acrylic caulk. Basically you follow the same process as the Scenarama kit, use wax paper or another nonstick material to build your fall and then attach it after it has dried. It seems like this might be the more durable choice, so I'll also be trying this method.

For the other areas I'll be using Envirotex light. While this is a costly material, I've had plenty of experience using it and feel confident that it will work for what I need it to. I think I'll be doing two pours of the epoxy, one to create a base for the water and a second after I've attached the falls. The tricky part is building up the pools where it will go to prevent them from running and flowing everywhere. To prevent this from happening I've used caulk to build up a lip, hopefully this will keep it where I want it to stay.

Movie Review – Sucker Punch

Amazing visuals, a great soundtrack tons of action ... what more could you want? Well, the whole movie seems forced and it really seems like large pieces are missing from the film. I imagine this was to get a PG-13 rating as the film pushes the boundaries and rather than modifying the script it seems as though things were just dropped wholesale.

A few portions of the film have awkward scenes that abruptly end, almost mid sentence. I'm not sure if this was intentional or just a hack-job to get the rating the studio wanted. But it makes the movie seem almost unfinished. The basic story is fun and feels like a comic book (which it never was) although the whole "reads like a video game" thing that other critics complain about doesn't bother me. The disjointed nature of the abrupt cuts is more problematic.

If you can get past the flaws this is a really fun movie. The visuals are amazing and the soundtrack really adds to the action scenes. The story is slightly weak, and I think the film within a film within a film thing is getting old and lame. But if you're just looking for a fun film filled with eye candy this is just what the doctor ordered. If you're looking for any depth well maybe a lobotomy is in order.

TNT and dynamite ...

Malifaux – I've create a few tokens for Malifaux per a clients request. In order we have, (5) dynamite markers, (2) treasure markers, (1) bag of soulstones.

Fairly simple, but having a specific model or token for any of the tasks helps to make every game feel different. However these can also be used for some other things as well, evidence counters maybe?

Caulk ... messy necessity

Helldorado – After checking a filling any odd gaps I found after putting some primer on my Hell Table, I'm ready to move onto to phase 2. I have a frame that fits around the board and need to create a seal that not only attaches the frame permanently but also creates a seamless seal. I decided to use Alex painters caulk, this is an acrylic product that cleans up with soap and water and is paintable. After attaching the frame I ran a bead of caulk along the seams and smoothed it with a wet rag.

While I had a tube of caulk open I also decided to work on the waterfall. From previous experience with water effects, it's VERY important to seal the area that the water will go on. I like to use caulk as it's cheap, fills the space and is somewhat sculptable. Basically I put the caulk on the table in the area that the water will go, and than take my finger and smooth it out. Once the area is covered I go back and use a tool to create swirls and flow patterns in the caulk. This will limit the amount of water effect you have to pour to fill the area. 

Once the caulk is dry it can be painted just like the rest of the board. To get the best effect out of Envirotex Light you need to create depth by painting the deeper areas darker. By mixing some ink with the water effects you'll be able to create even more depth.

On the painting table ...

Malifaux/Hell Dorado – To go along with the Executioner and Enslaved Nephilim I've been working on my client requested a Student of Conflict as well as some special tokens. He requested some dynamite counters, treasure counters and a bag of soul stones. He's also requested a double 50mm fire token. 

After re-reading what the tokens are I realized that I could use some of the blocks I've already cast to create a token set for him. I have some crates that fit nicely on a 30mm base as have just enough space to freehand TNT onto them. For the treasure tokens I have some small chests that also fit perfectly.

While working on that project I'm also getting some paint on a Saracen and Westerns box set for Hell Dorado. The Saracens are themed on the Genie from Aladdin. I've always liked that pale blue color and I think it works well with these models. The Westerners are borrowing a green, orange a white scheme that feels very Irish to me. As the board with be very earthy feeling I wanted to be sure the models were bright enough to stand out without looking clownish.

So far I think they're working and I only have a few details and highlights to go on them before I move into the next stage.

Building Hell

Hell Dorado – I've begun work on a board for Hell Dorado. After looking online for some examples of what the terrain should look like and searching for the terrain rules that should be in the english book if it's ever released, I came up with a plan. Well not really a plan but more of a general idea. This is going to be the first fixed terrain board I've done in a while and I want to be sure it's versatile enough to remain fun to play on while looking cool and incorporating some really dramatic fixed elements.

I had a piece of sintra with a frame that I salvaged from a graphic project that fell through. Luckily for me the piece I have is exactly 3' x 3' with a nice frame that goes around the edge. Also in my box of scrap I had a ton of 3" foam pieces left over from various projects. To begin I just randomly snapped the scraps into chunks and began placing them on the board. Once I had a general shape I used wood glue to secure them into place.

After letting it dry I added a few more pieces to smooth out transitions and create playable space. Once those sections were dry I took a dremel and began sculpting the rocks. This was a time intensive process and I was sure to have a figure on a 30mm and 40mm base on hand to be sure they would fit and be able to stand on the rocky sections. After finishing the carving I realized that the largest peak could accommodate a waterfall. After a bit more sanding I had created the basic shape of the river. 

The next step was to add some more texture to the flat areas. I began by roughly tearing sections of textured wallpaper to fit on the flat sections of the board. I secured these using wood glue. To transition from the wallpaper sections to the rocky crags I applied wood glue and sprinkled a mixture of sand a litter to create a rough texture. The trick to getting this right is to apply thin coats of glue and allow the sand to dry. Repeat until you've built up the desired thickness of debris.

Where the waterfall empties I'm creating a bed of skulls. Nothing says hell more than a river of blood and skulls. Using the mold I created for my bases I cast a whole bunch of skulls. Securing them to the board with tacky glue in all the areas that I plan to coat with water effect.

I've also taken the skulls and placed them in various nooks and cranies through out the board. I think small details like this really bring a piece to life.

I need to double check the bed of the water fall to be sure it's sealed properly so the water doesn't pour all over the place when I apply it. Ideally this needs to be done prior to painting. To paint I'm going to get some house paint mixed to match the grey I've used on the bases of my models. I've found the best paint has primer built into it so it adheres better. Painting on a thick primer and then applying paint causes some of the details to be obscured so I prefer to use an all-in-one.

Movie Review – I Sell the Dead

Over the weekend I watch the 2008 horror/comedy I Sell the Dead. This entertaining film stars Dominic Monaghan as Arthur Blake  and Ron Pearlman as Father Duffy. The film follows the trials and tribulations of a pair of graverobbers who discover digging up the undead is more profitable than selling regular corpse to the scientists of the day. Set in Victorian Era (London I'd assume) this is a really well done period piece.

One of my favorite aspects of the film is how they handled transitions. Most of the movie is told through flashback, and as a sequence ends the scene is frozen and transformed into a comic book style drawing. This give a nice pulp feel to the film and reminds  me a bit of the Tales From the Crypt movies and tv shows.

The film stands up well on its own but I really like it as it gave a feeling as what the Ressurectionists in Malifaux are like. Graverobbers and men of science working outside of society to further their own ends. I'd recommend this film to anyone that enjoys Malifaux as it provides a nice look into the time period.

OOOOh Scarier

Malifaux – I've been experimenting with some different Seamus lists as of late trying to nail down what's most effective with my favorite serial killer.

I've been pairing him with some of the Spirits lately and have had mixed success. Terrifying checks aren't nearly as effective as Lure to force a model to move so he can charge them. However spamming the most terrifying models you can seems to be a good way to force your opponent to burn through cards. 

Here's the 35SS list I've been working with:

Seamus
Shikome
Onryo
Onryo
Hanged
Crooked Man
7 SS pool

Ranged lists tend to cause this a fair amount of problems, as the spirits don't block LOS so Seamus is missing his army of dead whores to hide behind. Hence he tends to take more damage than with other lists. He also doesn't benefit from Necrotic Ministrations when they die nor does he gain a corpse. 

What this list does good is scare the crap out of your opponent as the Shikome can be in their face Turn 2. The Onryos can give the other spirits a bit of protection with Immediate Revenge and the Hanged can potentially give negative twists to Wp duels (which means the spirits can attack and the opposing model can have a negative twist when defending).

Depending on activation order you might get lucky enough to empty your opponents hand and pull off Slit Juggular (a trigger that's rarely worth using otherwise).

Garage Sale Continues...

I'm going to continue my Garage Sale for the rest of March. Each week I'm adding new products to the store. Some of the items are commissions that weren't picked up or the customer changed their mind. Other items are conversions and works-in-progress that I haven't worked on for a long time and don't anticipate coming back to. And of course the bulk of the items are well painted armies that I no longer have an interest in.

New this week are some models from what I'd consider a "display quality" Legion of Everblight army. This army features a cool blue and brown scheme with lots of detail work. The highlights don't show up in photographs as well as they do in hand, but I'm really proud of this project and hate to see it go. But in an interest of keeping my display cases current I'm willing to part with them as I have little interest in getting back into the system. 

Also up are some models from my Chaos Marine army. I'm not a big fan of the new codex and am trying to limit myself to just one army for each large game system I play. I don't play 40K as much as I used to and can probably get by with just a loyalist chapter that I can work on completing.

Assembling Hell Dorado Starters

Helldorado – Over the weekend I was able to sit down and work on assembling three of the Hell Dorado starter boxes. While the miniatures are really great sculpts, the casting process is a bit weird. Their are odd channels which go to visible portions of the models, also some of the connections to the tab and the weapons are fairly large. What this means is lots of cutting and sanding before they are anywhere near ready to assemble. 

The models were fairly easy to pin (a necessity given the small joins) most of the arms have nice flat sections that match up easily and allow for easy drilling. 

Once I finished assembly I mounted the models to my new hell bases, and used some greenstuff to smooth the transition of the smoke and bubbles that some of the models have built into their bases.