Onward to the Apocalypse ...

Warhammer 40K – So I broke down and bought the latest apocalypse book. It happen to be on the shelf at my local store for significantly less than the MSRP so I figured it would be good to have just in case. My group has been talking about trying to get in a "big" game once every few months where we could spend a Saturday or Sunday playing all day. This my or may not happen...

But I'd rather be prepaired just in case as the designated "organizer/president" of our game group the responsibilty for having the rules and planning events is usually mine. 

The 2013 Apocalypse rulebook is about the same size as the core 40k book with the majority of it taken up by pages of painted models and datasheets for all the races of 40K. The actual rule potion is fairly small and uses minor additions to the existing ruleset to better mimick a large scale battle. Notable among these rules are strategic assets, super heavy vehicles and some command structure changes. Also rules for massive template wepons are included in the book with drawing the illustrate how to make your own. Of course GW does sell these large scale templates and asset cards as a linited edition product, you can probably get by with photocopying from the book and making your own templates.

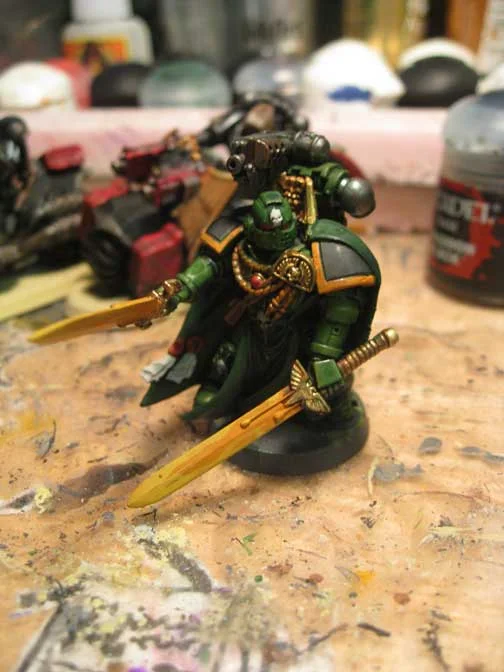
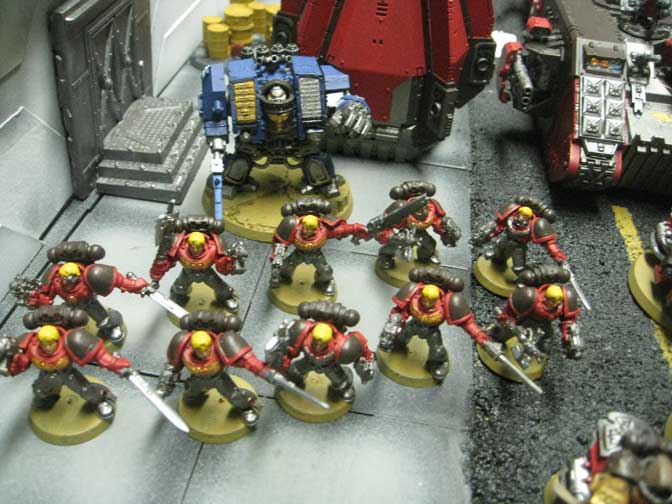
As someone who has built a full battle company of space marines I was interested in the data sheets for marine lists. These are only a few pages but they do give some interesting options if you own all the models needed to make a formation. For example having a full company gives you the option to fire overwatch with all units rather than just the one being charged. Kinda cool but nothing ridiculous.

The other reason I picked up the book is to have the most current rules for the superheavy vehicles. There are several charts you need to have access to included in the book as well as the rules for all the large scale pastic kits and some Forgeworld models. While I may never own a Titan it's fun to read the rules and dream... 

The book is not a must have by any means and you can probably get by without it unless you have your heart set on playing with superheavy vehicles. I really feel like the minimal amount of rules could have been included in the core 40K book as an optional way to play with the data sheets being part of the codex releases that seem to be happening every month. If you want to use any of the forgeworld varients you still have to pick up the correct Imperial Armour Supplement so this book fills a very minor niche in the hobby.

Art's and Crafts ... Logo designs

Recently I spent some time with my daughter teaching her how to make her own "silk-screened" t-shirts. This is a fun project which can be adapted to some tabletop applications; so I figured I'd share the technique.

Screen printing is a technique that can reproduce a design quickly and easily. Typically it is reserved for commercial applications. A while back Jo Anne's and Michael's sold a machine called a Yudu that was supposed to offer a easy low cost way to do silk screens at home. Unfortunately the cost of the materials for the machine was pretty ridiculous compared to buying you own supplies from an art store so it failed and was discontinued. 

This is a bit of a bummer as a family member had one that I used to make shirts for promoting this site. If you needed to make a couple dozen shirts it worked great.

Anyway, my daughter wanted to have a few shirts with logos printed on them and paying $20 a shirt from Hot Topic for something that wasn't exactly what she wanted was out of the question. So dad decided to share a trick with her that I used to use in art school.

For this project you'll need:

• Freezer Paper

• Hobby Knife and fresh blades

• Foam Brush

• Iron (preferable not your wife's expensive fancy one)

• Acrylic Paint

• The thing you want to print on 

Freezer paper is available at any grocery store it comes on a big roll for a few dollars. Essentially it's a heavy wax paper that is used when freezing meat. 

Step one is to print out (or draw) your design. Solid one color designs work best until you get more skilled. 

Step two is to tape the design to a piece of freezer paper slightly larger than the design you want to print.

Step three carefully cut out your design. Remember the parts that you want to have color need to be removed.

Step four iron down the negative version of the design. Be sure to not use steam you want the wax to stick to the shirt.

Step five use a foam brush to gently apply paint. Your want a thin even layer if it gets to heavy the design will crack when washed. (Alternatively you can use a credit card to squeegee the paint across the design, this is tricky and if you didn't create a good seal the paint will bleed.)

Step six carefully remove the freezer paper, this is easier to do when the paint is still tacky.

That's it six easy steps to create a unique design. This would work well on canvas army bags or anything else you might need to brand with your faction logos.


Judging the Aftermath ...

Book Review – As quickly as the Judge Dredd Complete Casefiles are being released in the US I'm picking them up and reading them. It bums me out that the next volume won't be released until February so I might have to splurge and get the British Editions.

Judge Dredd: The Complete Case Files Vol 6 picks up where the last volume ended. In the aftermath of the Soviet Judge invasion Mega City One is in ruins. Most of these stories deal with the problems that arose from the city being destroyed. Some of my favorites deal with a Soviet Judge who doesn't realize the war is over. 

Once the aftermath is dealt with the stories fall back into the usual pattern I really liked the series which dealt with the Perfect Crime. Each episode dealt with a different "genius plan" which is ultimately foiled by Dredd.

The quality of this as with the other collections is pretty top notch and I highly reccomend them if you have any interest in Judge Dredd as a character or the Mongoose Publishing miniature game.

A thorough application of firepower ...

Warhammer 40K – I had a chance to get my second game of 40K in with the new space marine book and i have to say I'm still loving it. Unfortunately I neglected to take photos during the game. But since I've been neglecting the battle reports section as of late I figured a text write up is better than nothing.

We played 1500 points. I ran my Twilight Ravens (as an Iron Hand Successor) against my buddy who ran a White Scars (Dark Angels using marine codex) detachment paired with an allied force of Deathwing Terminators. I don't have his exact list but this is essentially what we ran:

Twilight Ravens (As Iron Hands):

HQ – Master of Forge on bike with conversion beamer 

TROOP – Tactical Squad, 10 man in a rhino with flamer and missile launcher 

TROOP – Tactical Squad, 10 man in a rhino with flamer and missile launcher 

TROOP – Tactical Squad, 10 man in a rhino with flamer and missile launcher 

TROOP – Tactical Squad, 10 man in a rhino with flamer and missile launcher 

TROOP – Tactical Squad, 10 man in a rhino with flamer and missile launcher 

TROOP – Tactical Squad, 10 man in a rhino with flamer and missile launcher 

ELITE – Terminator Squad, 5 man power fists and storm bolters 

Dark Angels (White Scars)

HQ – Chapter Master on bike with burning blade and relic shield

HQ – Kosoro Khan on Moon Draken

TROOP – Bike Squad, 5 man with 2 grav guns and grav pistol

TROOP – Tactical Squad, 10 man, plasma gun, plasma pistol, plasma cannon, drop pod

Dark Angels (Allied Detachment)

HQ – Belial

TROOP – Terminator Squad, 10 man mix of thunderhammers, power fists, plasma cannon

FAST - Dark Shroud Land Speeder 

We rolled up the Purge the Alien Mission with the diagonal deployment. This is the first time playing 40K on my in progress city board so it was interesting setting up. We called all the buildings buildings and said the roofs were battlements (not that is mattered with the forces we used). I rolled the Furious Charge Warlord Trait and he had Defender of Humanity on his chapter master. I chose the more open deployment zone and set up all my rhinos on the starting line with the Master of the Forge sitting back. He deployed his bikes, and shroud with the pod and terminators coming in on turn one.

Turn One:

I gunned the engines and spread the rhinos out to cover and block as much of the city as possible.

He dropped in behind my lines and was unable to do anything to the rhinos, despite his best efforts.

Turn Two:

Everybody got out. My Terminators Teleported in. I focused on the two squads that dropped in and was able to eliminate half the terminators as well as the entire drop pod squad. The bikes were more difficult as I was only able to score a single wound on the chapter master. First Blood goes to me.

My opponent sent the bikes down a narrow alleyway (foreshadowing) and killed half the tactical squad with a grav gun salvo. His chapter master split from the group and headed for my horde of maries down the block. The rest of his army was able to kill of two marines in the shooting phase. In assault the bikes couldn't make it. Belial and the terminators killed three more marines and the remainder of the squad fell back.

Turn Three:

I moved a rhino to block the alley containing the bikes and rammed the dark shroud with another to block the other end of the alley. I didn't do any damage to the land speeder however I did lock the nasty bike squad into an area they couldn't get out of. I focused fire on the remaining Deathwing models and the Chapter Master to whittle them down to just two models and took some wounds off the chapter master. The conversion beamer did nothing as we were to close for it to have any significant armour penetration.

He fired into a tactical squad and took out a few models with the land speeder. His chapter master called down an orbital strike which took a hull point off a rhino. The grav guns immobilized the rhino blocking the exit to the alley. This is the point he realized he couldn't get rid of them with the grav guns as the wreck will still block the alley. The assault phase saw him tear through a tactical squad with his chapter master leaving three marines that stood firm. Belial took out the last two members of the squad he was chasing after. 

Turn Four:

With a ridiculous number of models still on the table I considered my options. Firing at Belial I was able to reduce him to just one wound remaining. The rest of my marines jockeyed for position on the table. During the assault phase my terminators moved in and the brave leader challenged his chapter master. He of course died horribly. However his brave sacrifice allowed the terminators to reduce the chapter master to paste. Slay the Warlord for me.

The Dark Shroud killed a marine during shooting and Belial then assaulted my Master of the Forge. Belial was unable to breech the armour of my warlord and my attacks back were able to kill him.

Turn Five:

Game Ends.

I scored 4 VP for killing his units, 1 for First Blood, and 1 for Slay the Warlord. He scored 1 VP for the squad he killed and 1 VP for Line Breaker with his drop pod.

In Summary:

The game was really fun my Feel No Pain made a difference against the grav guns but other wise I didn't benefit much from the Chapter Rules. I like the amount of scoring units I brought however in a mission like this it could have gone horribly wrong as I brought 14 potential VPs to his 8. However having 66 bodies on the table seems like a good way to deal with anything that might come up.

My opponent made some significant mistakes namely falling for the bait to head down that alley and then charging into a large squad with his chapter master allowing the terminators to get a counter charge. I also don't think sinking that many points into three HQs is a good idea. There was just no way for him to do enough wounds to my force in 6 turns even if he was able to hit with every shot and kill something.

The allies rule annoys me a bit. I like the idea behind it and I like the unique army builds you can make however I feel like it is open to abuse. Especially when a force is painted to look like an existing chapter like Dark Angels, Blood Angels, Ultramarines etc. I feel if you want to use or abuse the allies rules or the chapter tactics it's best to paint your stuff in a unique scheme. That way there's no confusion looking at the table and seeing Ravenwing bikers in the studio scheme and having to remember that they are White Scars and only the White Terminators are Dark Angels. It's a minor thing but still ...

Second, with allies if you chose to use it to represent a cohesive force you NEED to separate the detachments visually. Something as simple as an army badge or a helmet variation would help. Otherwise it's to easy to get confused with what is what. Sure you might know that this purple squad is White Scars and this purple squad are the allied Iron Hands but unless there is a consistent distinquising feature to separate the detachments your opponent won't know.

Lost in the Warp ... Shiny Syndrome

You may have noticed lately my blog has been all over the place. (Well probably more than just lately ...) I think I may have a problem. Many of you may have the same problem ad you may or may not have realized that you're suffering from it yet. I believe I may have a terminal case of Shiny Syndrome.

As with any problem Step One is admitting you have a problem. I've realized I very rarely complete a project. I'm constantly distracted by a new idea or a new shiney thing and I neglect to finish my own projects. This isn't really a problem when I'm doing commissions as I have a true deadline as well as a "reward" for finishing what I working on. However when it comes to my own personal projects my deadline is really "when I have time". I also have this annoying habit of getting things to a "playable state". This means getting the base colors down on a unit so I can play with them and not feel self conscious about having bare minis on the table. The problem with this method is it becomes a vicious circle where I never have the drive to paint my own stuff to completion as it's "good enough" for this weeks game. 

My other problem is getting distracted by this week's new hotness. Anytime a new game comes out or I listen to a positive review on a game I start obsessing about it. Reading everything I can until I get to the point where I MUST own it. Sometimes this works out for the best and the game becomes a staple that I can bring out regularly and get games in with a variety of opponents. Other times I pick up everything and can never convince anyone to try out the game (Resident Evil Deck Building game I'm looking at you). 

With the advent of Kickstarter and crowdfunding this problem has only increased. Especially with the games that get over funded to the point where you look at the cost and simple "can't refuse" a deal that good. So you go all in and wait. And wait. And wait. Eventually a giant box of stuff arrives at your door and the feeling of being overwhelmed sets in. Why did you buy this when you still haven't finished the piles of stuff filling up your game room.

________________________________________

Now that I've identified I have a problem, step two is coming up with a solution. The easy answer would be pick up the pace and get it done. The problem is getting it done will never happen if Shiny Stuff keeps stealing my attention. So the answer becomes a bit more complicated.

Step Two Phase One: First and foremost I need to swear off Kickstarter. While the deals can be amazing the amount of work each one will entail once I have it in hand is ridiculous. Hopefully barring any further delays I'll have Relic Knights, Deadzone and Kingdom Death in hand by Christmas. That alone is a couple hundred additional models I'll need to paint and assemble. Having just received the Chibi Dungeon stuff I'm already overwhelm with just trying to clean them up and assemble them. Hopefully the other stuff I'm expecting with be cleaner and easier to assemble but even if they are it's a ton of stuff. As my mother-in-law like to say, "You'll go broke on a good deal."  With Kickstarter this can't be more true, the time investment is huge even though the monetary investment isn't.

Step Two Phase Two: Admit your limitations. While I might have a cool new idea several times a week there's no way I have the time to bring every idea to completion. Accepting this fact and focusing on the best ideas that will be most relevant to my limited hobby time is key to getting this in check. The second part of this is accepting that I have limited hobby time. As an adult with family and work obligations the amount of time I have to play games is limited, which means I can't play every game I want to. This one is really hard because so many things interest me. But if I can allocate my time to a handful of projects and complete them I'll feel more accomplished and less overwhelmed.

Random Commission ... Blood Angels Economy

Warhammer 40K – Kind of an odd commission to share today, a friend of mine took a shot at painting up his own space marine chapter. For a beginner I think he did a pretty good job getting them tabletop ready. He asked me to apply the decals to the models and seal them for him. 

So a pretty simple commission of applying waterslide decals and sealing them with a satin clearcoat. Above you can see the photos of how the models were supplied to me and below you can see the shots of the models after having the decals applied. A simple thing like unit markings can really bring a tabletop model to the next level.

On the painting table ... T-U-R-T-L-E Power

Super Dungeon Explore – In an effort to get my cute stuff painted I began work on the heroes and Rocktop Gang from Caverns of Roxor. Yes I know I'm an expansion behind; but I decided I wouldn't pick up the next one until I had everything painted from this expansion.

As with all the SDE stuff removing the mold lines is a bitch. At some point I just had to give up because of where they fall going right through the detail on the heads of some of the turtles. Super annoying and it would have been easier to clean them up if they weren't preassembled, but alas after the uproar about the original box it seems that everything with come preassembled for the boardgamers.

Anyway after cleaning them up and sculpting stones on the bases to cover the gaps in the slotted bases; I primed them white and used GW base to block in the color. I chose to stick with a common color for all the turtles and shells. After looking at them again it's really hard to tell the rollers apart from the slowpokes so I changed them to a darker scheme then the rest. 

Making an Impact ... Kickstarter Delivered

Kickstarter – I recently received my order from the Impact Minis Chibi Kickstarter. I've been super excited about these since I pledged and was nervous about it when the creator had health problems. Amazingly he was able to get through the problems and deliver pretty close to the deadline. 

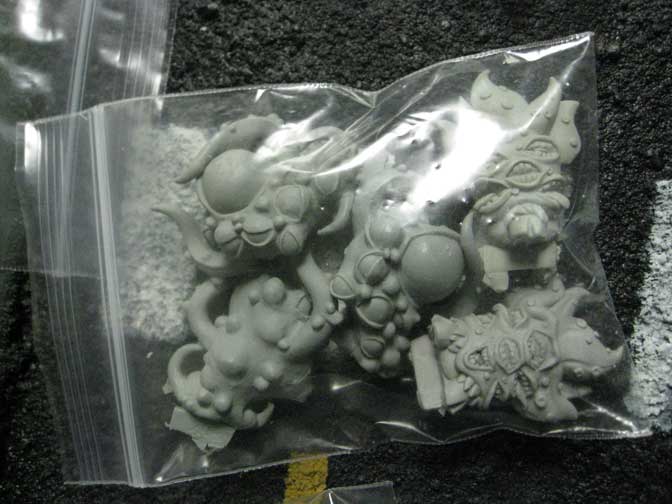
While I love the models and can't wait to get them all assemble and painted I do have to voice a single concern. Trollcast/finecast/whatever it is kinda sucks. Most of the minis have some minor bubble issues which is easy enough to correct with liquid greenstuff; in fact most of the bubble problems and on the undersides of models or in inconspicuous areas. The miscast issue is a bigger deal as I'm not a fan of resculpting ears. Thankfully it only looks like a few models are affected and I imagine impact will provide replacement parts once they get through the initial shipments. Another issue with the molding is the placement of the vents the areas they were place is less then optimal in some case. Notably with the Flesh Golem had a vent placed on it's chin ... really guys? The same can be said for where the mold lines run.

Ok now that the uncomfortable criticism is out of the way I can't stop gushing about these models. They are slightly larger than the Super Dungeon Explore stuff but the aesthetic matches up perfectly. As a fan of the old D&D cartoon I can't wait to see them on the table killing stuff and collecting loot.

Once I have them all assembled and painted I'm going to make custom rules and cards to increase the number of heroes available in my Super Dungeon Explore games. I'm also going to have to figure out custom spawn points for the monsters I picked up as well as decide whether to make the type 2 figures mini bosses or dungeon bosses.

On the painting table ... Fired Up

Super Dungeon Explore – After spending so much time working on terrain I decided to take a break from the Near Future Board and dig out some miniatures to paint. For Christmas I received the Caverns of Roxor Expansion and an extra box of the Fire Denizens. having only played a few games with them they've been sitting in my basement waiting for some painting love. 

All the new Super Dungeon stuff comes preassembled which is a bit of a mixed blessing. It's nice because you don't have to take hours putting all the little dudes together. It sucks because the preassemble minis aren't always put together well and you have some nasty gaps and a harder time removing the flash/mold lines. (which because of the type of plastic is a pain in the ass).

After gently scraping off all the mold lines with a brand new xacto blade I washed all the minis with warm soapy water. Again an important step because the type of plastic used has a weird sheen to it. Next I mixed up a blob of green stuff to attempt to rectify the gap problems and fill in the slots on the cavern bases. I decided to sculpt some stones that were raised up from the base to add a little more interest to them. The whole process took a few hours to finish up all the models with a fire theme.

This time around I stuck with a white primer. I think this is going to help the yellows and oranges pop on the models. Most of the time I use a red oxide primer as it's easy to cover and gives a darker feel than white but less muddy than black or grey primer. I've found white works best for bright colors.

I'm happy with these look for now and will probably go back in to smooth out the transitions and add more highlighting before sealing these. But for now they look way better than the bare red plastic and are usable on the tabletop.

Go Big or .... Near Future 4'x6' Board Progress

Terrain Making – After making the initial 3'x3' city block board with 3"x3" squares I decided that I needed to go all out and do a 4'x6' table. Between the two smaller near future boards I've been working on I have enough buildings to populate a larger area. I've always wanted to do a full city so I decided now is the time to do it. Having been successful with the smaller board I have a good grasp of what works and what doesn't. I made a quick trip to Home Depot to pick up a 1" thick sheet of insulation foam to act as the topper for my 4'x6' table. A quick stop at Michael's for some clean sheets of foam core and I was ready to go.

After trimming the insulation foam to fit within my tabletop I then measured out a 3"x3" grid over the entire surface. Once the grid was in place I moved the buildings I have around on the board until I was happy with the layout. My goal was to have some straight road sections without have a clear shot straight across the board. From prior experience, city blocks set up on a standard grid make for boring battlefields as their are to many "kill zones" that allow over watchers or snipers to control to much of the board. With the layout I settled on there are enough blind spots to offer cover from the various sniper nests.

The tedious part of the job took me two nights of cutting 3"x3" squares of foam core. While I probably could have just painted the grid on to these I find having the physical separation of the individual blocks to be more visually pleasing. Once I cut them all to size I set off with a large bottle of tacky glue and began gluing down the foam core to the insulation foam base. This process took another night of tedious work but the final result fit exactly what I had in mind.

I then cut out storm drains from granny grate and glued them in place at various points along the street sections. Little details like this help to bring the whole city to life. I opted to not include sewer drain covers at this time. I may change my mind before painting begins but right now I don't think I want to add them.

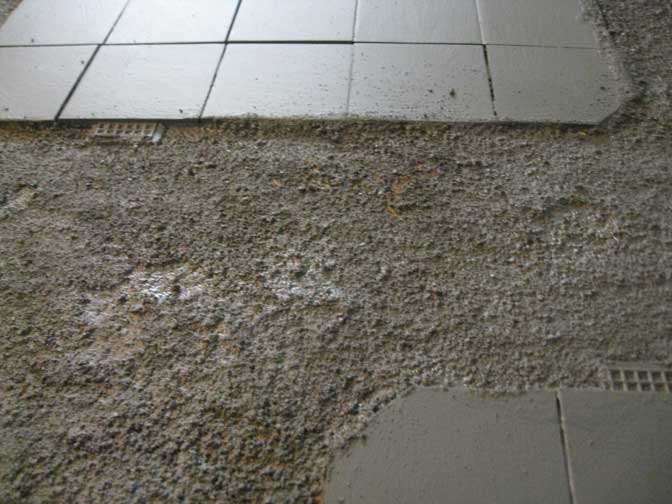
Once everything had dried overnight I took the sheet out to the garage and began applying the sand texture. For this I use a gallon of wood glue. I've found that wood glue adheres to the foam pretty good and dries solid enough to withstand the rigors of gaming. Working in sections I paint the glue down with a wide brush and then liberally coat the glue with sand. More is better at this point, you want to have the sand piled on thick enough so it will sink into the sand and give you the texture you want.

After this dries for a few days (you have to be sure the glue has set otherwise you'll get weird marks in the final texture) I use a shop vac to remove the excess sand. If you're smart and clean the shop vac prior to vacuuming the sand you'll be able to salvage the excess for the next project. 

After everything dried I painted the whole board with Behr Premium Paint + Primer. I find this covers well, is durable and comes in colors that match my other paints. After the base coat I went in with my airbrush and painted everything else. Starting with black I slowly worked up highlights to get a decent transition for the concrete slabs. Overall I'm happy with the results thus far.

And they shall know no fear ...

Warhammer 40K – My most anticipated release of sixth edition 40K has finally arrived. Space Marines love them or hate them are what define 40K. Everything else in the Warhammer 40,000 universe is really just filler for the eight foot tall power armored defenders of humanity. Anyone who has ever dipped their toes into the grim dark 41st millennium has owned or has a buddy that owns Space Marines. As such this release will have the biggest impact in this edition.

I picked my copy up from a local retailer that offers a 20% discount on GW stuff. This little discount is enough for me to stop by and pick up any stuff I might need. Sure I could probably find stuff cheaper online but I prefer to support my local stores so that I will still have a local store in the future. The price is a bit shocking but you can rationalize it with the fact that it's hardcover and in full color.

Moving on, everybody and their brother is going to go page by page and review this so I'm going to keep it general. The cover is nice and the embossing and UV spot varnish is cool, unnecessary but it looks nice. There is a ton of new art in this book as well as many of the same recycled pieces of art that have been in every marine book in recent memory. Personally, I'm sick to death of the Ultramarines Second Company by now, why not get some new art for a change.

The first part of the book is all background and it's nice to see the other "Codex" chapters get some love and more detailed background. This carries through to the unit entries which are organized by function instead of force organization slot, a nice change as this feels more like the Forge World books. From there you move into the model shots of which there seem to be a significant number of new shots.

Once you get through the background and photos there is the army list. This is set up just like the rest of the sixth edition codexs, with a unit summary options and costs. I like that they are still references the fluff page from back here as it makes finding stuff a little easier. The fold-out reference guide is also present and is worth photocopying laminating and keeping in your mini case for ease of use.

So overall the book looks good and functions the same as the rest of the books GW is steam rolling out. I'm happy with my purchase and hope that this editon will lat at least 2-3 years to justify the costs.

______________________________________

Function: There have been some significant changes to how the army list functions. Previously you chose a special character to unlock the army traits you wanted. That still exists for the most part. The big deal is you can no longer mix and match choosing which traits you want to take. You choose a chapter and that dictates the abilities you have and what characters you can use. So if you want to use the Chronos tank upgrade you have to be an Ultramarine Successor and you can't take the named characters with characters from other chapters unless you have them as allies.

It seems like this is going to fix any broken combos that could rear their head but it's a little annoying for someone that made up their own chapter and "created" characters using the named ones for stats.

Some things have gotten cheaper but to get the exact same options as you had in the previous book for a ten man tactical squad in a rhino you're looking at a 5 point bump in cost. Which means I'm going to have to redo my huge book of lists which was to be expected with a new book; and honestly if you don't need the leadership and attack bump on the sergeant you can get the same number of models for 5 points cheaper. 

Overall it looks like I'll be able to retain most of my lists with little modification. With the revised Chapter Tactics I also have a slew of new options to try out with my home-brew chapter. This book has also rekindled my fire to complete my company as well as potentially adding some new units once I can choke down the ridiculous cost of the Centurion Models. 


Been a little busy...

Just a quick update,  I'm a little behind in my posts but wanted to take a moment to introduce the newest member of my brood: Sebastian.

With a new baby in the house I don't have as much time to post updates on my hobby stuff once I can settle back into a regular routine I'll resume regular updates.

Look for a review of the Chibi Dungeon miniatures, some painting progress on my Super Dungeon Explore stuff, more updates on the near future board, and a review of the latest Codex: Space Marines.

When You're Hot ... and They're Not

Random – Sometimes you have those days where everything just seems to go your way. Sometimes you get lucky and that happens during a game night. Last night that happened to me.

Every week I have a group of 3-8 guys over to play games. Sometimes we play board games, sometimes tabletop games but most of the time we wind up playing Magic the Gathering: Commander. (During the week it's faster to get a few games in of Magic than it is to play a single tabletop game.)

Lots of real-life stuff (new babies, new houses, etc) meant we had a rather lite turnout last night, so I played a game of 1-on-1 Commander while we waited. The game was pretty crazy as it seemed like I was able to draw an answer to anything my opponent played. I was excited as it's been a long time since my Xiahou Dunn deck hit on all cylinders.

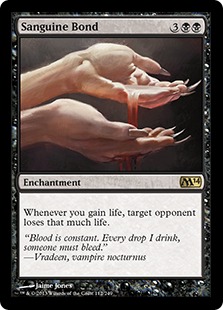
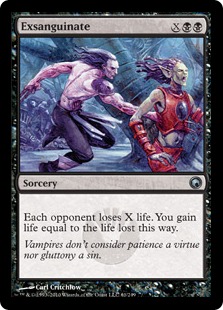
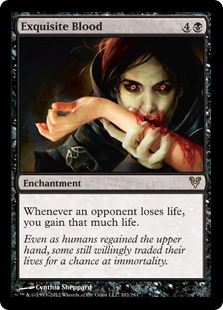
We wrapped up shortly after our last player arrived and jumped into a second game. Again I had an amazing draw: 2 swamp, Hex Mage, Dark Depths which meant on turn three I was swinging with a 20/20. An inopportune Innocent Blood lost me my fancy token, but I drew into Sanguine Bond and Exquisite Blood followed by Exsanguinate. Just plain crazy as I comboed off on the seventh turn.

At this point I switched up decks, pulling out my Mimeoplasm deck I figured this would be a bit slower. Also at this point we pulled out the community Planechase deck. Wouldn't you know it I had another amazing draw all the land I needed (including Urborg) and a mana doubler. I was riding high, right up until a Planar Phenomenon forced us to shuffled our permanents into the library and reveal that many cards. Turns out my flips were amazing and the other guys were not so much. The game ground on for a while with me building steam and my opponents struggling to build up a resistance. A creepy doll/pariah combo kept me from doing much to one opponent until I drew into some extort creatures and a Jace. End result third win for the evening.

So is there a point to this story, other than gloating about some wins? Well yes, yes there is. You see when you have a night like this where everything goes right you feel really great. That is until you notice that the rest of the table seems to be frustrated as they are not having a good night and your good luck is running the table. Suddenly your shining moment looses it luster.

The question is when this happens what do you do? You can continue to just roll with it and enjoy your luck. Or, do you tone down your game to give everybody else a chance? (You know not make plays you could, maybe "just be a little short" for range, "forget" about an ability, etc.) Even better what do you do if this happens when you're trying to teach a game, is it really the burned hand learns best?

I've been on both sides of the field on this one and can attest to the pure misery that comes from an opponent being on fire during a game while you struggle to get a measly spark from your side of the field. I can also attest to the pure joy you feel when everything is going right. Does it matter are those "rare" instances of extreme luck or bad luck just part of playing games? Or is should you do your best to keep a game "competitive"?

I would feel patronized if I knew they were purposely letting things slip to give me a chance (or is this really just rightious idignation and I wouldn't really care or even know?). That said I'm a hypocrite because I commonly do the same thing during demos or while teaching a game. Sometimes I'll even do it if my opponent seems really bummed or has had a really bad string of luck at the tables. Is that wrong? 

What do you think? Please post comments below.


Summer Vacation

Random – This year I took the family on a road trip to Williamsburg, VA; with a quick stop by Pittsburgh and Washington D.C. during the long drive down. While this isn't really gaming related I did gain some inspiration for some future terrain pieces while we were on the trip.

Day One: We left in the evening with plans to drive through the night until I was exhausted and get a room on the way down. As my wife is 8.5 months pregnant and my son is just under two years old I wasn't sure how often we'd have to stop so making an accurate plan of how far we could get on day one wasn't happening. As it turns out we made good time and stopped every 2 hours to stretch our legs and refuel. Was lucky enough to find a decent "truck-stop" hotel that was clean and cheap around 3 am. 

Day Two: The plan was to drive into D.C. on our way to Williamsburg; however construction and traffic during the daylight hours was so miserable we just drove through so we could get to our resort and unpack. Once we arrived and picked up groceries for our stay we all crashed hard and got some sleep.

Day Three: We got up early and headed off to the pool; which due to some renovations at our site was at another location down the street. The pool was really nice and had a splash pad and waterside built in. The kids had a blast and we headed back to the room for lunch and to make plans for the rest of the day. 

After picking up a boatload of brochures we settled on visiting Ripley's Believe it or Not and doing a ghost tour of Historic Williamsburg. The Ripley's Museum was a bit smaller than others I've been to but there were some cool exhibits as well as some games the kids really enjoyed.

Once my son went to bed I took the girls (my wife isn't a big fan of scary stuff) out for late night ghost tour of Williamsburg. The guide was really good and told some interesting stories, he recommended a few books from the local bookstore that the ghost stories were pulled from and then had to cut the tour a little short as a nasty thunderstorm rolled in. During the damp walk home the girls proceeded to freak themselves out and some weird wind noises sent them running back to the resort. Overall a fun time

Day Four: My wife and I woke up early with Oliver and decided to let the girls sleep in. We took the opportunity to walk around the Historic District and see the sites. I have quite a few new ideas for my Malifaux boards when I get back to working on them as the architecture and layout of the town is really interesting. We decided against paying for the passes to go into the buildings as Oliver was more than happy to just tromp up and down the steps and look at the outside and the 13 year olds didn't have much interest in it.

Once we got back to the room we woke up the girls and packed the car to visit Virginia Beach. The drive from Williamsburg was about and hour and took us through a large tunnel as well as over some interesting bridges. The beach reminded me of Daytona Beach in Florida, hotels on every inch or waterfront property with beach shops selling the same iron on t-shirts on the opposite side. The girls of course thought this was the best thing ever and had a blast looking at all the cheesy shop stuff. The beach itself was really nice and fairly clean. Oliver really liked the ocean and we had fun digging tunnels in the sand for him to drive his 1:43 scale Ice Cream Truck through (Note: I should have bought one for myself as it would be perfect for my near future board). 

Day Five: Busch Gardens. We broke down and decided to go to the amusement park. It's close to the same cost as Cedar Point with more family friendly atmosphere. They have a pretty nice Sesame Street Area (which unfortunately oliver was to small to ride most of the stuff), some decent shows, a nice zoo area and a few really fun rides. It was nice as the lines were really short and for some of the attractions we could get on and off immediately. This year is also the 35th anniversary of the Loch Ness Monster (pretty fun corkscrew-type coaster with a decent theme in the waiting area) so I got a cool souvenir cup which was only a buck to refill all day long. If you're a big fan of roller coasters they have a few that are worth riding Verbolten, Griffin, Alpinegeist, Loch Ness Monster, Apollo's Chariot, as well as some other types of thirll rides: Mach Tower and Darkastle.

Day Six: We packed up and headed north to Washington D.C., the drive was much better then it was coming down and we made pretty good time. D.C. is a pain-in-the-ass to navigate but we eventually found the National Zoo and a place to park (Note: the zoo is free, parking is not figure $30 for the day at least). After eating lunch we busted out the stroller and began our walk along the the 163-acre park. 

The National Zoo has many animals that you don't see any where else (like Pandas) as well as a very robust research center that you can peak into in some of the exhibits. During our visit they had a CODE: Green which was a drill in case one of the Orangutans (that can freely traverse the zoo on high wire lines) decides to make a break for it. The elephant house was also very cool and the kids were excited since they haven't seen any up close since the Detroit Zoo had to ship theirs away.

After the zoo we attempted to drive by the National Mall and White House (Note: you can't drive by the White House and there are military style check points when you get close). After a quick drive by we began the trek home staying in a really cool (circa 1977) Comfort Inn outside of Pittsburgh. 

Day Seven: Waking to a complementary "hot" breakfast we ate our fill and headed into Pittsburgh. We drove by the stadiums and over several of the bridges and tunnels that crisscross the city. Eventually we made our way to the incline and road the tram up and down the mountain. The view was pretty amazing and well worth checking out. I gave up on finding the original Primanti Brothers and headed north towards home. 

As luck would have it Primanti Brothers recently became a chain of restaurant and we were able to eat at one of the suburban locations. (check off another of the 1000 places to see before you die) The sandwiches were interesting and pretty tasty. Essentially it's a deli sandwich with provolone cheese, french fries and a sweet mayonnaise free slaw on two thick slices of italian bread. I went with the traditional corn beef.

The rest of the drive home was fairly uneventful. Overall I'm happy with the way the trip turned out and what we were able to accomplish in the time we spent in the area. I'm not sure that I'd want to go back to the same resort anytime soon, but I think as an option I'd consider it.

I also added a few more pins to the "Vacation Dad Hat" that has since become a little tradition for me. Goofy stuff like this your kids will remember and up until they become uppty teenagers it creates something to look for while on vacation. (photo to come)

Paving the Way - City Block Painting

Paving the Way - City Block Painting

Terrain Making – I seem to be getting better with the airbrush, after the primer dried on the 3x3 city board I went in and air brushed the city streets and the the blocks. The trick is to apply the paint in layers starting with the darkest and then building up to get a smooth transition between colors. 

Read More

3x3 - 3x3 - 3x3 - 3x3 - 3x3 ...Repeat

Terrain Making – While I love my 3'x3' Zuzzy mat I decided to build a 3'x3' base board to go with this near future stuff (Ideally I'll also be able to use it with Deadzone). I used the same wooden framework and insulation foam core as I've done with my Malifaux boards.

While waiting for the caulk to dry I started cutting out 3"x3" squares to build the city blocks for this board out of 1/4" foamcore. With small sections I don't think I'll run into a warping issue with the foamcore but just in case I applied my glue generously.

I figure using 3"x3" squares to build the foundations will give me an interesting look that serves the dual purpose of creating a grid for Deadzone. (As I've said before with the amount of games I like to play making the terrain as multipurpose as possible save me some space.) The 3"x3" slabs of concrete will also help to create a sidewalk for the various buildings as well as clearly define the roadway.

After glueing the squares into city blocks and defining the streets and alleyways, I cut some drains out of granny grate and glued them down onto the street. Once that had dried overnight I used some wood glue and play sand to texturize the street. With the high humidity this took quite a bit longer to dry than it normally does.

While waiting for the glue to dry I started cutting the basic shapes for more city buildings. The last few I made didn't fit into the parameters for Deadzone terrain exactly so I decided to make some additional buildings that match up with the grid. I kept 3.5" high as my standard for the height of A floor of a building and kept all the lengths multiples of three. They seem to work pretty good and I'm considering adding several stories to each of the buildings. 

To paint the whole thing I picked up a quart of Behr Premium Paint and Primer in a color called Pencil Point. This is a nice deep gray that only requires one coat to cover and improve overall adhesion. I like how thick the paint is as it helps to fill weird gaps and seal the sand to prevent chipping.

Boned - A Reaper Review

I recently took some time to assemble my Cthulu and Undead Dragon from the BONES kickstarter. I'm really impressed with how easy these models went together. The pegs only fit in the correct hole and fit snuggly enough I was able to put them together without glue or tack. This was a pretty impressive feat as I was even able to move them around a little bit unglued.

After dry fitting them together I used some Gorilla Glue in the sockets and put them together permanently. Note plastic cement will not work on BONES you have to use regular crazy glue. Also with the BONES material you can't prime the models, just wash them off with soap and water and then start painting. It's weird I know but most spray primers will never dry because of some chemical reaction.

There was no flash and very little in the way of mold lines. The material is a bit rubbery so you have to use a very sharp fresh blade to scrape them off. 

Overall I'm impressed with the huge figures I picked up and now I need to figure out what I want to do with them. I was thinking maybe having a monster attack Mega City One or have a beastie rampaging through Malifaux...

The Possibilities are endless I suppose.

More Airbrush Action - Near Future Terrain

Terrain Making – I'm getting the hang of using the airbrush with the second set of buildings for the Near Future board. It seems that consistent pressure and paint gives a smoother finish than short controlled bursts. Which is odd because it goes against everything I've been taught but hey ... whatever works.

After lining the seems with a dark gray I went back in with a white to do the bulk of the painting. I think both buildings took me less than twenty minutes to cover with a solid base coat with basic shading. 

Next I went in and painted the details with a traditional brush to pick out signs and metallic parts. My plan is to go back in and add some glow effect with the airbrush around the light globes.

Going Platinum, Baby - Mold Problem Solved

Terrain Making – After having several of my OOMO molds fail on me I was bummed out. The ones that failed on me were mostly components that I had built from other kits and used the molds to replicate my work rather than starting from scratch every time. I'm more or less just a hobby caster so I needed to find an expert to help me out. Luckily the TFB Plastics the shop that I usually pick up my supplies from has a really knowledgable staff.

After explaining my issues he suggested using a platinum cure instead of a tin cure silicone. Apparently the tin cure like OOMO is a cheaper silicone that is only supposed to hold up for 50+ pulls if you properly care for your molds. (I got much more that that with my base molds, but anything with undercuts was far less) The product he suggested is called Mold Star which should last for 400+ pulls. I was excited as the OOMO lasted quite a long time and the Mold Star was only $5 more per 1 lb. kit.

Once I got it home and set up my masters I mixed up a batch and used my vacum chamber to removed the air bubbles. Since it has a 50 min pot life I had plenty of time to degas the silicone before pouring. While mixing I noticed the color of this material is the same as the Hirst Arts molds which explains why their molds seem to be much stiffer than the ones I made in my intial runs. I used the 15 Slow version of Mold Star which meant four hours to cure, I decided to leave it overnight just to be sure.

After popping out the mold I'm really happy with how it turned out the material is much stiffer so it should hold up better against the rigors of resin casting.