We Be Clubbin' ... Near Future Board Progress

Terrain – I spent some time working on the club terrain piece for my near future board. After constructing the walls I realized this was going to be a rather bland structure since it has no windows and only one entry point. The interior is fairly interesting with several height variations leading to the private rooms and stage as well as the main entry check point/bar.

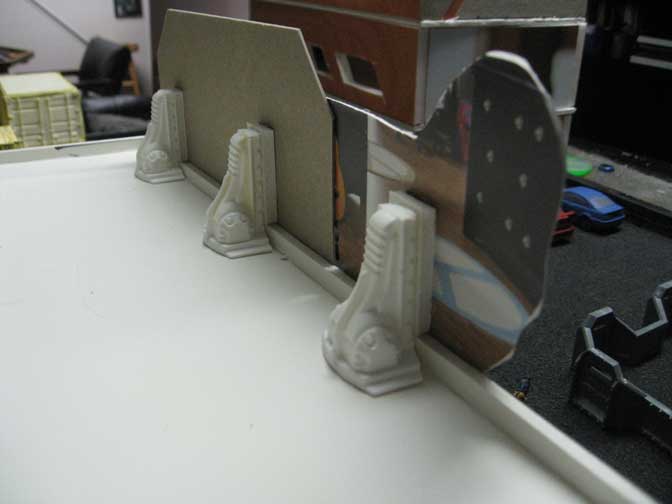
To add some additional interest to the building exterior I've cut some strips of lightweight cardstock into "futuristic shapes" (yes that means variations on hexagons...) While I was cutting strips Empire Strikes Back was on Spike so I gleaned a little inspiration from the set pieces in the film. Most of the futuristic feel of the set comes from the various panel shapes in the background. I also have been paying more attention to newer commercial buildings and noticed most of them use something called efface for the exterior. Essentially what that means is the exterior walls are covered with a foam product skinned with concrete, this allows for interesting shapes at a low cost.

Taking these two points of reference I've added quite a bit of exterior detail that will bring out interest areas without resorting to the typical rivets everywhere look of some futuristic terrain.

I also created the removable roof. Initially it fit a little to snug, after trimming the paper backing off the foamcore on the interior side it is now easier to remove and shouldn't cause to many problems lifting off during gameplay to place models inside.

For the large sign on the exterior I opt to go with a silhouette and a large billboard. I'm still contemplating how I want to do the name of the club. Most likely I'm going to cut out the letters and paint them like neon but I'm still on the fence. For the actual name I'm leaning towards "The Slippery Kitty Lounge" this seems to be a solid name that will fit in numerous settings. 

The roof needed quite a bit of detailing. Because the structure takes up a significant portion of the 3'x3' board, I have a feeling the rooftop is going to be a popular perch. Because of this I added some HVAC units and other structures to the roof to provide some cover. Ideally I don't want the roof to be just a sniper's nest but an area that could be contested by several models without becoming a no mans land if there is a model at a higher vantage point. The HVAC units were made from some Platformer parts I had laying around as well as some other bitz.

I still have some other details that need to be figured out before I can move onto painting this building but at this point I think it's ready for a test game to be sure it works as intended.

In the year 2000 ... Building a Near Future Board

Terrain – I've begun the groundwork for my near future board. After doing a few sketches and looking at the large amount of laser cut terrain available in the market today I decided to pull some inspiration from these designs. While I really like the look of the laser cut mdf I can't justify the cost when I can build eactly what i want myself. Sure it might be easier to just buy and glue together a kit (probably will go that route in the future...) but I'd like to build everything from scratch for this board.

After laying out some paper shapes on my Zuzzy mat I got a rough idea of what type of layout I wanted to create. My thought is to create a slum/industrial area and I drove around Detroit for some inspiration. In many seedier neighborhoods you have truck depots/shipping yards that but up against residential areas and also feature some of the less desirable businesses. For my purposes this is going to be the ideal battleground. The structures I have planned are a three-story apartment building, liquor store, gentleman's club and a fenced in shipping yard; combined with the variety of 1:43 scale cars I've found I'll be able to detail out the neighborhood easily.

The first step was determining a size for my buildings as there are several different systems I plan on using this board for it was important to make sure the scale made sense for everything. In MERCS the movement cards are about 3.5" long, so I used that as my basis for the height of a standard wall, this way it's easy to determine how many MP it takes for a model to ascend a level. Most other systems have 4"-6" as a standard move so this size will work with them as well.

I happen to have a bunch of 1/2" gator board that I saved from a dumpster (technically) which I decided to used as the basis for my walls. The nice thing about gator board is it has a styrene skin which holds up better than paper. This board is very dense and provides a sturdy foundation for the walls, especially when cut down to small sections like these buildings. It is however difficult to cut as the plastic skin is so durable it will take a few passes with the blade before you get to the foam.

After messing around with a few designs I came up with a look I like for the apartment building and have begun cutting out the windows and cutting cardstock to detail the exterior of the building. I'm going to give the impression of concrete formed material with some geometric patterns. I think this will look futuristic enough without going over the top.

I also cut out the walls for the club. I went with an "L" shape that can break up the table in some interesting ways. My plan is to fully detail out the interiors of these buildings and add removable roofs so you can easily enter and exit them.

Next steps are to continue detailing the building exteriors and devise a method for stacking them that won't be to difficult to remove during game play. 

Chop Shop – Repainting 1:43 scale cars

I decided to begin work on my Near Future board. Well, not really the board itself but rather some of the scatter terrain. With all the cars I have laying around now it makes sense to begin the repaints so they match up with my style of painting. While I suppose I could just dip them in stain and call it a day ... that's not really my style.

Step one is to mask off all the windows and headlamps. I like how the clear material looks and don't want to loose that with the repaint. So I dug up some blue painters tape and began the tedious process of masking and trimming each window. It's not a difficult process however it takes time and patience to do it right and not scratch up the plastic with my blade.

After trimming them up I sprayed each car with Duplicolor Dark Gray primer. I really like this stuff it drys fast and smooth giving me a nice surface to paint. 

I've decided to recreate some of the cars I've pimped out in Saints Row 3. I really like the purple and silver scheme of the protagonists in that game and think it will add some much needed color to what could be a rather bland board. (most urbanscapes have this boring gray tone which I want to try and avoid this time around). 

I'm also working with some Laser Decal paper to try and figure our how to tint the windows out. I'll probably add some of the decals to the windows as well to call out and personalize the cars similar to what you see in urban neighborhoods.

Eye in the Sky ... Storm Talon

Warhammer 40,000 – Over the weekend I had some time to put together a few plastic kits I've had lying around for a while. First up were two Storm Talons for my Space Marine army. I haven't picked up the revised rules for flyers (and honestly I doubt I will a new codex is probably on the horizon...) However based on the pdf i have from the White Dwarf they seem to be a reasonable investment for the Fast Attack slot. 

Being able to escort a reserve unit into play can bring a nice 1-2 punch and I've been working on some lists featuring Khan that take advantage of Out Flank. 

The kits are easy to assemble just like most of the plastice kits GW puts out. I was a little bummed at how small the model is when put together (it's slightly larger than a lans speeder) but over-all its a cool kit with a nifty roatating engine housing.

Of note when assembling the kit you may want to paint the cockpit ahead of time, I chose not to and am dreading going in to paint all the little lights and screens. Luckily the cockpit glass will obscure theses details so it's not going to be a huge deal if the interior is a little sloppy. Also of note is the printed instructions for the optional weapon systems are numbered incorrectly. If you want to use the heavy bolters or lascannons there is a separate weapons housing that fits the batteries/ammo box. In the instructions it tells you to use the same parts for all three options.

I really hate the GW flying stands. The "X" shape of the acrylic catches the light from multiple angles and as such doesn't disappear into the battle field. I've opted to use the 1/2" flying stands from Dragon Forge Designs as the solid rod disappears better and seems to be a more stable option. The connecting widget that comes with the stand doesn't fit on the Storm Talon very well, however a little sniping and sanding and it fits nicely on the bottom of the cockpit and looks a little like the bottom thrusters.

Special Salamander - Captain Pellas Mir'san

Warhammer 40,000 – A while back I painted up a Salamanders force for a friend. He's really liking the list he has but as of late has decided he wants to add some different force commanders. I let him look through my Badab War books and he really liked the two characters available to him in the book.

The first character is a special dreadnaught, Bray'arth Ashmantle. This beast of a commander is pretty cool and Forgeworld makes a model for it. 

The second Salamander character is Captain Pellas Mir'san, which currently does not have a model. When I first looked at this guy during 5th edition he seemed pretty mediocre, cool concept but he didn't really change the force to much. Looking at him in 6th edition with Challenges, his abilities get significantly better. Essentially he's a duelist armed with two power swords and a combi-flamer. If he's in base with and enemy character he can either gain the +1 attack or deny the enemy an attack. Pretty nifty.

To build him I rummaged around in my bitz box to find the correct parts. I had an extra captain from Assault on Black Reach that I thought would make a passible base for the conversion. Next up were two power swords, one that came with the captain model and another that I think was from the force commander box. Since his hands would be full with the swords I decided to build a predator style combi-flamer to mount over his shoulder. By attaching it to the backpack he looks similar to the tech marine models, which ties in with the Salamanders forge father look.

After a bit a clipping, sanding and welding the plastic together I have a pretty cool model to represent this character.

Transformers ... Getting more use out of tanks

Warhammer 40,000 – Oh look another green tank! This time around I'm working on a Razorback/Rhino for the Dark Angels commission I've been grinding through. My client was creative with this one and used 3D Studio Max to sculpt some custom parts and have them 3D printed by Shapeways. From what he was telling me they were really reasonably priced running about $2 a part (which is comperable to only bitz sellers) so if you have access to a 3D modeling program you can make some pretty cool unique stuff.

He created a front door hatch similar to the Rogue Trader style rhinos, some custum doors and a rear hatch variation that looks really cool. It looks like he was also able to make his own variation on the gun cowel and turrent so with one kit he has both options he'd plan on using.

Paint follows the same formula as the rest of the army, green base, wash, edge highlight. Then go in and get the other colors.

Also in this batch is a Deathwing Apothacary. It's weird painting bone and bright white on the same model as it can look like a mistake. However that's the official scheme so I'm going to stick with it.

Blood Luster of Slaanesh?

Warhammer 40,000 – The Chaos Daemons codex released and out of curiosity I picked it up. I still can't believe the asking price for these books, sure it's nice they're in full color with a hardback and embossed cover but $50 for a army book is a bit much. Luckily I support my local gaming store and they had it for 25% off the MSRP. $37.50 is a bit more palatable. (Barely, but it's easier to rationalize than $50)

I already own a sizable Slaanesh Daemon force that has been sitting on the shelf since shortly after the last book was released. I hated the random deployment in the last codex and as such I played a grand total of three games with them before putting them back on the shelf. Initially I picked most of these models up to accompany my 3rd edition Emperor's Children marines. Who along with all my other chaos marine stuff has long since moved on to another owner, as it seems GW has no plans on bringing the army anywhere near what it was when I enjoyed playing them. However I held onto the Daemons as I enjoy the look of the Slaanesh models and figure they'll look nice on my shelf if I ever finish painting them.

At first blush it seems the new Daemon Codex is a huge improvement over the last book, contrary to what the rest of the internet tells you. It seems that a full Slaanesh force is a viable option, and I plan on building out a few list options using the models I already own. I still am trying not to sink any more money into 40K models until I finish eveything I have in the que, so I'm not looking into any of the new models yet. 

A while back I picked up an Ultraforge Pleasure Demon, I just liked the model and didn't really have any plans for it (plus it was on a clearance sale at the time), so it sat on my shelf partially assembled. Reading through the new book I really think I should use a Blood Thirster in my list, problem is I hate how the Khorne models look and in general the asthetic of the daemon book bothers me. When you run a mixed force the models don't match up and look like a rainbow vomited on the table. (Chaotic sure, but ugly as hell) So my solution is to use the Ultraforge Demon as a Blood Luster of Slaanesh, it solves my problem of fitting the look and feel of the rest of the force while allowing me to use the rules for a model that I think is fairly strong. 

I'm going to try out a all Slaanesh list a few times to see how that works out and if I like playing them I'll finish up the army. (adding yet another 40K army to my que) And if I really want to add some of the other units I'll probably just scratch build some stuff (maybe I'll be able to use those Soul Drinker bitz after all ... Sarpedon might make a decent Herald on a Chariot, an a unit of mutated marines might pass as flamers or horrors).

My initial thoughts are: 1x Bloodthirster, 1x Keeper of Secrets, 4x Units of 12 Daemonettes (2 with banners), 1x unit of 6 Steeds, 1x Slaanesh Daemon Prince with Wings, 2x SoulGrinder w/ Phlegm. This comes in just under 1500 points and puts 59 models on the table. I have a feeling splurging on the random gifts might be useful however for my first run through I don't want to spend points on upgrades.

On the painting table ... Death Wing Contemptor

Warhammer 40,000 – Continuing along I have some more models I'm painting for that Dark Angels commission. Again in order to save costs the client provided the models "clean and assembled" so all I'm doing is putting a tabletop quality finish on the models. Apparently he had some issue with putting the Contemptor together and had to put a rod in so it would stand up properly. After seeing what he had done I gave him a quick walk through of cleaning and prepping resin for assembly. He didn't want to take apart what he had done so ... I'm just painting it as is. I'll paint the rod black in an attempt to hide it.

I began the same as I did with the Terminators a stone base coat with a earthshade wash followed by a bone highlight. The metal was washed with black and highlighted with silver. Overall the Contemptor is a joy to paint and looks like a very cool model. (Once I finish all the stuff I already own I might pick one up for my own marines)

Also in this batch are some Raven Wing bikers, these are the three that came in the Dark Vengeance set. The sculpts on these are a bit weird as I'm not sure why a marine would have a scroll on the outside of his calf like a bad tatoo other than the digital sculptor just thought they need something there. (I imagine an art director screaming more flair, 15 is not enough). My client wasn't a fan of the wings on the back and clipped them off to add some gas cans (long range patrols need extra fuel, right?)

Painting on Raven Wing is pretty down and dirty. Paint the metallics, black basecoat, black wash go back and edge highlight/ pick out details. 

Smells like ... Vinegar (Decal Tips)

Warhammer 40,000 – As promised the next step is actually applying the decals. One of the tricks I've learned over the years is to use Micro Set and Micro Sol. This nifty products help to melt the decals into the model so you don't get that weird halo line that needs to be painted over.

Step One: Paint the area you plan on applying the decal to with a gloss varnish. This serves two purposes, first it gives you a pretty smooth surface to apply the decal to. Second something about the Micro products reacts with the varnish to help the decals melt in. This might be completely a rationalization on my part as I'm no scientist but it's the way I do it and it seems to work great.

Step Two: Put down the Micro set on the area you want to place the decal. Paint it on with a soft brush. 

Step Three: Slide the decal in place. At this point I gently dap with a paper towel to remove excess liquid.

Step Four: Gently apply Micro Sol over top over the decal and leave it alone. The Micro Sol will soften the decal and cause it to "melt" into the paint.

Step Five: Once it's dry apply a second coat of gloss varnish. This will protect the decal from damage. If you desire a matte finish apply that after the gloss has dried.

Pretty simple really. A small bottle of either product will last you forever, I picked mine up years ago and still have an almost full bottle of each.

So how did the laser decal paper hold up? The answer is pretty good. I only had minor problems with the toner coming off and was simple enough to paint over the decal with some thinned down paint. I highly recommend this style decal paper over the more readily available inkjet papers.

The devil's in the decals ...

Warhammer 40,000 – Continuing my quest to complete this company of marines prior to my various Kickstarters arriving (Relic Knights, Kingdom Death, Chibi Minis to customize Super Dungeon), I've realized that I misplaced my decal sheet. Way back when I ordered some Iron Raven sheets from Griffon Games, at some point the ever benevolent GW sent them a cease and desist letter forcing them to remove the decals from their store. The bummer about this was I needed another sheet to finish my project. I never found a great solution since the army got put on the back burner. 

Fast forward to the second time I tried to finish this army and I began looking into inkjet decals. These worked ok for the marine names on my bases but if you look close you can see a faint red halo around the decal. Even though they were sealed per the manufacturer's specs the ink bleed a little. Something about black inkjet ink having red in it that separates when exposed to water. This just wouldn't do for bright white shoulder pads.

Forge World eventually released a Raven Guard Transfer sheet however for the the cost I'd only get a handful of black ravens. At about $20 a pop this just won't work.

After doing more research it seems that my best option (aside from buying an ALPS printer) is to use Laser Transfer paper. Since this is toner based I shouldn't get the same bleed-through issue and as a bonus I shouldn't have to seal the decal prior to using it which should help the decals to adhere to the curved shoulder pads better.

Next I had to create the art. After a few attempts I created a logo that was close enough to the original decals I used. While I was at it I also drew the tactical and devastator symbols so I have enough of them to complete my company. 

Next up, applying decals.

Vindication ... The end is nigh

Warhammer 40,000 – It sounds like I'm near the end of this Dark Angels commission. It's been a fun ride and I've impressed myself by painting two full Space Marine armies in a few months time. As this project winds down I'm going to have a little time to continue work on my own company. One of my favorite things about doing commission work is finding quicker and easier ways of painting that will get you the same or similar results.

This time around I'm working on a Vindicator. This heavy choice is ideal for situations where you face lots of deep striking units or 3+ saves. I never have much luck with it but I've seen others use it on the table for devastating results. Imagine your rhino gets blown up but a lucky shot then the squad stuck in the crater proceeds to take a direct hit by this massive template cannon. Most of the time that means you've lost that squad. (Of course when I use one in my own lists it always scatters to far to make up it's points).

Painting on this one is just like the rest of the "regular" Dark Angels troops. A Orkhide base coat followed with a green wash and edge highlighting completes the green sections. The metallic bits are painted gunmetal, washed black and edge highlighted with silver. To keep the red weapon casing theme in tact I painted the gun cowl the same as the line troopers bolters.

My client said he's going to have a Razorback to round off the force and then will be done with it for a while. He's looking into doing a Blood Angel biker force next which sounds pretty cool and should have a pretty low model count, once he gets it wrapped up I anticipate it making its way to my painting table in the future.

Clawing Out ... Terminators as Troops?

Warhammer 40,000 – Part of the goal for my personal Space Marine army is to have the flexibility to play whatever I want while still maintaining the look and feel of my own chapter. Typically I do this by modifying the special characters I want to use and making them fit my general aesthetic or convert/scratch build something that mimics the character I want to represent.

When the Badab War books came out along with the model for Tyberous, chapter master of the Carcharodons (aka space sharks) I knew this was something I'd want to play. However I refuse to start another army so he is being implemented into my existing force as my Master of the Fleet. To accompany him I had to make a squad or two of "assault marine" minus jumppacks to take advantage of his special rules as well as the "Red Brethren" a squad of Lightening Claw armed Assault Terminators that count as troops.

As part of my "FINISH THEM!" initiative I'm been working on putting the final touches on this squad as well as a standard issue Black Reach Dreadnaught. (Yes that right I still have unpainted stuff from the last starter box)

Painting purple is interesting and it took me a while to get my mix right. I used to based the whole model in a grape color and wash it with purple ink. From there I'd go in and add a mid tone purple and them an extreme edge highlight. I've found that using the Leviathan Purple wash saves me the step of going back in to repaint the mid tone. The wash has the benefit of not being shiny like the inks where. At this point I have some models with the ink and some I did with the wash and it's pretty hard to tell them apart once they're sealed. 


Ravens for the Win!

Warhammer 40,000 – I'm really excited to see the Ravens in the Superbowl this year, hopefully they'll pull out a win. Many moons ago they were the inspiration for the color scheme of my home-brew chapter. When I started these Space Marines I was primarily a Chaos player with so many options in the 3rd edition Chaos book most everyone I knew had a Chaos army so the local meta was skewed. I picked up a Sisters of Battle army and decided to pair them up with a Raven Guard force based on the Chapter Approved rules for them. At the time I thought this was brilliant as they were a good foil for the bulk of Chaos players. At that time I wanted to do a home-brew as I was tired of painting black. Of course those rules disappeared with the advent of 4th Edition and they weren't as viable so they sat on the shelf while I began looking into Warmachine and began selling off my plethora of 40K models.

Fast forward to the release of 5th edition. My local group got excited about 40K again and I decided to focus on Codex Marines as my primary army. Up until this point I rarely played the good guys in any system but was disenfranchised with the sudden up and down swings in the quality of other codexes. Figuring marines always get the best toys and updates it seemed like the best choice for an evergreen army. I got some really great deals on Mega Force boxes and picked up a ton of sprues at a local bitz swap. After assembling a solid force I realized I still had a ton of models and began work on putting together a full company. Not long after my local group bored of 40K again and the models went back on the shelf.

After the release of the Badab War books from Forge World my local group ran a few mini campaigns and I began work on the Twilight Ravens yet again. Shortly after interest petered out again and they went back to the shelf.

If you haven't notice a pattern yet, you will. Warhammer 6th Edition released this year, my group is once again excited so the Ravens are flying again. I've dubbed this project, "FINISH THEM!" as I feel an aggressive urge to complete the project. 

This week I've just about completed a special tactical squad armed with dual close combat weapons. These can serve double duty as troops for Blood Angels or when Tyberous leads my force, as well as Assault Marines without jump packs for standard codex marines. I initially built these in 2011, and left them after basecoating the models.

Scouting Ahead ... Dark Angels New Units

Warhammer 40,000 – Sick of green yet? Just kidding with the new book out for a little while my client has decided to add more models to his Dark Angels force. I'm honestly a little jealous of his forward thinking. He essentially has a completed force with most of the bells and whistles to match up with the new book done and thanks to me, completely painted.

Next up is a nifty troop choice. Space Marine scouts are cheap objective takers. If you can get them into cover they can harass units with their sniper rifles and divert attention from your key units to take care of the annoyance they provide. 

I also painted up a custom Belial, Deathwing Champion, Plasma Cannon Terminator and two drop pods. I'm not looking forward playing against these models as a unit of 11 terminator equipped to handle anything that doesn't scatter when they come in (on whatever turn you want) is pretty nasty. 

You like the boom? Thunderfire completed.

Warhammer 40K – I like blast weapons, there's something satisfying about laying a template on the table rolling for scatter and then subtracting your BS. Especially when your BS is really good. Odds are you're going to hit a few models at minimum with each template. That said placing 4 of them is even cooler. Sure most of the time you're not killing anything because they make their armor save, but there's something about making your opponent roll a ton of saves that brings a smile to my face. (During a recent game I scored 15 wounds on a unit of 10 marines, a bad set of armour saves left two of the standing).

I've completed work on my Landraider Achilles and and just about done with my Thunderfire cannon. With these two models completed I'll have some nice heavy support options to add to my completely painted based and sealed list. 

The Thunderfire cannon is a weird model. So much of it wants to be metallic silver that it doesn't really feel like you've done much to paint it. I went in and added a bunch of bronze components just to add some interest areas to the model. Of course once the washes and highlights are applied the general look is mostly silver metallic. The Techmarine gunner has the same issue, just tons of metallic parts that don't make sense to do in any other color. Coupled with the "Mechanicus wear red" the model looks a little odd to me. But I'm trying to keep my home-brew chapter as codex adherent as possible so I make sacrifices to my design sensibilities to fit with the existing cannon.

I'm still on the fence as to whether I should base this or not. I have something it will fit on and I think the base would add stability and durability if I need to transport it much. I'm probably going to to use one of the attack bike bases to complete this gun.

Putting Plastic Together ... fumless fallacy

Over the weekend I sat down and put together the blevy of plastic kits I've had sitting around waiting to put them together. While it's probably counterproductive to put together more stuff to paint before I finish my existing project load I needed to take a break from painting for a little while.

When assembling plastics it's important to use the correct glue. For most model kits the correct glue is plastic cement. (Super Dungeon Explore is an exception to this) Plastic cement causes a chemical reaction which softens the plastic and welds the two parts together into a solid join. This is more durable than a standard glue join and the models are unlikely to come back apart without serious repercussions. (notably truly broken pieces).

It's been some time since I had an assembly line going to put together a bunch of kits at one time and I forgot how messy plastics can be. Shaving the mold lines and sprue nubs left my workspace covered in plastic shavings. It's a good thing I set up in the basement where it's easy enough to sweep up the mess. The lesson to be learned here is to put a drop cloth down when doing mass assembly. It's also helpful to keep the shop-vac handily.

When choosing a plastic cement there are a ton of choices available. I prefer to stick with the "non-toxic" blue testors brand in the metal tube. It's cheap and easy to get and does a great job. The only problem is the tip is far from accurate and to much pressure on the tube means glue everywhere. I've heard there are better glues that only require a single drop with a pin to hold the plastics together. I have to assume they are also fairly smelly and toxic like the red tubes of testors. 

Not feeling adventurous I stuck with the stand by blue tubes. Just because it's labeled "non-toxic" does not mean it doesn't smell. In fact the glue I was using had a very strong citrus odor that lingered well beyond the time it took for the glue to dry.

The next important tool to have on hand are a pair of side snips or sprue snips. These allow you to easily remove the pieces from the sprue. Don't twist the pieces off or try and carve them off with an exacto blade, you'll wind up damaging the part and probably gouging yourself with the blade. A good pair of hobby snips will cost you less that $15 and will save you much more than that cost in potentially damaged models. You'll also want to have some fresh exacto blades around to scrape off the mold lines.

With the proper tools in hand I went to work. Over the course of a few hours each night I was able to assemble Skullvane Manse, an Imperial Stongpoint, Dark Debts, Mr. Tanner, Mr. Graves and Santana Ortega. Next up I'll review these kits individually.

Baseline ... Knowing where to start

Warhammer 40,000 – I've been working on my Space Marine army off and on since 2005. In that time I've continued to build and base coat models for this project without actually finishing anything. I've finished lots of other projects but this pet project is the one that I can never just finish. I think it's probably a subconscious thing as I've told myself this is going to be my go to 40K army (also I set my goal at finishing a company, eventually an entire chapter ... maybe). I'll have my Slaaneshi Daemons as a backup but this is going to be the one army that I will hold onto and use going forward. Which means is I ever finish it I won't have things to build for 40K, silly as it is since new stuff comes out constantly for marines which means I'll always be adding something I think that might be what holds me back.

Anyway the point is to finish this project I need to know where to start. I've tried a few different goals, doing a unit at a time, building a core list etc. None of these have kept me on track, so what's my baseline? Bases of course! When I decided to do a company I went and made little name decals for every marine in my army, these will fit on the little scroll I sculpted on the front of each base. [Interesting fact: the name of each battle brother in my force is based on the genus or species of a bird.] 

My thought is if I finish painting all the bases and put the names on them I'll be motivated to finish up the squads so I can pin them to their final base and seal them with matte varnish. I started the tedious process of painting the bases and realized that I ran out of chestnut ink. Given this army has been in progress for almost a decade I've run into the issue of paints and inks being discontinued. Unfortunately there's not a good GW replacement for Chestnut ink, none of my local stores carry Reaper paints so I had to go to their website and order them direct. This time I'm stocking up with enough to finish the project (just in case).


On the painting table ... Dark Angel Command Squad

Warhammer 40,000 – No catchy title today, I'm starting to run out of ideas for these Dark Angels. I started work on a command squad for my Dark Angels commission. Essentially the paint follows the same pattern as the first few batches I did, if you want the details and recipes check that post.

Interestingly enough my client ran out of Dark Angel pads and provided these with a single sword shoulder pad. I believe these are from the Black Templar sprues. He requested I cut in the decals to create a semi 3D shoulder pad. Honestly it was a pain to get the cut right but I think it paid off and looks really sharp.

Now that the new codex is out I'm anticipating several more units to fill out his force.

Off the painting table ... Guild Avatars

Malifaux – I finished up the two Guild Avatars I was working on for a client last night. Overall I'm happy with the way the models turned out. I need to fix my pop-up light box to get better final photos. The iphone is ok for some WIP shots but when it comes to finished models I'm having a hard time getting shots of similar quality as I was able to get with my Cannon Powershot. I suppose the dream of using one device for everything isn't really that feasible. I plan on taking some better shots of these to add to the gallery. Stay tuned for updates.

On the painting table ... Tank Shock

Warhammer 40,000 – If you can't tell locally the sixth edition rules for 40K have been pretty popular. I'm tandemly working on two separate commission space marine armies. Oddly enough they're both green and share many of the same models. Unfortunately they are two very different shades of green which means I can't assembly line both armies at the same time. 

To speed up the process I pulled the common colors between the two armies and put them in the main slot of my paint table. Then I took two shoebox lids and put the custom mixes and army specific colors into them. That way when I need to change gears I have everything ready to go and can bring up the colors I need right away.

This time around I had to assemble and paint a Rhino and Landraider Redeemer. Both kits a very straightforward and fairly quick to put together. My client has no interest in opening the doors so I was able to glue it shut and skip the fiddly interior details. Once glue together with plastic cement these things are essentially solid bricks.

Painting followed the same rhythm as the other units in the army. Gretchin Green base with a green wash on the bulk of the model. Followed by edge highlights. I used the same grey with black wash for the black doors.

I left the hatches loose so he could upgrade to the melta if he so desired or just stick a standard hatch on if he didn't. I'm pretty happy with how these have turned out so far and just have some minor details to finish up and decals to apply.