Tenzi Review - A Dice Rolling Game

Review – I received an interesting little game this year called Tenzi. Prior to receiving it I had never heard about the game which is rare as I like to try and keep up with any game that is out there.

The game itself comes nicely packaged in a tube with 40 dice (all D6's) in four different color combinations. The tube is a little odd as I think a bag would be better but for what it is it works. Also included in the game is a simple instruction sheet explaining how to play and the story of the creators. The story is nice as it's a simple garage packed game that caught on and got decent distribution. Two ad agency guys decided to make a game, came up with this and started selling it out of their garage is the short version.

To play you'll need to round up 2-4 players that are old enough to understand how to roll dice and match them. Each player gets ten dice and rolls them. From the initial roll each player picks one die and then trys to match the rest of his dice with that roll. First player that gets the same result on all ten dice wins. Simple right?

In practice the game is really fun (although a bit to random for some people) and I can see busting this out at gatherings and as a time killer. The basic game is easy and fast, just roll and roll until you get all ten. The extra rules include a variation where you can steal dice from your opponents if they match your chosen number. This variation gives a bit more player interaction and is my favorite.

For most hardcore gamers though you probably already have 40+ dice and can play this without buying the game. Although the dice are very nice and come in some interesting color combinations, so you might want to pick this up just for that.

Happy Thanksgiving

I wanted to take a second to wish all my readers a Happy Thanksgiving. While gorging myself on turkey and stuffing I thought it might be a good time to reflect on what I'm thankful for (with a hobby related spin of course)

1. My Family: I'm thankful to have such a supportive family that understands my dedication to my hobby and even though they might not fully understand while a grown man plays with toys; they support my efforts and see the "art" that goes into my creations.

2. My Club: The Paperbag Warriors have officially been my gaming club since 2003 and in those 10+ years we've had a rotating cast of members all of whom bring something different to the table. Having such a great group of guys to play games with and share of love of the hobby isn't something all gamers have and I'm thankful for them.

3. A Disposable Income/Self-Sustaining Hobby Budget: Let's be honest this isn't a cheap hobby, sure the amount I spend on models and whatnot might be what someone else drops in a night at the bar it's still a significant investment. Having a good job and a booming side business via this site is what makes my hobby possible and I'm thankful for both.

4. My Creativity: I'm thankful for being gifted with the creative spark. This makes my hobby enjoyable and provides me with a good job.

5. Game Designers: Without them our hobby wouldn't exist so I'm thankful for all the creative men and women that strive to produce quality games and models to full my endless desire for the new shiny. 

What are you thankful for?

Gameroom Update ... Moving Things Around

Random – We've been in a bit of a clean-up mode around the house lately. The motivation to go through boxes that were packed away when we moved in a few years ago and determine the need to hold onto stuff that's been in a box for years has been strong. The garbage man is probably less than happy with me as each week I've been putting out 10+ bags of random crap. This doesn't include the bags of donations that have mad their way to Salvation Army or the boxes of stuff slated to go up on ebay. It's crazy the amount of stuff you accumulate.

Anyway to the point, after cleaning up the basement I decided to reorganize the way the gameroom is set up, unfortunately I don't have a ton of options unless I start knocking down walls so it's been more of a minor tweak and move.

The location of my 4'x6' table has always been problematic as it makes sense from a space standpoint to put one of the short edges against a wall. Essentially this takes the place of where a bar would be in a typical home. The problem with that is the art of the table that buts against the wall sees little use because it's inconvenient to move models around and you miss some site lines because you can't go all the way around the table.

After busting out the measuring tape I realized that I could float the table in relatively the same area it already occupied without loosing to much space. Some of the larger memebers of my play group might have an issue getting around it but the needs of the many outweigh the needs of the few. Besides its my house and if I can fit around it that's really all that matters.

After moving the table I realized the my shelves looked a little off balance, so I made a trip to IKEA and got another small BILLY shelf to separate the two display cabinets. This helped to balance out the wall a little better. (I'd prefer to do the full wall in shelves but the location of the closet around the water meter means I have to leave some space, my wife also didn't want me to cover the window any more than is already is ...)

With the additon of the shelf I was able to put all my rulebooks on the same wall as my models and bring my trophies out of the cabinet onto a shelf where they are more visible and centrally located.

I'm still trying to find the right place to store my terrain as the bins under the table are less than ideal. With the move however I was able to fit two barstools under the table so seating for two is possible. It still needs some work but it feels good to move some stuff around.

The long boxes of comics that I was storing under the table are on their way to ebay. I've given up on trying to get anything near their actual value and just need to get them out of the house. So if you're looking for any issues from the 80's or 90's check out my ebay auctions.

Back to Badab ... A Warhammer 40K Campaign

Warhammer 40K - It's about that time again when I try to organize our gaming group to play a linked campaign. I've done my research and looked through numerous reference books to see if I could find some inspiration for a setting to tie together our games of Warhammer 40K. With grand plans to write up something immersive and complex I set to work ... and then realized I don't have time to get that in depth.

Currently everyone in my group has a Space Marine force of some type, and we never really played out a full campaign the last time we tried to run the Badab Campaign. So rather than get in over my head I'm using the forgeworld books as a starting point and making up my own missions to fill in the blanks.

Below are the missions we're using for week one. Each week I'm providing the missions to the warlord of each side to delegate who will fight which mission. Named characters can only appear in one battle each week so that will help to force some tactics when deciding who will fight where.

This will act like a ladder, each battle has to have a clear winner to move on to the next warzone. If it ends in a tie the game is replayed the next week as part of an ongoing siege. Units that survived the first part of the siege will begin on the table and any additions to the force will arrive via reserves.

During the campaign if a named character is killed they cannot be used in the following week's missions.

Week One

Capture the Shuttle (1500 points) Desert Big Table (4'x6')

A shuttle carrying vital information has crashed. Both sides need to recover the information.

Primary Mission: King of the Hill - Uncontested control of the center objective at the end of the game +5 points

Secondary Missions: Slay the Warlord, First Blood

Special Rules: Nightfight (in effect first turn), Reserves, mysterious forests, Fast Attack counts as scoring and gives up 1VP when eliminated.

Set up: Diagonal 12" no mans land through the middle 

Secure the City (750 points) Small City Table (3'x3')

Amid the sprawling hive you must secure a location to set up a command center.

Primary Mission: Objectives Place (6) objective counters in various buildings throughout the city, they are mysterious and have random values. 

Secondary Missions: Slay the Warlord, First Blood, Linebreaker

Special Rules: Reserves, Intact Buildings AV12, firing points per model, Nightfight begin rolling on turn 3

Set-up: Standard 8" deployment

Secure the Complex (750 points) Small Swamp Table (3'x3')

Deep in the jungle swamp something nefarious is happening in an underground complex. Secure the entrance and prepare to cleanse the base.

Primary Mission: Table quarters for each uncontested table quarter held by scoring units +2

Secondary Missions: Slay the Warlord, First Blood

Special Rules: Reserves, mysterious forests/rivers, Heavy Support counts as scoring and gives up 1VP when eliminated.

Set-up: Standard 8" deployment


Building a better list ... Twilight Ravens

Warhammer 40K – Back in third edition I had an Emperor's Children Biker List that ran sonic blasters on everything. I loved that list (and really anything I could dream up from the old Chaos Codex) for the flavor and fun that it represented on the table. If I happened to get stuck playing on a table with a ton of difficult terrain that would die to the dangerous terrain tests more often than to enemy gun fire but when they got there they could summon a ton of daemonettes to gun whatever withstood the hail of firepower they could dish out.

Unfortunately every Chaos codex (barring Daemons) has been pretty crappy and most of my custom models were no longer relevant. Disenfranchised I sold off all the Chaos Marines and focused on just playing the loyalists. I figure at least they get a ton of love every edition and most of the models don't change much in function so at least I'd have something that didn't require complete shelving of the army when editions changed.

Enough history, fast forward to today. With the new space marine book the options are back(sorta). With chapter tactics you can build and have a very unique list using the exact same models with a different choice of chapter tactics. Which is a pretty cool thing one list becomes 5+ each with a unique playstyle; add in the stuff from Forgeworld and you have even more options.

With the new grav guns I realized I can mimic the play style of my old biker list using space marines and get a much reduced (yet more effective) hail of fire because of the relentless rule on bikes.

Here's the 1500 point list I've come up with:

• Chapter Master: Bike, Artificer Armor, Relic Shield, Thunder Hammer

• Master of the Forge: Bike, Conversion Beamer

• Ten man Bike Squad: Power Weapon, 2X Grav Guns, Multimelta

• Ten man Bike Squad: Power Weapon, Melta, Grav Gun, Multimelta

• Landraider Achilles

• Three man Centurion Squad: Grav Cannons, Omniscope, Hurricane Bolters 

Happy Birthday to Me

Random - It's my Birthday and I got some new toys. Look for a full review of these in the future.

Super Dungeon Von Drake's Manor - Love the look of this box. I really need to allocate some time to playing this game and getting these minis painted. The whole thing is way to fun to sit on the shelf.

Chessex Pound of Dice - You can never have enough dice, this bag has a full pound of assorted D6. I really like these to have in my community dice box. Nothing is more frustrating than having somebody else touch your dice and jinx them.

Deathwatch: Honour the Chapter - I love these books even if I never get a chance to play the RPG the wealth of information within these is great to read. I've been absorbing all this stuff as I begin to rework my own Space Marine Chapters backstory.

On the painting table ... Imperial Guard

Warhammer 40K – My newest commission is a Imperial Guard force that I'll be painting squad by squad. My client opted to go with the more affordable Wargames Factory Shock Troopers the models are about the right scale and they have the look he wanted with out breaking the bank trying to build a Death Corps Forgeworld Army.

He was little haphazard with the way he glued models to the bases he had so the scrolls don't always line up on the bottom of the base. He asked that I just try and hide it with paint. Easy enough, the models also have a plastic tab on their feet which he just glued to the base. Not exactly how I would go about it but every gamer has their own quirks and for some just getting something on the table that looks decent is more important than the little details. I hid the bases with some sand and rubble then set about priming the models.

This is another basic tabletop job. Which seems to be the norm for large scale army jobs. Honestly you rather see individual models by themselves so going overboard on the details isn't necessary for most gamers. (With my own stuff I obsess over the details ... which is why I can't grind them out as fast as my commission work)

After a gray base I went in with foundation paint and picked out the black, red and white areas then added metallic to the guns and face masks. Doing these assembly line style I was able to get most of the work done in one night.

Next steps are to wash them with black, do some minor highlights and apply the Helghast Decals to the shoulder pads.

On the painting table ... A stern look

Warhammer 40K – Anytime a new power armor book comes out it seems like a get swamped with new commission work. This is a good thing, so I'm looking forward to all the supplemental codexes that are coming out hopefully they'll have some cool unique units that my clients will want to add to their forces.

On the table now are some Sternguard Veterans to go along with the Dark Angels army I'm been painting for the same client. His goal is to have a nice looking tabletop force without breaking the bank. Which means all I'm doing it applying paint, I have to repeat this any time I post things for this army as personally mold lines and flash drive me crazy. However to keep the project within budget I have to remind myself that these were provided "ready to paint."

Anyway the new Sternguard plastics are pretty nice. They have all "ten pieces of flair" just like the old metal/finecast versions as well as all the weapon options in the kit for the basic entry. Looking at the way he's assembled these models I definitely want to pick up the set for the extra parts there are plenty of cool bits to make some unique models from this kit.

Painting is pretty basic a green base with a wash for the armor. I went in with gold and tan to pick out the robes and bling. Then gunmetal and red on the weapons. Once that was done I went in and picked out some of the highlights on the models and applied the single sword decal my client is using to denote veterans.

Also in this batch is his custom version of Ko'soro Khan on foot. I guess he's working on the mounted version as well so the two models will look the same. In an effort to make the most out of his power armor models I'm painting him as a master of the Ravenwing. My client likes to run a Codex: Space Marine list for his bikes with Kahn and pairs them with an allied detachment of Dark Angels. 

On the painting table ... Tanked

Warhammer 40K – My newly refocused efforts are starting to pay off. After finishing the third tactical squad I decided to dedicate some time to completing their transports. In order to differentiate the various rhinos I have from one another I used parts of different kits to give them their own look and feel. The vindicator kit and the whirlwind both have some unique fittings that can help to make the rhino stand out. I try to keep the modifications generic enough to be able to represent the various upgrades available that I would consider taking. Also in an effort to make these chassis universal I made some custom gun turrets from some left over bits so I could also use these as razorbacks if need be.

I used a custom purple mix for the base coat and followed this with a wash of leviathan purple. It's not quite the same are the purple ink I used initially with the army and I haven't decided if I need to track down more purple ink from somewhere to get an exact match. One of the problems with dragging projects over long time spans are paints dry out and get discontinued so having an exact match might be difficult.

After getting the base coat down I went in and painted the silver portions as well as picked out the details on the doors and hatches. I have the Forgeworld Raven Guard doors I'm using on all my tanks to some extent and I think it helps to bring out the character of the tanks better than a simple decal on the doors.

After base coating everything and putting down the primary washes I go back in and do the edge highlights and clean up the shading. This is by far the most tedious part of the process but it does equate to a nice clean look on the tabletop. My goal is always to have something that looks good at arms length and stand up to some scrutiny up close. Intricate blends are reserved for showpiece models that won't ever see table time.

Once the paint is complete I'll go in and add decals to match the tank up with the squad it is assigned to. This is a big deal for me as the decision for what squad goes in what becomes pretty permanent once the decals are applied. For me this is ok because the clarity of saying yes single arrow squad 7 is in single arrow seven rhino is better than pointing at the table and saying, "Um I think it was this one..."

Gravity Guns ... A Review

Warhammer 40K – I needed to add some gravity guns to some of my squads so I could have the option available to me. At the moment I have no need for another tactical squad or sternguard veterans. Looking at ebay the bitz are going for upward of $14 each. Which makes sense because everybody wants them but not as many people actually need more marine kits.

I looked around for some after market accessories and found some that I liked. The company is based in Poland and offered a pretty good deal on these guns. Shipping was fairly fast for an international order and they arrived well packed in a small package.

The guns themselves look very similar to the GW versions and different enough that there is no question as to what the gun is supposed to represent. There was minimal flash and clean up is pretty standard for a resin kit. 

The first two I used on a bike squad as salvo weapons with relentless just makes sense. The proportions on the guns looks great and I'm happy with the results. I'm going to build some standard marines to sprinkle throughout my tactical squads as I think this weapon could come in handy.

On the painting table ... The Tyrant's Legion

Warhammer 40K – The Imperial Guard commission continues, my client is giving them to me a squad at a time so this might get a little boring as they for the most part look exactly the same. Painting them in batches does help to stay focused and I've gotten them down to a basic 5 color process to paint. Base gray, paint gunmetal, paint red, paint white and paint black. Wash with black and edge highlight. Apply decals, spray varnish, turn over to client. Repeat.

Luckily he has also began to assemble some marine models to fill in for the special characters presented in the Badab War book. He liked the look of the Tyrant's Legion but opted to go with his own scheme to match the Helghast look of the Guard models. Dark iron armor, white pads with red accents is what I came up with using the space marine painter from Bolter and Chainsword and I think they look pretty good. To call out the veterans I went with a black helmet with white faceplate. The look mimics what is going on with the guard models and ties the force together as one complete unit.

The two conversions he built are pretty cool and I like his take on the conversion beamer and whips as well as the Tyrant's Champion. While I'd have preferred using a larger shield for the champion he wanted to keep it versitle so he could field it in a regular command squad as well.
On the painting table ... Tactically Sound

Warhammer 40,000 – My "FINISH THEM" project is moving along at a snail's pace due to other more pressing projects. I've decided working on a single squad at a time is the best way to get these marines done. I've been mass painting the bases and applying the name to each scroll which while tedious sets the groundwork for the rest of the project. 

So far my list that maxes out my force org chart with six Tactical Squads of 10 marines each has been impressive on the table. The amount of punishment that many marines can dish out makes it feels right to continue painting these squads until they are all done. 

As you can see from the make-up of these squads I have marine models from several different eras of 40K. The other day an opponent was amazed at what flamers used to look like. The old static one piece metal models provide a good contrast with the more dynamically posed conversions I've assembled more recently. Prior to the wonky "take the closest model as a casualty" rule I used to take the standing at attention marines off the table first. Alas, sometimes I get stuck with the "redshirts" on the table alone but more often then not they take the bullet.

Painting follows the same pattern as the other squads I've done. With these completed I'm nearly half-way through with the project. I'll be happy once I have all six tactical squads, two devastator squads, two assault squads, command squad, chaplain and two dreadnoughts and rhinos the company will be complete. From there I'll have the support elements to finish up and some other options like bikes and flyers to finish.

My revised goal of just finishing the company seems likely to happen before the end of the year. The rest will follow behind shortly before I begin any other projects ... maybe.

Cleaning House - Great Ebay Deals

I've decided to once again downsize some of my collections to make room for new stuff. With Malifaux second edition on the horizon I decided it was time to sell off some of the crew boxes that I haven't opened yet as well as some of the models that don't fit my play style as much.

I had picked up Snowstorm to use with Kirai because I love the model and it brings some cool abilities to the table. But I'm not in love with how the model looks with the rest of my crew and I don't want to be tempted into buying Arcanist stuff to fill it out. So I'm putting him up along with some clear resin ice pillars. 

Also up for bid are a variety of counters and terrain; including supply wagon pieces I've built for various scenarios. I hate to sell off this stuff but I haven't been playing much Malifaux lately and I think with the second edition I'm going to stick with Resurrectionists and Guild as the only factions I collect. This way I'll always have just enough models to run a demo or get a game in with a friend who doesn't own anything.

I've also started sorting through my comics collection and will be putting up lots of books for sale. I own a ton of comics from the 80-90's that are taking up to much space in my basement. So my goal is to just hang on to the ones that I like the cover art so I can display them as art and  sell off the rest. If you're a comics fan check the button up top often as things will be updated weekly.

In the same vein I'm selling off my large White Dwarf Collection so if you're missing an issue or want to pick up books from back when they were more than an ad for the army of the month check out the auctions. I really just want to get rid of them and cover my costs so you'll find some great deals.

Check out the auctions here.

Centurions ... Make the most of them

Centurions ... Make the most of them

Warhammer 40K – As I continue my attempt to put together as much of the marine stuff I've had laying around as possible I began work on my Centurions. Like the rest of the world parts of the kit really bothered me. The whole weapons just strapped on the bottom of a giant powerfist (that's not really a powerfist) looks ridiculous.

Read More

Fixing my Chi ...

Random – Things have been a bit crazy around the house lately. My wife has been doing some organizing of the main living spaces when she's not meeting the demands of our infant. Besides just sorting through and throwing out unneeded stuff she's been analyzing what we use the various spaces in our home for and trying to make them more functional for what we use each room for.

Read More

Orange Fumes ... building again

Orange Fumes ... building again

Warhammer 40K – I had some time in the workshop to myself recently and I've been able to assemble some of the plastic kits that have been begging for attention. While this does somewhat go against my FINISH THEM initiative I feel that since they are for the same army getting them assembled will count towards that project.

Read More

On the painting table ... Shrouded

On the painting table ... Shrouded

Warhammer 40K – On the table this week is a converted Dark Shroud to go with the Dark Angels commission I worked on earlier this year. My client realized this is a great piece to ally with his Codex: Space Marines White Scars list. He however hated the stock model and decided to build his own using some plasticard and a landspeeder storm.

Read More

Christmas in October ... Kickstarters Deliver

Random – After what seems like forever some of the Kickstarters I've backed are finally deliverying. Honestly it's pretty crazy when these massive boxes show up at the house. This has been a great week as two arrived at the same time.

First to arrive was my Bug Hunt Coridoors, this laser cut terrain replicates the station from the Aliens movie and is going to look amazing once I have time to sit down and paint it then assemble it. Looking at the sections it seems that if I build everything first I'm never going to be able to get a brush into all the nooks and crannies.

The box was massive and smells interesting, the wood doesn't quite smell like burnt wood but slightly different. Each piece is bagged with all the compaonents needed to assemble it and there is an extensive print out of how to put everything togther. For a project done by a single guy in his garage I'm really impressed with the quality and can't wait to put this together. If you haven't seen it yet Rob Hawkins did an amazing display board using these parts for Sedition Wars. I'm considering doing something similar however this project is going to have to wait until my marines are complete.

Next up Zombicide Season 2 arrived. I couldn't really pass this one up as the few games I've played with the core game have been really fun. With the Kickstarter you go a pretty decent amount of freebies for backing the expansion so I jumped in. As with the other project this was a huge box full of stuff. I like the though C'MoN put into the packaging for the shipping box. They had nice styrofoam spacers that kept everything from moving around and a nice cardboard box to hold all the Stretch goals. Little things like this show they continue to learn from each kickstarter project, and their business model of using Kickstarter as a preorder system is working for them.

Built to Fail ...

Warhammer 40K – Lately I've been playing a fair bit of 40K. With the new marine book I've rekindled my love for the game. Regardless of GW's pricing and corporate policies the game itself is enjoyable and fun. Sure their are some weird rules and some careless editing that can cause confusion and pain during a game but overall it's just plain fun.

With my 4'x6' board currently dominated by the near future city I've been working on (I swear I will post progress sooner or later) many of my recent games have been played using this board. For as packed full of terrain as it is the games have gone pretty smooth. For the first few we just played the building interiors as impassible terrain and kept the fight in the street. While this worked well it seemed to be missing something.

In my most recent game we decided to delve into the big book and figure out how in tact buildings are supposed to work. In previous editions the rules for buildings were pretty vague and left much to the obligatory house rules. This time around they actually put some thought into the rules and gave pretty solid guidelines on how they will work. Essentially buildings are treated similar to a vehicle in which you can shoot a structure and cause damage to it which in turn effects the units inside. The guidelines base the armor value on the size of the structure and its function which then determine how many models can fit in it, how many fire points and what type of protection it offers.

Since my board is mostly 9"x9" structures that represent a habblock or business district each building is essentially the same as a drop pod. Which you would think means they are pretty filmsy however in practice they are anything but.

We played a three player game with two marine players facing off against a guard army. The set up seemed to favor the marines as the guard player was forced into a corner dominated by a large complex. Essentially three different buildings consisting of multiple stories with bridges. As it turns out the guard player was able to fit most of his army inside the buildings making it very hard to shoot them. Over the course of six turns he stayed holed up in the buiding taking pot shots out the doors. Duting the last turn i was able to score a penetrating hit on the building finally and caused catostrophic damage. This killed off over 50% of the guys in the building and caused those on the roof to tumble to their death. Pretty game changing if this had happened earlier in the game it would have been devastating, this late in the game it didn't do much.

I like the rules for in tact buildings and think they add a lot of flavor to the game. I also like that they have a certain amount of risk/reward built into them. Sure you can take advantage of holing up the whole game but one luckily shot could bring the whole thing down around your ears. I'm tempting to build a force geared to taking out structures to see what kind of impact that will have on the game when using this board.

Gamer Gear - Showing Your Colors

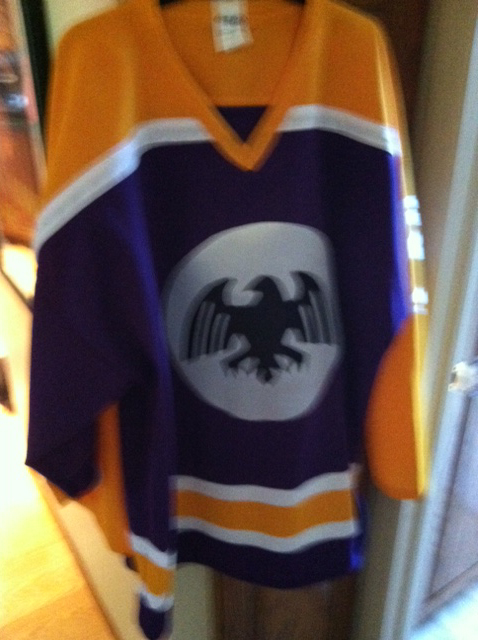
Random – A while back I did a few custom jerseys, at that time i had ordered a few for myself that I never got around to to designing the final look and feel. In an effort to tie up loose ends I finally had a chance to revisit the project.

I had ordered a throw back black LA Kings jersey, this is the one with the bright yellow, white a purple scheme. It just so happens that the colors match up with my Twilight Ravens Space Marines perfectly. Part of my problem was the chest on this jersey is so large that the standard embroidery hoop wouldn't be able to handle the stitching. So I let the project sit on the back burner until I could come up with a better solution.

Recently I found some heat bond in a box of fabric while cleaning out the basement and realized this would be the perfect solution for my oversized logo needs. Heatbond in a glue that comes on a roll. You iron it on to the back of a piece of fabric and then once it cools pull off the carrier sheet and it leaves the glue attached to the fabric. You can then cut your design out of the fabric and iron it down to create a permanent bond.

After some experimenting I settled on doing my raven logo on a white shield for the front of the jersey with the Astartes Numeral Three on the back and sleeves. I primarily run my marine lists using my third company so I figured I'd represent with the jersey. 

With the extra fabric I had on hand I also cut out the logo to put on a plain gray hoodie. Honestly having unique gear to wear while your playing adds a bit to the overall experience.

While the heat bond is a permanent solution I really wanted to have the appliques finished with a satin stitch around the edges. Luckily my mother is a skilled freehand quilter and offered to do the stitching for me once I explained my conundrum. 

I'm happy with the way these turned out and am eager to play some 40K with my new gear.